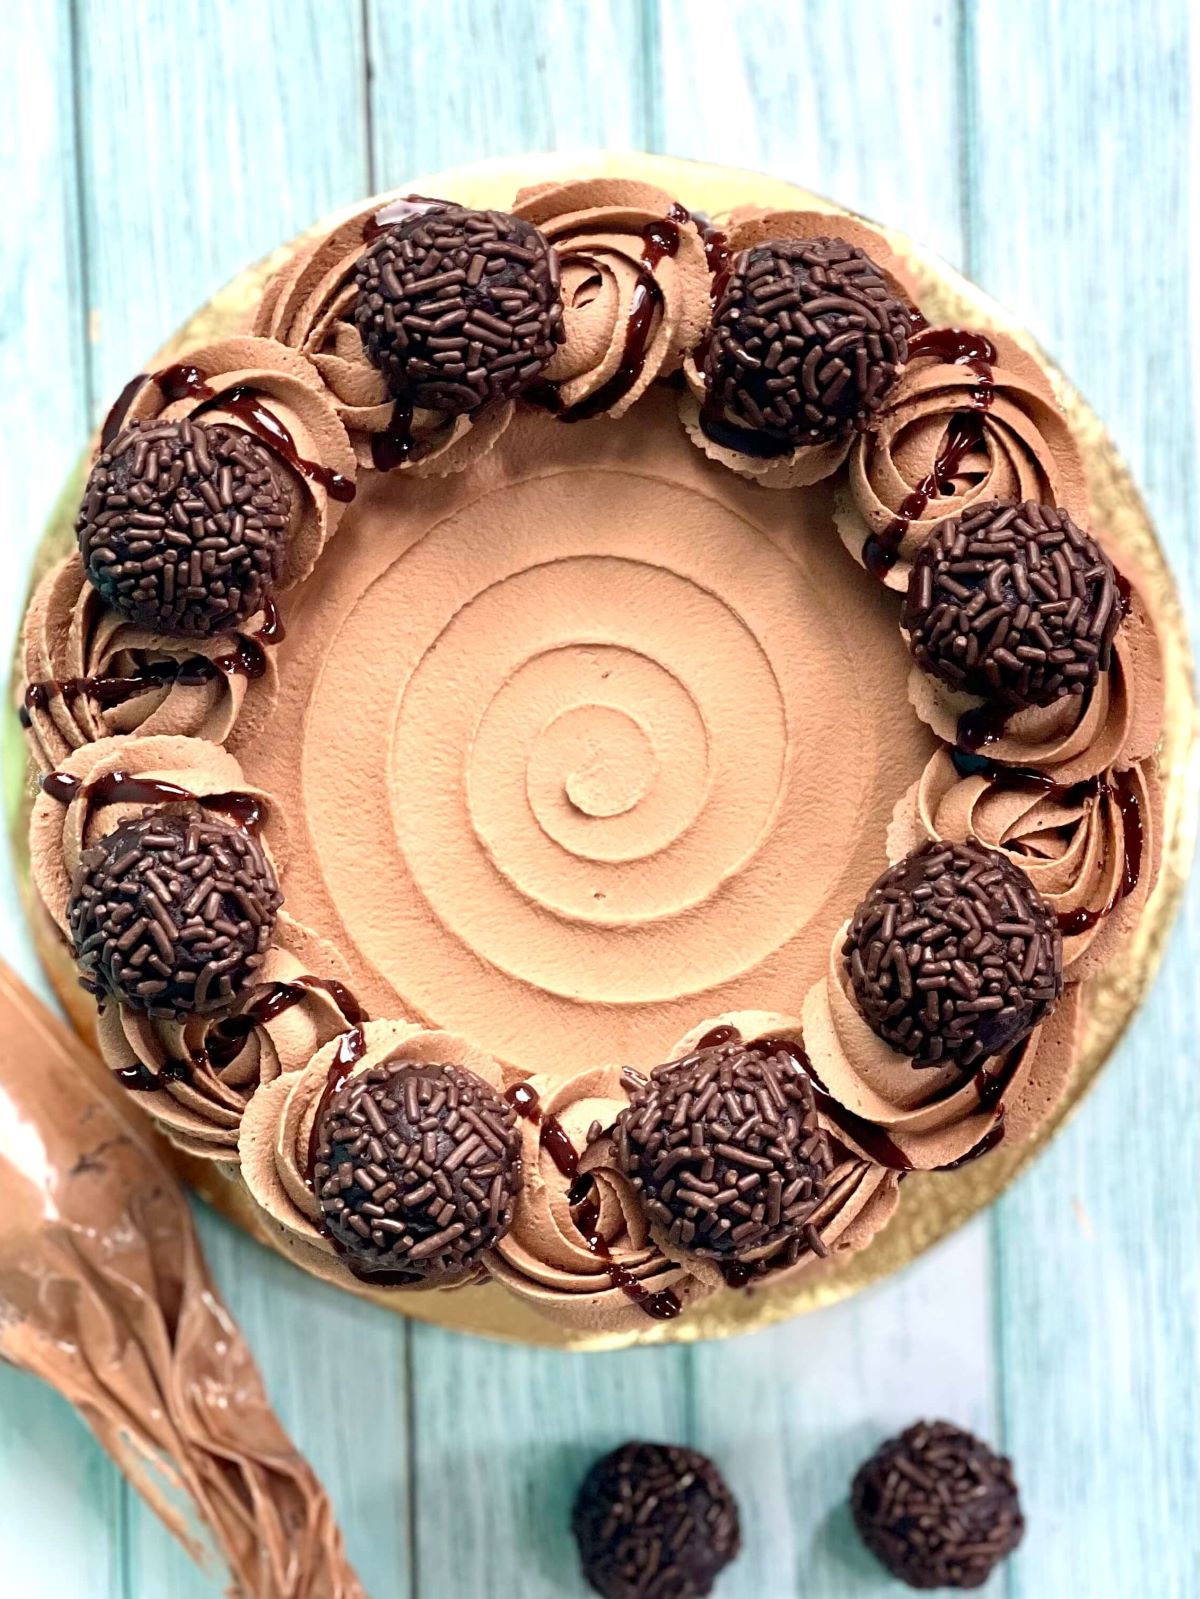
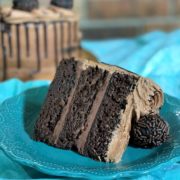
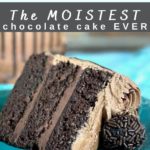
This fudgy chocolate ganache cake was one of my most requested bakery recipes and continues to be one of the most popular recipes on my site. I think the comments section speaks for itself!
💬 Featured Comment: "Triple Chocolate Ganache!! There is no other chocolate cake in the same category. Yours is truly outstanding. My absolute favorite."--Jennifer M.
Never Miss a Recipe!
I'm sharing my tried-and-true Amycakes Bakery recipes! Sign up to be the first to know about my favorite recipes, baking tips, and bakery secrets!
Jump to:
- ⭐ About this secret bakery recipe
- Equipment Checklist
- How We Know This is The Best Chocolate Cake with Chocolate Ganache
- 🥣What's the Two-Bowl Method?
- Ingredients
- 🎥 Step by step VIDEO
- Variations
- 🍰 How to Layer & Decorate Chocolate Ganache Cake
- Baker's Shortcut
- Storage Suggestions
- 💭 Frequently Asked Questions
- 📖 Recipe
- 💬 Comments
⭐ About this secret bakery recipe
This is the very first Amycakes Bakery recipe that I shared! In addition to it being the 2nd most requested recipe (the most requested being the popular Vanilla Almond Cake recipe), I wanted to share this one first because it is one of my easier cakes to bake.
Don't let the number of ingredients or length of the recipe scare you away. Keep in mind that after owning a bakery for over 11 years, I can't help but write these recipes like I'm training an employee...We'll see if that's a good thing or a bad thing. 😂
You may need a few extra ingredients on hand, but most of these are ingredients that I use in all of my cake recipes. And with a few simple steps, you'll have this cake baked in no time.
For similar chocolate cakes you'll love, try my Chocolate Walnut Cake or Peanut Butter Cup Cake. This homemade chocolate cake is almost brownie-like with a thick and fudgy chocolate ganache filling. They're all great, so make sure you try them all!
Equipment Checklist
Whenever you're baking from scratch, it helps to have the right collection of tools on hand. I use different methods than other bakers, so you may need to source the right equipment before you start baking!
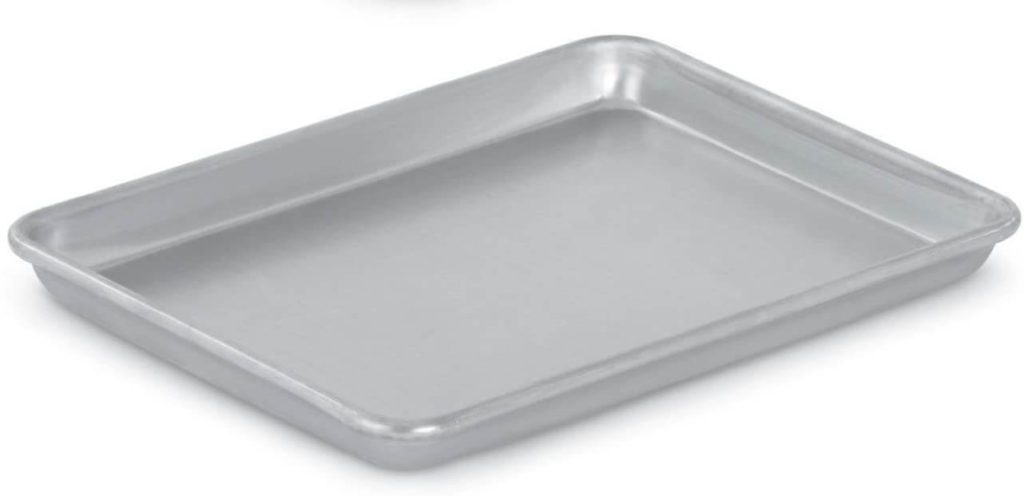
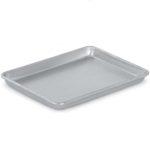
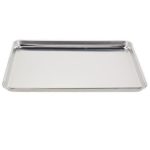
For the Cut and Stack method, you'll need either a quarter or half sheet pan depending on the size of the batch.
This special ingredient helps make sure the cake is ultra moist and flavorful every time.
How We Know This is The Best Chocolate Cake with Chocolate Ganache
- Bakery-tested: This recipe has been made countless times in the bakery and is one of the most popular recipes we ever shared. Few recipes have been made this many times. You can trust that it turns out great every time!
- Perfect flavor: This chocolate ganache cake recipe is fudgy, moist, and dense with a rich chocolate flavor. It's delicious on its own, or perfect with a glass of milk, scoop of ice cream, or cup of coffee.
- Easy to make: I can't emphasize that enough - this is an easy recipe! It's made with the two-bowl method, which is extremely easy to make and ensures the cake comes out ultra-moist every time. It's the best!
🥣What's the Two-Bowl Method?
To make this triple chocolate cake, all you really need are two bowls--one medium bowl for the wet ingredients and one large bowl for the dry ingredients. This is called the Two-Bowl method, and I use it in several (though not all) of my cake recipes.
Whisking the dry, then whisking the wet in the Two-Bowl Method prevents the batter from overmixing and makes a very moist and tender cake.
I learned this method from Barb Baker who owned The Bakehouse in Springfield, Missouri for over 20 years. I trained under Barb for a couple of months after my parents and I bought her business, which later reopened as Amycakes Bakery.
Barb shared her knowledge and taught me some very important skills, including that cake methods don't have to be overly complicated to create a really moist and delicious cake! Who knew that the best chocolate ganache cake recipe could be so easy? 🙂
Ingredients
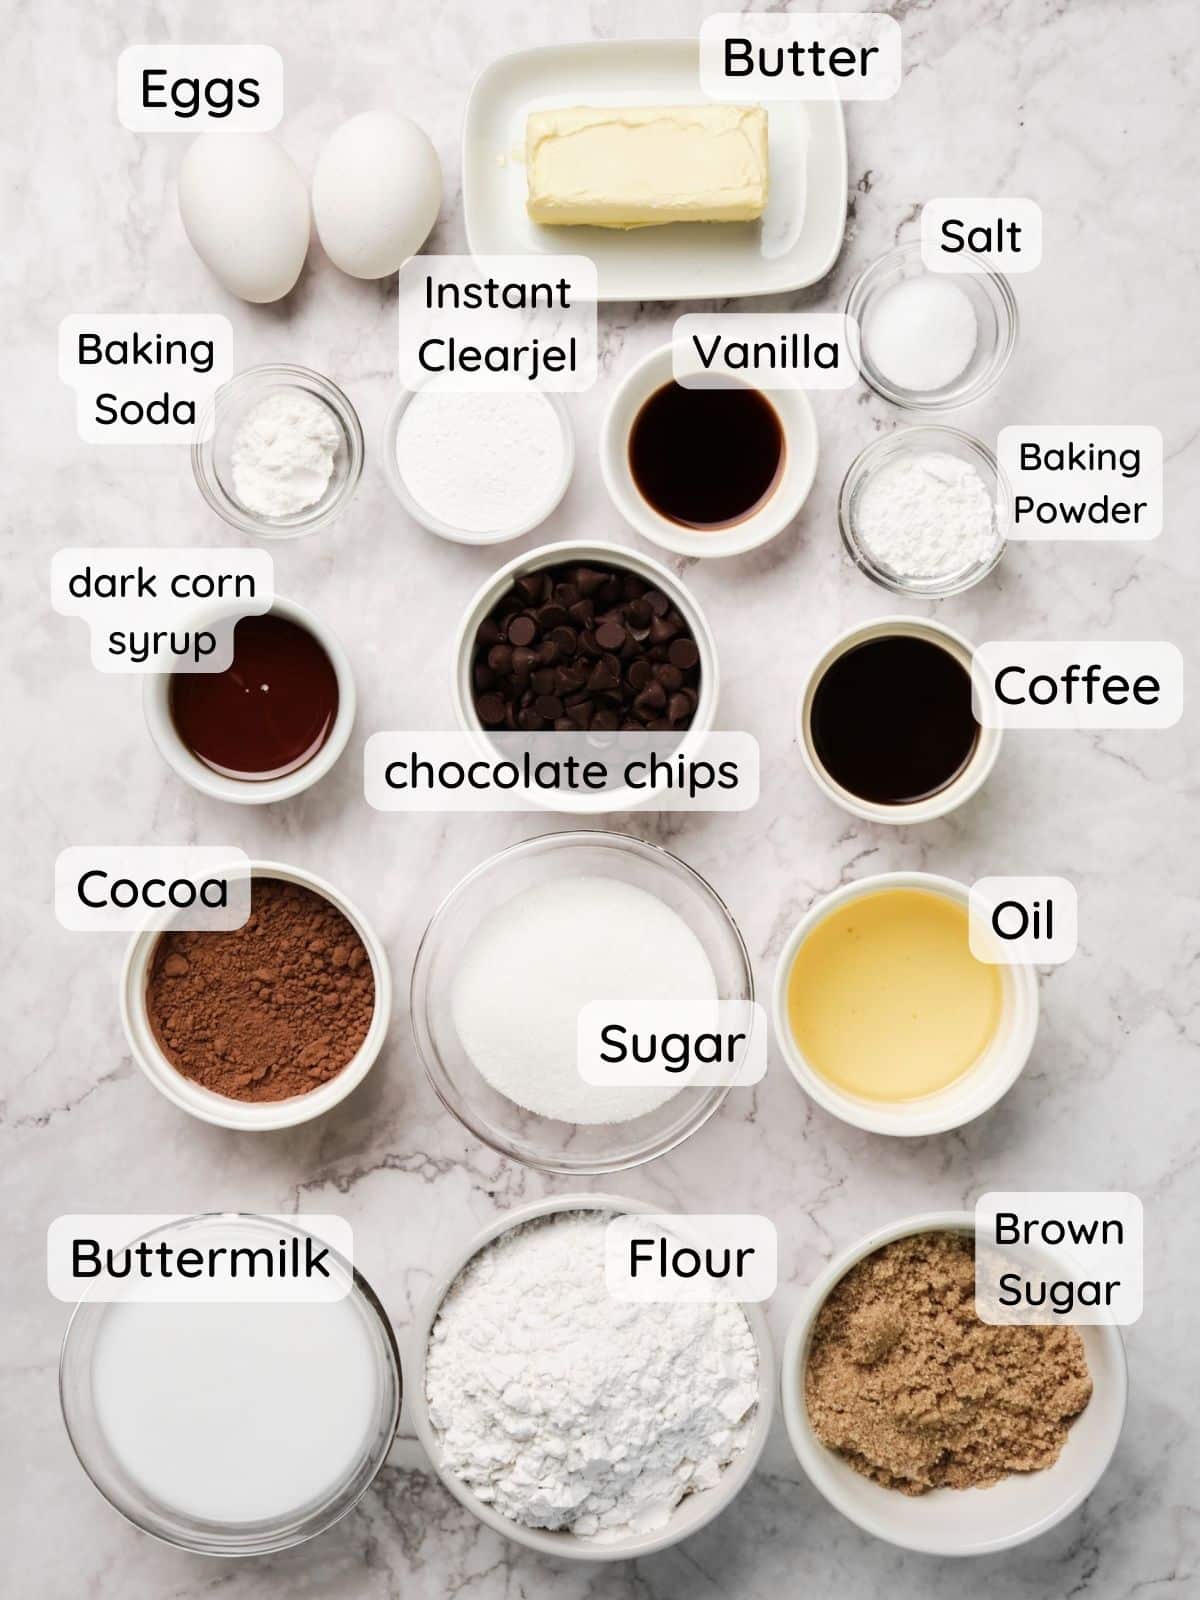
All of the ingredients are listed in the recipe card at the end of this post. To help you pull off the bake, I'll share some of the different components you'll need for this chocolate cake with chocolate ganache.
Cake Ingredients
- All-purpose flour: This flour is better suited for the structure in this moist chocolate cake (rather than a delicate cake flour).
- Unsweetened cocoa powder: I use Hershey's. I recommend regular cocoa powder over Dutch process, due to the way it interacts with the buttermilk and baking soda.
- Buttermilk: One of my top ingredients for making moist cakes!
- Vegetable oil: The addition of vegetable oil adds moisture and a soft texture.
- Melted butter: We'll melt this with chocolate chips and then add it to the cake batter
- Brewed coffee: This doesn't add a coffee flavor, but it enhances the rich chocolate flavor. I recommend letting your hot coffee cool down slightly before adding it to your wet ingredients. If you don't want to use coffee, use water instead.
- Dark (or light) corn syrup: This enhances the cake's texture, rise, and moisture. You can substitute this with equal parts brown sugar if needed.
Do you have to use Instant Clearjel?
This recipe recommends Instant Clearjel, a modified cornstarch that retains moisture and allows me to include extra moisture-generating ingredients like buttermilk and oil.
It's food starch used in commercial baking that you can use at home. Make sure the Instant Clearjel you use is labeled as "Instant." Cook-style Clearjel is a different product that does not work the same in cakes.
If you don't want to try this new ingredient, just use Chocolate Instant Pudding mix as described within the recipe--it contains instant clearjel (modified cornstarch) as the second ingredient, so it works similarly and provides delicious results.
Top Tip: If you have a kitchen scale, please use it for the grams (g) and ounces (oz) provided for more consistent results. If you don't have a scale, no worries!--just be sure to "spoon and level" your dry ingredients, and to fully pack your brown sugar into its measuring cup.
Ingredients for Easy Chocolate Ganache Filling
There are a lot of ganache recipes out there, but even easier than the Two Bowl Method cake batter is the chocolate ganache filling. I can't tell you the number of times we were complimented on our fudgy chocolate ganache filling at Amycakes Bakery.
And now everyone will know that it's the easiest filling ever, with only two ingredients--chocolate chips and heavy cream!
We'll drizzle the warm ganache down the sides of the cake, and the cooled ganache will be used as a thick dark chocolate filling. It adds such a delicious component to this rich chocolate cake.
Fluffy Chocolate Buttercream Ingredients
A stand mixer with a paddle attachment will make this chocolate buttercream much easier, but you can use a handheld mixer as well.
Cream Cheese gives the buttercream a creamy texture and balances the sweetness, but most taste-testers won't know that it has cream cheese as an ingredient.
A little bit of shortening helps with the stability and fluffy texture.
Pure Vanilla extract is recommended for the best flavor. I save my treasured Pure Vanilla for my buttercreams and don't mind using a more cost-efficient imitation extract in my cake batters or baked items where it is hard to tell a difference.
(Olive Nation, where I buy many of my extracts, has provided Amycakes Bakes readers with a coupon code AB20 for 20% off).
🎥 Step by step VIDEO
Watch the recipe video above or watch it on my Youtube.
Variations
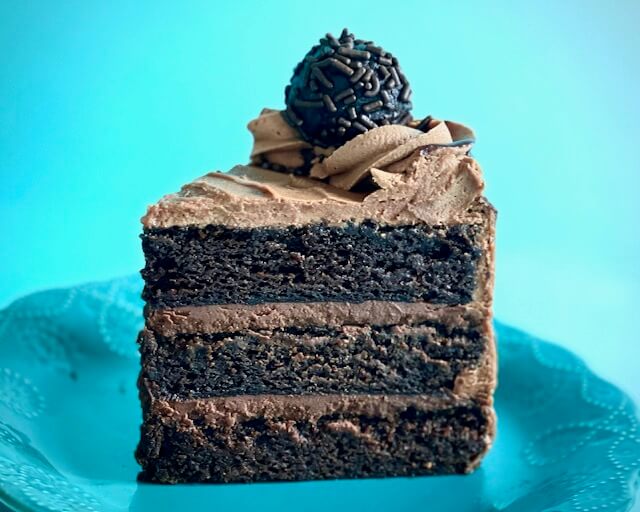
Once you have the cake layers baked and chilled, you can dream up any different fillings or frostings you'd like. Although I'm a huge fan of the chocolate cake filling and fluffy buttercream, you could easily make a few creative substitutions!
Add fruit
To balance the richness of the chocolate, replace one of the layers of filling with strawberry compote for a chocolate strawberry flavor. Serve with fresh strawberries (or chocolate dipped strawberries) on top!
Whip the ganache
Regular chocolate ganache is very rich and creamy with a deep chocolate flavor. If you want to mellow it out a little for this triple chocolate cake, let the ganache cool until solid, then whip it with an electric mixer until light and fluffy.
All that extra air will mellow out the richness in the best way.
Add different types of chocolate
This truly is the best chocolate ganache cake and is has deep chocolate flavor everyone loves. However, it'd be very easy to to make that triple chocolate label literal.
Pair the dark chocolate with milk and white chocolate, too! Make the ganache out of milk chocolate and add white chocolate shavings over the top of the cake after decorating.
The different shades of brown and white look (and taste) great together!
🍰 How to Layer & Decorate Chocolate Ganache Cake
I get lots of questions from readers about how to make cakes look *exactly* like the cakes in the images. I wanted to share my tips here to help you get a bakery-worthy cake every time!
1. Cut and Stack the Layers
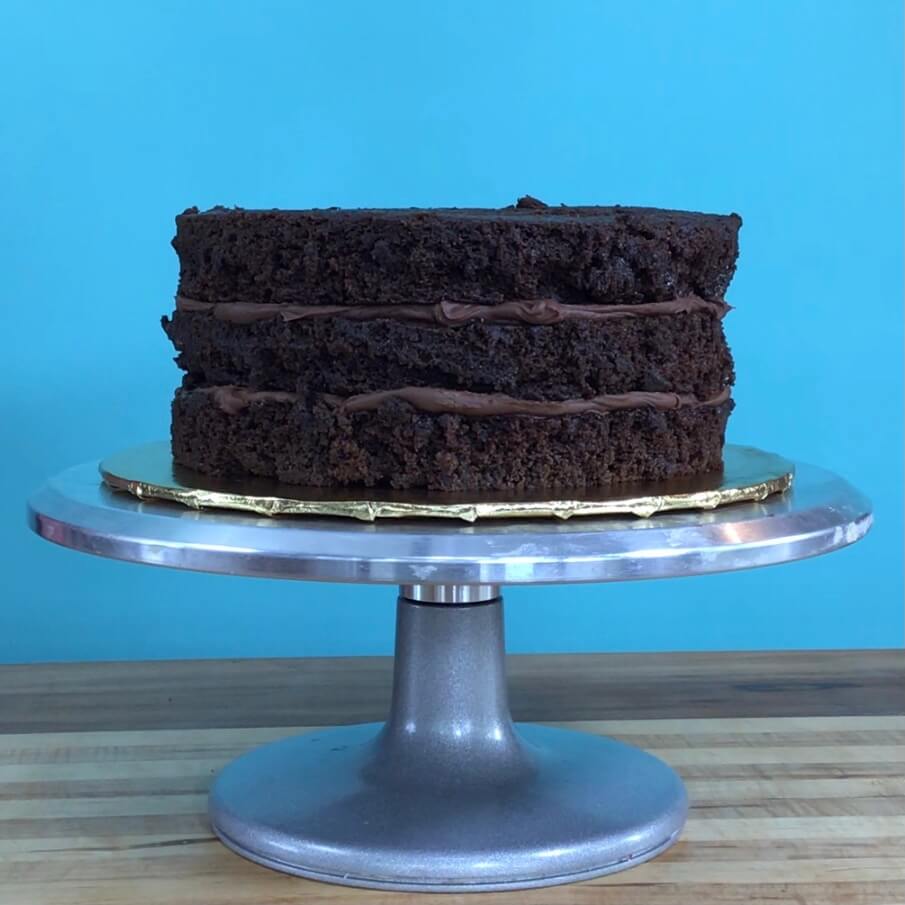
My preferred baking method is to bake all the batter in a 1" tall sheet pan and use what I call the Cut and Stack Method to assemble the cake (Inspired by Christina Tosi's Milkbar cutting method). This provides a flatter, more even bake (a less domed cake in the middle and no dark edges).
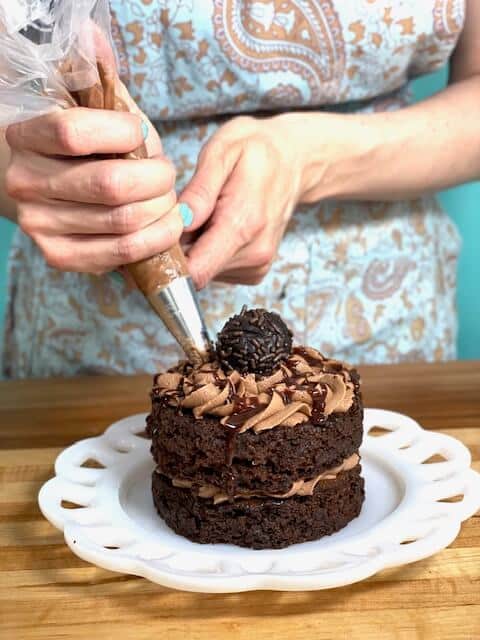
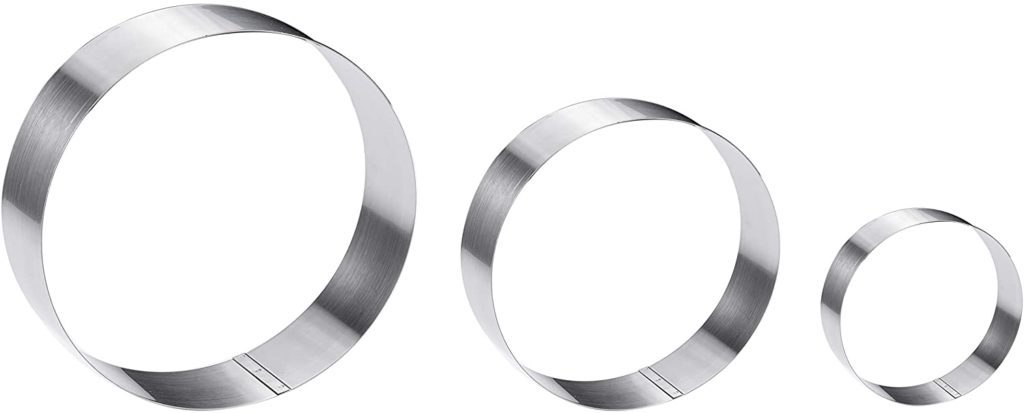
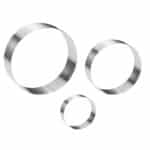
You can even cut little mini cakes with 4" cake rings or 3" or 2" round cookie cutters. Use a piping bag and frost the cakes like a cupcake for an adorable mini dessert!
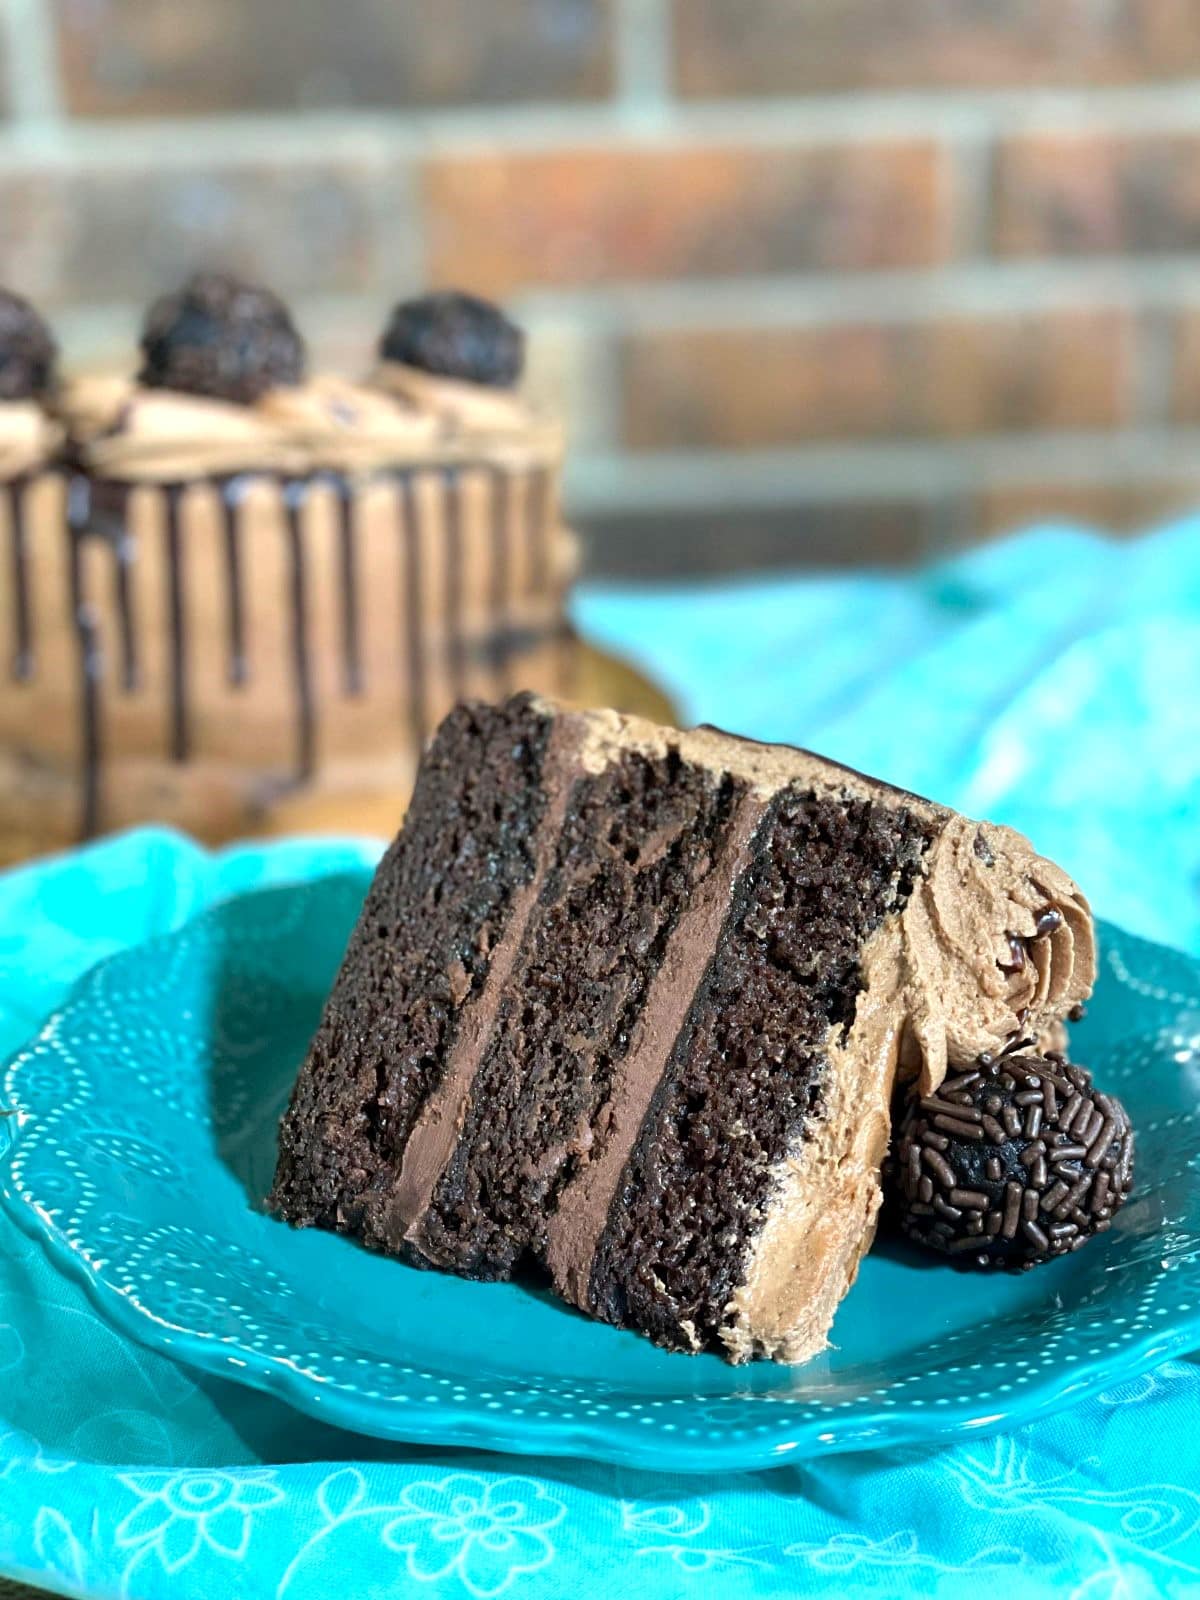
The layer cake pictured is an 8" round (a 2x batch), but you could make an extra tall 6" cake or even two 6" cakes in a 2x batch (freeze one for later!) 😊 Or make one 6" chocolate ganache cake in a 1x batch.
I leave my cake in the pan when I cut them because my moist cake recipes are so tender that I have to take extra care with them. If you cut them too soon, they're soft and can fall apart. Then I layer the cakes when they are cold or frozen.
The easiest way is to cut the cake with cake rings when it is at room temperature, then wrap and freeze the whole cake pan for around 2 hours or overnight so it is cold or frozen before layering.
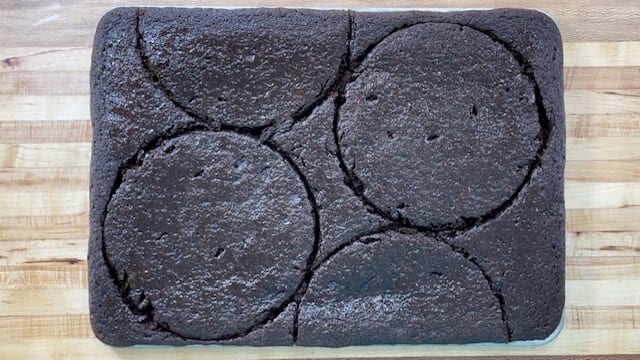
If you are layering and decorating your cake the day you plan to serve it, I recommend keeping the cake in the fridge instead of the freezer overnight. It will not be quite as easy to work with as frozen, but we don't want to risk serving a frozen cake. You can learn more in How to Bake and Layer Cakes like a Pro.
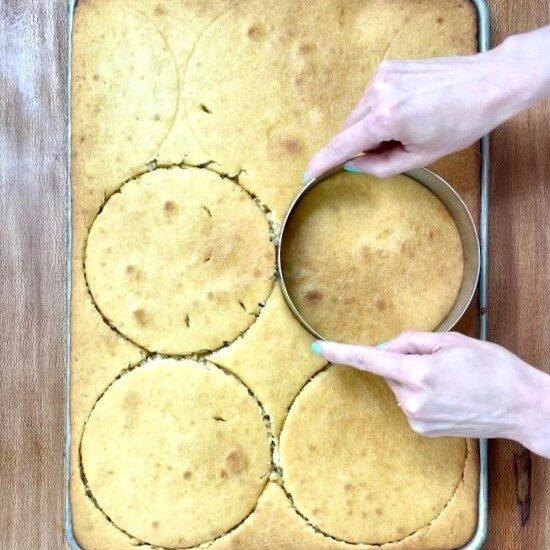
Layer this Cake using the Cut and Stack Method
I bake all my cakes in sheet pans and cut them out with cake rings. I talk about this in detail in 5 Easy Steps to Baking and Layering Cakes Like a Pro, but here's a quick rundown:
1. Bake the Cake in a Sheet Pan
2. Wrap and Freeze the Cake in the Pan
3. Cut Desired Cake Size with Cake Rings and Layer the Cake from Frozen
4. Crumb Coat the Cake
5. Decorate and Serve
Don't have the right pan? You can use a different baking pan following my cake pan chart (best viewed on desktop).
Baker's Shortcut
There's nothing wrong with not having the time or the patience for layering a cake--sometimes and we just want to eat cake NOW!
For this cake, if you just want to be able to enjoy a fudgy delicious sheet cake as soon as possible, follow the "Baker's Shortcut" in the Notes section of the recipe.
2. Fill the Layers
You can either spread the chocolate ganache filling with a spoon and offset spatula or pipe it between the layers. Make sure it spread it evenly to keep the whole cake balanced.
3. Frost and Decorate
You can decorate this cake any way that strikes your fancy. You could use a small offset icing spatula to add a simple fluffy homestyle texture.
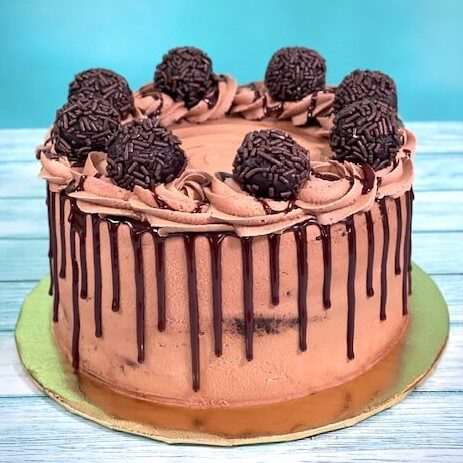
To decorate the cake like the video in my recipe, use reserved chocolate ganache to drizzle around the edges in a squeeze bottle.
Then fill a disposable piping bag with a 1M star tip and swirl some easy rosettes around the edges. I topped my rosettes with another drizzle of ganache and the easy cake truffles that I made with the extra cake scraps.
I topped my rosettes with another drizzle of ganache and the easy cake truffles that I made with the extra cake scraps.
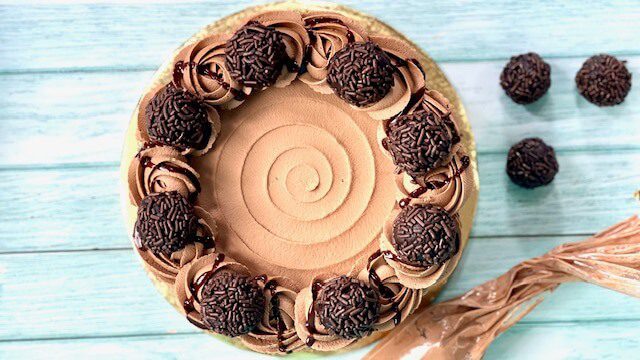
4. Add Chocolate Cake Truffles
Once you've stacked your cake you'll have some delicious cake scraps to munch on or to just test your creation (I always felt better serving a cake when I had already tried the cake scraps and knew it was delicious!). You can also turn the scraps into easy cake truffles, cake pops, or mini cake parfaits.
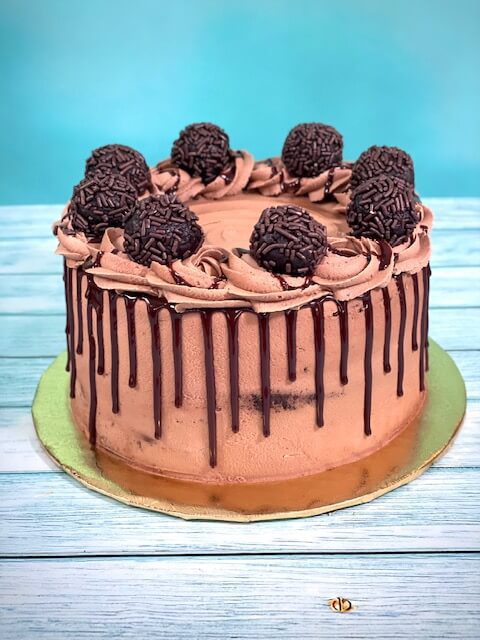
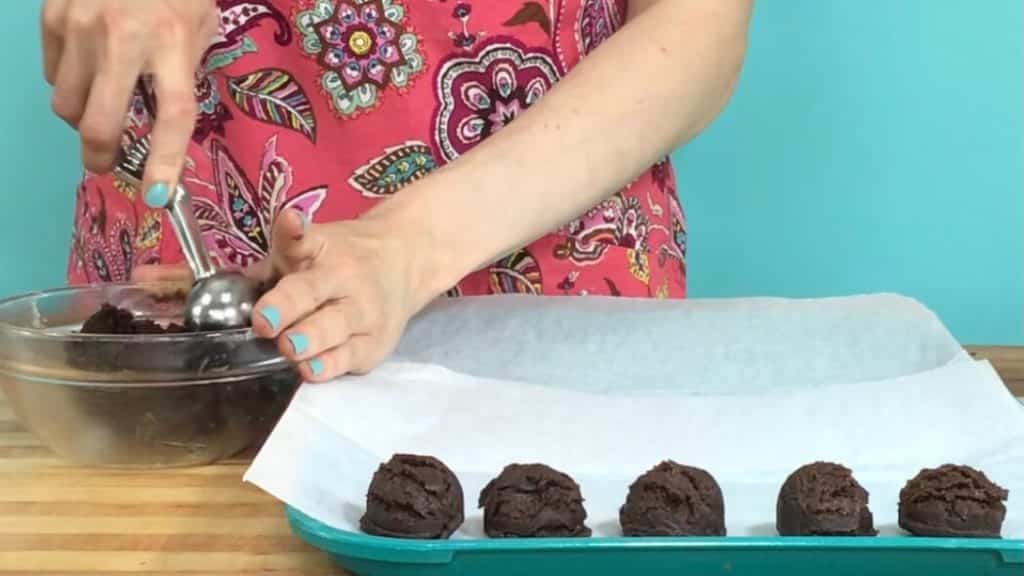
In this recipe, we are making the easiest cake truffles for garnish, and you don't even have to dip them! Just smash and roll the cake into 1" balls, then press jimmy sprinkles, mini chocolate chips, or chocolate flakes into the outside of the balls.
You can also roll them in cocoa powder. They taste similar to fudgy brownie-batter bites! Place them around the outer ring of icing for an over-the-top presentation.
Troubleshooting Overflowing Sheet Pans--
All my cake recipes are a tight fit in my recommended 1" tall sheet pans.  I love baking cakes in these pans, but a couple of readers have had their cake overflow slightly while it bakes in their oven.  I'm guessing this has to do with either:
1) Lower oven temps causing the cake to bake slower and not bake as quickly as it rises, therefore overflowing.  You can check your oven with an oven thermometer.
2) Uneven spreading or warped or shorter sheet cake pans.  The sheet pan I use is  and this ¼ sheet (for 1x batches) or this ½ sheet (for 2x batches).
3) Slight Measuring variations when using measuring cups instead of a kitchen scale.
If you find this to be a frequent issue, I would recommend baking in a 9x13 sheet-cake pan (for 1x batches) or a 12x18 sheet-cake pan (for 2x batches), which are 2" tall instead of 1" tall.  With these pans, you'll still be able to easily cut the cake out with a cake ring, and use the ring as a guide when cutting the two half pieces of cake. The bottom layer may require extra cake scraps--just fill in the middle of the bottom pieced layer of cake with cake scraps as needed.
Storage Suggestions
Nearly all of my cakes are best at room temperature!
They'll still taste yummy out of the fridge, but will be firm and have a different texture due to all the yummy butter in the cake and buttercream.
I want to make sure you enjoy the soft and moist cake texture that is intended by eating the cake at room temperature cake.
You can refrigerate the cake after decorating it, but allow it to come back to room temperature 2-3 hours before serving. (Keep in mind the buttercream can melt in warm conditions).
I keep my leftover cake out of the fridge for up to 24 hours, but I'll refrigerate or freeze anything that won't get eaten within that time.
Be sure to store the leftovers in an airtight container or neatly wrapped with plastic wrap. Air will dry out the cake and ruin that moist texture and flavor.
💭 Frequently Asked Questions
To turn this cake into cupcakes, I recommend using my chocolate cupcake recipe with the fudgy ganache filling and fluffy chocolate buttercream.
This delicious chocolate cake calls for coffee, which enhances the flavor. If you can't have coffee for any reason, replace it with water instead.
I think you're ready to go! You'll do great! This is my very first recipe post, and I'm sure I have a lot to learn--comment below with any questions or let me know what you think of the recipe!
If you make this cake, I would absolutely love it if you would snap a photo and tag me @amycakesbakes, or share this recipe using the social share buttons below. 😊
Thanks for Reading. ❤️

📖 Recipe
Extra Moist Triple Chocolate Ganache Cake
Equipment
Ingredients
Dry Ingredients
- 170 grams (1 ¼ cups + 2 Tablespoons) All-Purpose Flour (I use Gold Medal)
- 1 ½ teaspoons Baking Powder
- 1 teaspoon Baking Soda
- ¾ teaspoon Salt
- 2 Tablespoons Instant Clearjel or 3 Tablespoons Chocolate Instant Pudding Mix (a food starch used in commercial baking that you can use at home, see Note #1)
- 26 grams (¼ cup) Unsweetened Cocoa Powder (I use Hershey's)
- 100 grams (½ cup) Sugar
- 113 grams (½ cup packed) Brown Sugar
Wet Ingredients
- 2 large Eggs
- ¾ cup Buttermilk
- ¼ cup brewed Coffee
- ¼ cup + 1 Tablespoon(s) Vegetable Oil
- 3 Tablespoons Dark Corn Syrup (or use light corn syrup)
- 1 ½ teaspoons Vanilla Extract
Chocolate Butter Mixture
- ¾ stick(s) (3 ounces) Salted Butter
- 43 grams (¼ cup) Semi-Sweet Chocolate Chips (I use Nestle)
Chocolate Ganache
- ½ cup Heavy Cream
- 172 grams (1 cup) Semi-Sweet Chocolate Chips (I use Nestle)
Chocolate Buttercream
- 1 x batch prepared Fluffy Chocolate Buttercream
Easy Cake Truffles (optional)
- ¼ cup Chocolate Jimmy Sprinkles (or use mini chocolate chips, cocoa powder or chocolate flakes)
Instructions
Make Chocolate Cake
- Preheat oven to 325 degrees. Line a 1" tall ¼ sheet pan with parchment paper, then spray the bottom (on top of the parchment) and sides of the pan with cooking spray. Or choose a different cake pan(s) using the chart in my post about Half-Batches and Cake Pans.
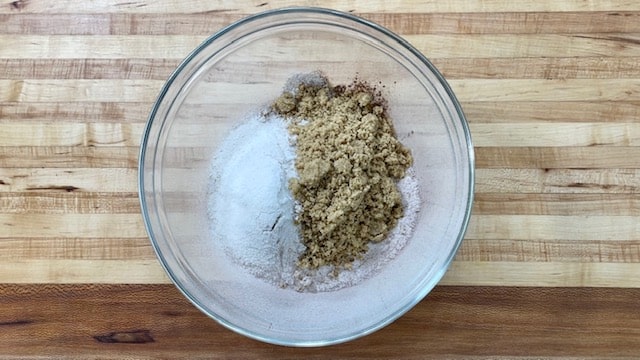
- Using a sifter or fine mesh strainer, sift the first seven Dry Ingredients into a large bowl, then add brown sugar. Whisk until well blended. If you see any large brown sugar clumps, break them up and blend them in with your fingers.
- Combine Wet Ingredients in a separate large bowl and whisk until smooth and well-blended.
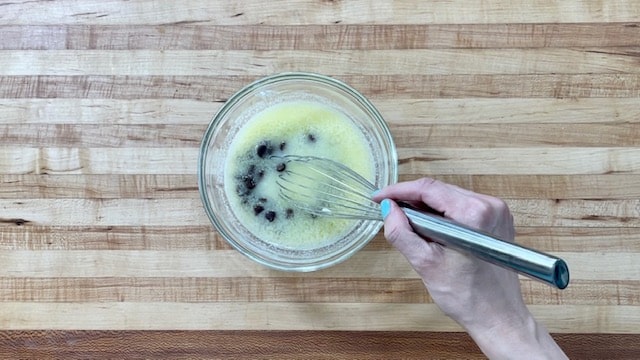
- Melt salted butter in the microwave (or over the stove) until just melted. Avoid overcooking. Add semi-sweet chocolate chips and whisk until melted and smooth (Whisk for 30 seconds to 1 minute--the heat from the melted butter plus the whisking will melt the chips).
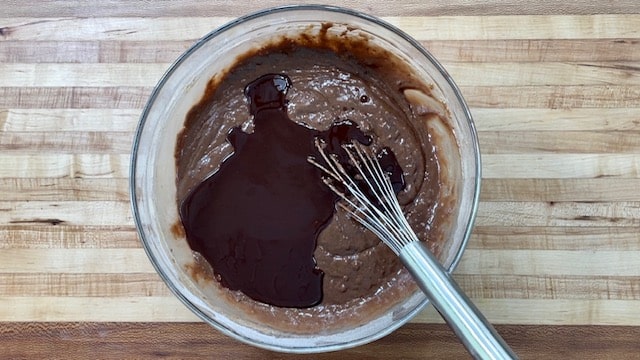
- Pour Wet Ingredients into Dry Ingredients and whisk until incorporated. Pour Chocolate Butter Mixture over batter and whisk until smooth and lump-free. (A few teeny brown sugar lumps are ok and will dissolve as it bakes).
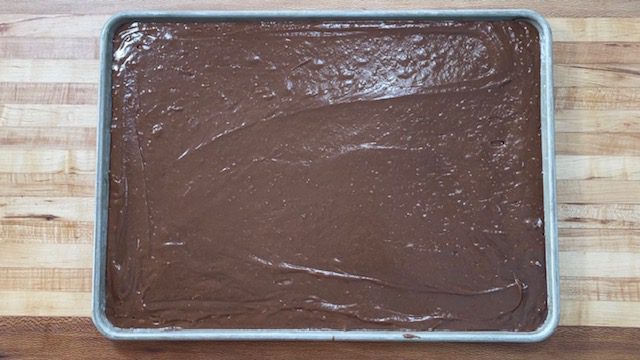
- Pour batter into the prepared ¼ sheet pan and smooth out batter until even (an offset icing spatula works well for this). The batter will be about ¼ inch from the top of a 1" tall sheet pan.
- Allow pan to set for 5-10 minutes before putting it in the oven. This will give time for the instant clearjel (or instant pudding mix) to thicken the cake batter before it bakes, allowing for a better rise.
- Bake in the middle or top rack (avoid bottom rack) of a preheated 325-degree oven for 16 minutes. Without opening the oven, turn the temperature down to 300 degrees and bake for another 8-10 minutes. Check the cake at this point. See if it is done by lightly touching the top of the cake--try to avoid moving the cake pan or baking rack, which could cause an underdone cake to sink. If jiggly at all to your touch, bake for another 1-5 minutes. The cake is done when a toothpick or small paring knife comes out clean when quickly stuck in the cake. A few moist crumbs on your knife are fine, but they shouldn't look wet.
- Allow cake to cool completely. To make a sheet cake, follow the Baker's Shortcut (Note #4), or choose your round cake size using the Cut and Stack method (Note #2). Leave the cake in the sheet pan, and using a slight sawing motion, cut the cooled cake into your desired cake size with cake rings (You can use a knife and the cake rings as a guide for any halve pieces that you cut.) Brush lightly with simple syrup (optional, Note #3).
- Wrap thoroughly in plastic wrap and freeze cake in the pan for 2 hours or overnight. (You can even bake the cake up to a week ahead of time and freeze). The cake will be much easier to layer if it is cold or frozen. To wrap the cake, place another sheet of parchment on top of the cake (this will prevent the plastic wrap from sticking to the cake), and wrap the whole pan with plastic wrap. (I pull the plastic wrap out and place the pan on top of it. Then I wrap 2-3 ways horizontally and one way vertically so that there are two layers of wrap on all sides of the pan including the bottom).
Make Ganache Filling
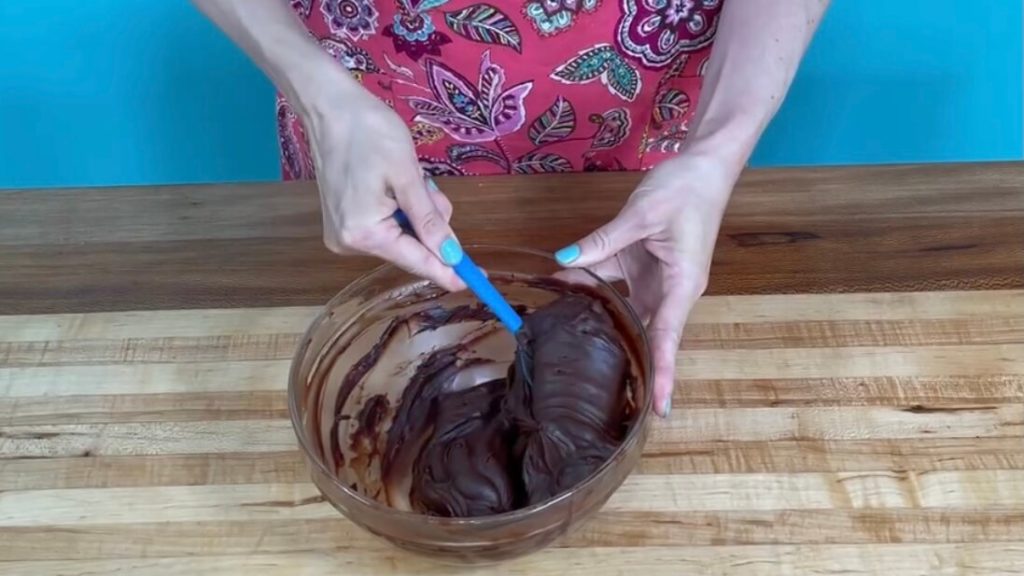
- Combine heavy cream and semi-sweet chocolate chips in a medium-sized microwave-safe bowl. Microwave at 30-second increments, stirring for 30 seconds to one minute in between each heat. (It should only take two to three heats in the microwave. Lots of whisking will melt your chocolate faster and prevent the chocolate chips from overcooking in the microwave.
- Once all the chocolate chips are melted and your ganache is shiny and smooth, place it in the fridge to cool. Stir occasionally until it is has cooled to a very thick and fudgy consistency. Once it is the right thickness, remove it from the fridge until you are ready to fill and layer your cake. (If your ganache gets too cold, it will be too thick to spread. Simply reheat in the microwave at 5-10 second increments, stirring frequently, until it is the right consistency.)
Layer, Decorate, and Serve
- The easiest way to layer the cake is to layer the cake from frozen the day before you plan to serve it. If serving the cake the same day you are layering it, use refrigerated cake layers instead of frozen.
- Reserve ½ cup chocolate ganache for drizzling down the sides of the cake (optional). Use your two half-circles of cake to make the bottom cake layer (fill in with scraps if needed to make a level surface). Fill your three cake layers with 2 layers of fudgy chocolate ganache, and frost on the outside with the prepared fluffy chocolate buttercream. An offset icing spatula (I use the small and medium size on all my cakes) helps with this. I recommend frosting a thin crumb coat of buttercream on the outside of the cake which will catch all the crumby edges, then allow it to set up in the freezer for about 10 minutes until the buttercream is firm. Then spread another layer of buttercream over your crumb coat. (I just lightly ice my cakes on the 2nd coat and smooth it with a bench scraper, as I don't mind cake showing through as long as the sides are smooth, but there is enough buttercream for you to fully-ice it.)
- While your crumb coat is setting up in the freezer, make easy cake truffles with some or all your cake scraps! (I decorated the cake with eight truffles in my video, and there were several left over). Simply squish together room-temperature cake scraps until it becomes a smooth dough. Divide the cake truffle dough into 1" pieces and roll into balls. Press chocolate jimmies into the sides of the balls (The dough is thick so you have to press the sprinkles into the balls to get them to stick instead of just rolling them). Refrigerate until ready to use.
- Microwave the reserved ganache until thin, and drizzle down the sides of the cake using a spoon or squeeze bottle. There is enough fluffy chocolate buttercream to frost a row of rosettes around the top of the cake using a pastry bag and 1M star tip (or get creative with a different design!). Top the cake with easy cake truffles if desired.
- You can let the cake set up in the fridge, but remove it from the fridge 1-3 hours before serving so it can come back to room temperature. This cake has the best texture at room temperature. Enjoy!
Notes
- Read my article Instant Clearjel: a Magical Little-Known Bakery Ingredient to see why I think this ingredient is worth having in your pantry. Instant Clearjel must always be whisked thoroughly with other dry ingredients before added to wet ingredients to avoid clumping. (Make sure what you purchase is labeled as "Instant." Cooktyle Clearjel is a different product that does not work the same in cakes). Instant Pudding mix contains instant clearjel (modified cornstarch) as the second ingredient, which is why it works similarly.
- When baking cakes in a sheet pan, the cake bakes more evenly (flatter on top and with no dark edges), and you get to choose your cake size after baking! With a 1x recipe in a ¼ sheet pan you can make a 6" 3-layer cake (2 full rounds, one pieced round from two half-circles) or several little cakelets. In a 2x batch in a ½ Sheet Pan you can make a three-layer 8" cake (two full rounds, one pieced round from two half-circles), an extra tall six-layer 6" cake (5 full rounds, one pieced round from two half-circles), TWO 3-layer 6" cakes (eat one now and freeze one for later. 🙂 Or have a baking party with a friend and you each get a cake!) or several little Cakelets using a 4" cake ring or 3" or 2" round cookie cutters.
- Simple Syrup is optional, but I use it to seal in the moisture for cakes that will be refrigerated or frozen. While the cake cools, make a simple syrup by combining 1 T water and 1 T sugar in a small microwave-safe bowl. Microwave until the sugar is dissolved after whisking, about 20-30 seconds. You can also make a larger batch of this (1 part sugar to 1 part water) and keep it in the fridge if you're doing a lot of cake baking. Always cut the cake with cake rings before brushing the cake brush simple syrup, to avoid the cake being too sticky when cut.
- BAKER'S SHORTCUT:
1). Make a sheet cake instead! While the cake bakes, make the ganache and the chocolate buttercream. Don't refrigerate the ganache, but allow it to cool at room temperature until it is about the thickness of yogurt and easily spreadable. Reserve ½ cup ganache for drizzling if desired.
2). Once the cake is fully cooled, keep the cake in the pan and spread the thickened ganache on top of the cake. The ganache should be thin enough that it doesn't damage the cake as you spread it. Set the pan in the freezer for 10 minutes so the ganache can set up.
3). Spread the fluffy buttercream on top of the set-up ganache. Drizzle with some reserved ganache, if desired. Serve cake slices out of the pan and enjoy at room temperature.
9-16-21: The original recipe made an 8" cake in a ½ sheet pan. All my recipes now start with small batches, so it now makes a 6" cake in a ¼ sheet pan. Press the "2x" if you'd like to double the recipe for an 8" cake in a ½ sheet pan.



Chris Baisley says
would this chocolate cake pair well with homemade caramel filling? it looks better than the chocolate cake i usually use with my caramel filling and i just tried your vanilla, almond recipe, amazing!
Amy says
Yes it would! I love pairing it with caramel. So glad you enjoyed the vanilla almond cake recipe, and I hope you enjoy this one too! 🙂
Susan says
I love this cake as much as your vanilla cake. So fudgy and moist! Step by step is so thorough. Thank you for sharing this delicious recipe with us!
Amy says
Yay, thank you Susan! So glad you've enjoyed the chocolate ganache cake. 🙂
Rachel says
I have been wanting to make one of your cakes and have a question. They look so delicious! Can these bakery style cakes be used to make tiered cakes?
Amy says
Thanks for checking! They sure can! I tiered nearly all of my cake flavors and recipes at my bakery. The only flavors I didn't tier were my Lemon Drizzle and Coconut Cream, which both have holes poked in them for glaze drizzles, and were more delicate.
Rachel says
Thank you so much!
Frieda says
I made this cake for my son's 15th birthday, and my family said it was the best cake I have ever made! As someone who has made a lot of cakes from scratch, I enjoyed your tips and explanations of your cake baking strategies. I would have never thought of baking the cake in a flat pan and then cut out the cake layers like a cookie cutter - ingenious! Thank you for sharing your knowledge to the home baker!
Amy says
That is wonderful to hear, thanks so much Frieda! So glad you and your family enjoyed the chocolate ganache cake recipe and the cut-and-stack method. 🙂
Debbie says
OMG!!! I have made this cake once with the truffles, and I also made the cake recipe and used chocolate peanutbutter buttercream - both cakes were amazing!! I am so sold on baking in a half sheet pan now-so much easier and I don't have to "level" my layers or worry about them not being even! And the taste is amazing!! So moist and stayed that way for several days - even in the fridge!
My next 2 are your lemon and your Blueberry- and thank you for the coupon for the blueberry emulsion - already ordered and am going to place another!!
Thank you so much for sharing your expertise!! My husband thanks you more!
Amy says
That is so awesome to hear! Thanks so much for your comment, Debbie! So happy that you enjoyed the chocolate ganache cake and the cut-and-stack method! 🙂
Debbie Green says
Hi Amy!
I just wanted to tell you that I have also made this cake now but with peanut butter buttercream and was a huge hit with my husband. this week I am making your Blueberry cake as that is as much of his favorite flavor as the peanutbutter! Thank you so much for sharing everything you do with us! I am also making a lemon cake and definately trying you triple layer pumpkin pie!
Amy says
Hi Debbie, that is wonderful to hear! Thanks so much for taking the time to comment. 🙂
Marilyn says
Can I make this cake using regular 9 inch round cake pans? I don’t have room in my freezer for the sheet pan you use.
Amy says
Yes you can! 🙂 A 2x batch makes three 9" layers of cake. Or a 1x batch makes 2 round 8" layers (for a shorter cake).
Angie says
I made this today for my husband's birthday. EVERYBODY raved about it! It raised up nicely in the sheet pans and that made for nice, thick layers (4 in total). The cake was so moist and delicious. I kept hearing 'decadent' being used to describe it.
I think that I'm going to be making this cake for several family members birthdays in the future.
Amy says
Hi Angie! Thank you for taking the time to comment, I'm so happy to hear that everyone enjoyed the chocolate ganache cake! 🙂
Tina says
This cake was absolutely delicious. Multiple people that I served it to said it was the best chocolate cake they've ever had. I followed the recipe exact aside from using a coffee buttercream instead of chocolate. Such a moist, fudgey, perfect cake that every chocolate lover needs to experience.
Amy says
Thank you so much for your comment, Tina! This is wonderful to hear and I'm so glad everyone enjoyed it. I bet coffee buttercream was a delicious pairing 🙂
Sandie says
Hi Amy,
Please help! I am so excited to make this cake, it looks divine!!! However, I have a small hiccup, sadly I cannot have coffee is there another substitute for that ingredient?
Amy says
Hi Sandie! No worries, you can substitute equal parts water for the coffee in the chocolate cake batter. Hope you enjoy it! 🙂
Sandie says
Oh my gosh it is the best cake I have made from scratch here in UT! I live in a higher altitude and I have struggled since I moved here 4 years ago to find the right one and this cake is perfect. I have been trying so many different recipes, that I have used in CA but they just fall short of moisture here. I made the sheet cake version and did exactly that last night taking a gamble. 😉 It was a flavor burst of chocolate with a soft moist crumb that melts in your mouth. My family was like mom's making cake and I did not even get a chance to put it in the fridge, my family waited for it to cool down and ate it without the ganache or frosting, it is that amazing! Thank you so much Amy.
Amy says
This made my day! I'm so glad you enjoyed the chocolate ganache cake, it's one of my family's favorites, too. Thanks so much for taking the time to comment. 🙂
Rachel says
This is absolutely the best chocolate cake recipe I’ve ever made! And I’ve tried a lot of them! As all your recipes, it’s the perfect combination of flavor, texture, moistness. Just absolutely decadent! Love the ganache layer in the filling - nice little surprise! I paired this cake with your peanut butter buttercream frosting - perfection! I’m never trying another cake recipe - all of your recipes are amazing! Thank you so much for sharing!!!
Amy says
What a wonderful comment, thank you so much, Rachel! Great idea pairing it with the peanut butter buttercream! I'm so happy that you've been enjoying the recipes. 🙂
Chels says
OH MY GAWD. This is the best chocolate cake I have ever had! I've made it twice now and it's now a staple in my home! I'm going to make this cake for any gatherings I ever go to!
Amy says
Yay, thank you so much for your comment!! I'm so happy to hear that you loved the recipe. 😄
Rain says
Hi, I’m planning to do this recipe but the problem is I don’t have any buttermilk at hand, any substitute for it? Thank you so much
Amy says
Thanks for checking! I haven't tried substituting the buttermilk in this chocolate cake, but I think this link looks promising: https://www.healthline.com/nutrition/buttermilk-substitutes#dairy-substitutes. I'd recommend the sour cream option (#5), because I have used sour cream in muffins with good results. Followed by either the lemon juice or vinegar option. I'd love to hear how it turns out for you! 🙂
Marissa says
My husband requested a chocolate ganache cake for his birthday and this cake was perfect! He and I both loved everything about this cake, it's a very chocolatey rich cake that goes well with a cold glass of milk 🙂 I appreciated the detailed instructions with pictures and video on how to make it, very helpful for those like me who are less familiar with cakes of this decadence. Also, Amy was very helpful and quick to respond when I had a question about the recipe.
Amy says
Thank you so much, Marissa! I'm so happy that you enjoyed the recipe, and thank you for taking the time to comment! 🙂
Caitlin says
Just made this for the first time and it is the only chocolate cake recipe I will be using from now on!!! I still need to practice decorating it because it's nowhere near as pretty as yours, but it is delicious! Thank you for this recipe and all of the helpful tips 🙂
Amy says
This made my day! Thank you so much, Caitlin, I'm so glad you enjoyed the recipe! 🙂
Jessica says
Made this, it was perfect. I do not generally like chocolate cake but this was good. One question... Please tell me how to get the sprinkles to stick to the truffles. Mine would not stick at all even pressing them in barely worked for me 😆
Amy says
I'm so glad you liked the recipe! I press them into the truffle ball with my hands--it helps if the cake isn't super cold, so you might try doing it on room temperature cake balls next time (this may be more difficult to keep them in balls however, but you could press the sprinkles in, then roll the sprinkled truffle back into a ball). You can also use the dipped method in my cake truffle recipe-- a little more work, but the dipped truffles are delicious and then you just sprinkle the sprinkles on top. 🙂
Tanya says
I made this cake for my sons birthday, it tasted amazing and a hit with everyone. I have always struggled with chocolate cake recipes, and this step by step recipe is foolproof. Thank you so much for sharing the recipe. The frosting was so good as well, could stop eating it out of the bowl. we now have our go to chocolate cake recipe,
Amy says
This is so wonderful to hear! Thank you Tanya, so glad you enjoyed the recipe! 🙂
Joan says
Looking forward to making this recipe! One of my family's favorite Amycakes!
Amy says
Thanks so much, I hope you all enjoy it!
KK says
My Husband asks for this cake every year on his birthday! I can’t wait to try to make it on my own!
Amy says
Yay, I hope he loves it! 🙂
April Scott says
Can’t wait to try this recipe!!
Amy says
Thank you, I hope you enjoy the recipe!
Amy McGee says
Wowza! I think that you’ve got to be about the most generous baker around to share this delicious recipe with your fandom. I loved learning that your cakes are baked as a sheet cake and then cut into circles. Thank you for sharing all your amazing tips.
Amy says
Thank you, it's been fun to share! 🙂
Clancey Mills says
I ended up getting the wrong clearjel for this cake, so I used the pudding mix substitute. It was so delicious! I definitely want to try it again sometime with the instant clearjel though.
Amy says
Thank you Clancey, so glad you enjoyed it!
mary powell says
Made this cake and used the leftover cake to make parfaits. Not as pretty as yours, but darn tasty.
Amy says
Thanks so much Mary, so glad you enjoyed the recipe!
Valerie Litwinick says
We made the chocolate cake for my Bachelorette party. It was the best tasting chocolate cake I had ever had. Can't wait to try the others too!!!
Amy says
That's wonderful to hear! So glad you enjoyed the recipe!
Cassy says
My first attempt at this cake wasn't pretty but it was so delicious! Can't wait to try again 🙂
Amy says
I'm so glad you liked it! Taste is the most important part after all! 😄
Shari Ennes says
I am a chocolate lover!! I can’t wait to make this for my next girls event!!
Amy says
Yay, I hope you enjoy it!
Nicole Grant says
This is the best chocolate cake I've ever had in my life. I can't wait to try and make it myself. Thank you for sharing your recipes!
Amy says
Thanks so much Nicole, I hope you enjoy it!
Karen Scott says
Can this recipe be made into cupcakes? If so, how full do you fill the cupcake liners, and how long do you bake?
Amy says
This recipe works great as cupcakes! I haven’t had a chance to test it extensively in my residential oven, but when I did try it I baked them at 350 degrees for 8 minutes, then turned the oven down to 300 for 6-8 more minutes. A 0.5x batch makes around 16 cupcakes. I use a 2 oz scoop for mine, which is about 1/4 cup batter per cupcake.
Lindsey Yocum says
I would like to try this too!
Amy says
Thank you, I hope you enjoy the recipe! 🙂
Anonymous says
Love the sheet cake method! I admit—I didn’t make any truffles because I ended up eating all the scraps! 😂
Amy says
That is usually is what happens in our house too! 😂 So glad you enjoyed it! 🙂
K R says
This has to be the best chocolate cake ever! Thanks for sharing!
Amy says
Thank you so much! So glad you enjoyed it!
Lisa says
Oh my word this recipe makes a delicious cake. My family loved it and thank you so much for sharing it. The ganache was soft when the cake was at room temperature and caused the layers to slide on the 3” piece that wasn’t devoured. Is it supposed to be, or did I make a mistake on the consistency?
Amy says
That is so wonderful to hear! 🙂 I'm so happy that you liked the recipe and thanks for commenting! 🙂 When I make it my ganache is still thick at room temp, so I'm wondering if it was due to the either a different brand of chocolate chips, or maybe it's the warm weather we've been having? Letting the cake get nice and firm in the fridge before bringing it out a couple hours before serving to get back to room temp can also help with stability. 🙂
Rebecca says
Oh my goodness! I just finished icing this cake. We iced the scraps so we could taste it. Amazing!!! It is not nearly as beautiful as your cakes. (Trouble with the getting the drizzle to drip nicely.) I can’t believe that something this yummy came out of my oven. Thank you! Thank you for the way that you wrote the recipe. It was very easy to follow. Having the video, as well, was extremely helpful. I appreciate you sharing your recipe.
Amy says
This made me so happy, thank you Rebecca! I'm so glad that you enjoyed the recipe. 🙂
Melissa M says
This recipe launch has been the highlight of my week!! I never ordered the chocolate so I baked it today. I thought I followed the recipe but it’s overflowing my sheet pan. I can’t figure out what I did wrong? Thanks so much for all your hard work! I love it.
Amy says
I’m so glad you made it today and thanks for writing! I’m guessing you did nothing wrong—Probably has to do with either scale vs measuring cups or ovens baking differently or brand of sheet pan--was it just a little bit overflowing? When I bake it in my oven it mounds at the edge but doesn’t overflow, so it is a tight fit. It should not affect the flavor at all and I would just continue baking it like normal. (I’m sorry about the mess though!). If this happens to others I will look into downsizing the recipe. Let me know how it turns out!
Melissa M says
Yes! Just a little and only on 2 sides. I thought maybe I didn’t spread totally even when I used my offset spatula. I’m going to finish it Saturday so I’ll post then. Thanks so much. I appreciate all your feedback.
Amy says
That could have something to do with it! Another reader told me hers overflowed sligthly as well, so I have updated my recommendations under the heading "Layering the Cake" on this post. For most people it seems like the 1/2 sheet pan is fine, but I am also recommending a 12x18 sheet-cake pan that's 2" tall for anyone who has problems with it overflowing. 🙂
Daphne says
This has been happening to me as well. I measure using a scale and I bought the pans you link in the recipe.
Amy says
Hi Daphne! Here are some things I recommend when troubleshooting overflowing cake pans--https://amycakesbakes.com/double-batches-and-cake-pans/#troubleshooting . It sounds like the only difference could be oven temperature (if my oven bakes higher than yours for instance, then your cake may not be baking as fast as it rises and be more prone to overflowing). There are a few ways to fix this--1) you could increase your oven temp during the first round of baking (use an oven thermometer if you have it). This would be trial and error, and I wouldn't recommend going higher than 350 degrees. 2) You could take out a few scoops of batter before baking and bake them as cupcakes. 3) You could bake the cake in a 2" tall cake pan instead of my recommended 1" tall sheet pans (so a 9x13x2 for a 1x batch, or a 12x18x2 for a 2x batch). It is still possible to use the Cut and Stack method to cut out the cake with cake rings this way--if the bottom layer made from two halved pieces needs it, you can fill in the middle tightly with extra cake scraps (since those taller pans are typically a little less wide). I hope that helps! 🙂
Patsy says
I was so excited to try your chocolate cake recipe and it was amazing! We loved it!! I made the cake for Father’s Day and used German Chocolate Icing because that’s my husband’s favorite. Can’t wait to try the rest of the recipe. I had never used instant clear jell before. I’m excited to add it to my cookies and pies. Is there a formula for how much you add to a recipe? I’ve done a little research and it suggested adding a teaspoon per cup of flour used. Do you make any adjustments with the other ingredients, or just add it to your recipe? Thank you so much sharing your recipe, Amy!! I look forward to trying the next one you share!
Amy says
Yum, German Chocolate icing would be great with this! 🙂 So glad you enjoyed the cake recipe and thanks for commenting! The amount of Instant Clearjel I use varies between my recipes, but for me it tends to be around 1 Tbsp Instant Clearjel per 1 1/2 cup flour in cakes. As long as you mix it with your dry ingredients first you don't have to do anything different, but I've found I can usually add around equal parts additional moist ingredients like vegetable oil, because the instant clearjel allows the cake to retain more moisture without getting heavy. Cookies and pies vary a lot more depending on the ingredients. I hope you have fun working with it, and I think I'm going to work on updating my Instant Clearjel article with more specifics for bakers who want to experiment! 🙂
Patsy says
Thank you, Amy! I tried the Clear Jel in an apple pie over the weekend and it worked great. I’ve always used cornstarch for my thickener. I haven’t been able to bake much in months and you have stirred up a fire in me.👩🍳
Amy says
I love hearing that!! Thanks so much for sharing, Patsy! 🙂
Christy Welty says
So excited to try your recipe. I was so sad when you closed your shop. Thank you for sharing your lovely cake recipes.
Amy says
Thank you, I hope you enjoy them! 🙂
Melissa says
Looks amazing, can't wait to try it 🙂
Amy says
Yay, thank you! Let me know how it goes! 🙂
Anonymous says
Thank you for sharing Amy! I ordered the cake rings and they will be here tomorrow. I have all of the ingredients and can't wait to make the cake!
Amy says
Oh good, thank you so much! Let me know how it turns out! 🙂
Jenny Curtis says
I made it, but have a little bit of work to do on the drizzle:) Can't wait to try it!
Amy says
Yay! Can't wait to hear what you think! 🙂
Jenny Curtis says
It was delicious!! I posted a picture on the Facebook post and my mom posted one that tagged you on her facebook:)
Amy says
That photo on facebook seriously made my day! Thank you Jenny!! So glad you guys liked it. 🙂
Paige Schwent says
This will forever be the BEST cake and I can’t wait to make it at home myself! The step by step photos and videos are so helpful! ❤️
Amy says
Thank you so much Paige! ❤️❤️❤️
Jennifer M. says
I’m so excited to make this! Thank you so much for sharing. The step by step instructions and photos will be a tremendous help. ♥️
Amy says
Yay, thank you so much Jennifer! 🙂
Laura Moore says
Thank you! Can’t wait to try and make it!
Amy says
Thank you Laura! Let me know what you think! 🙂