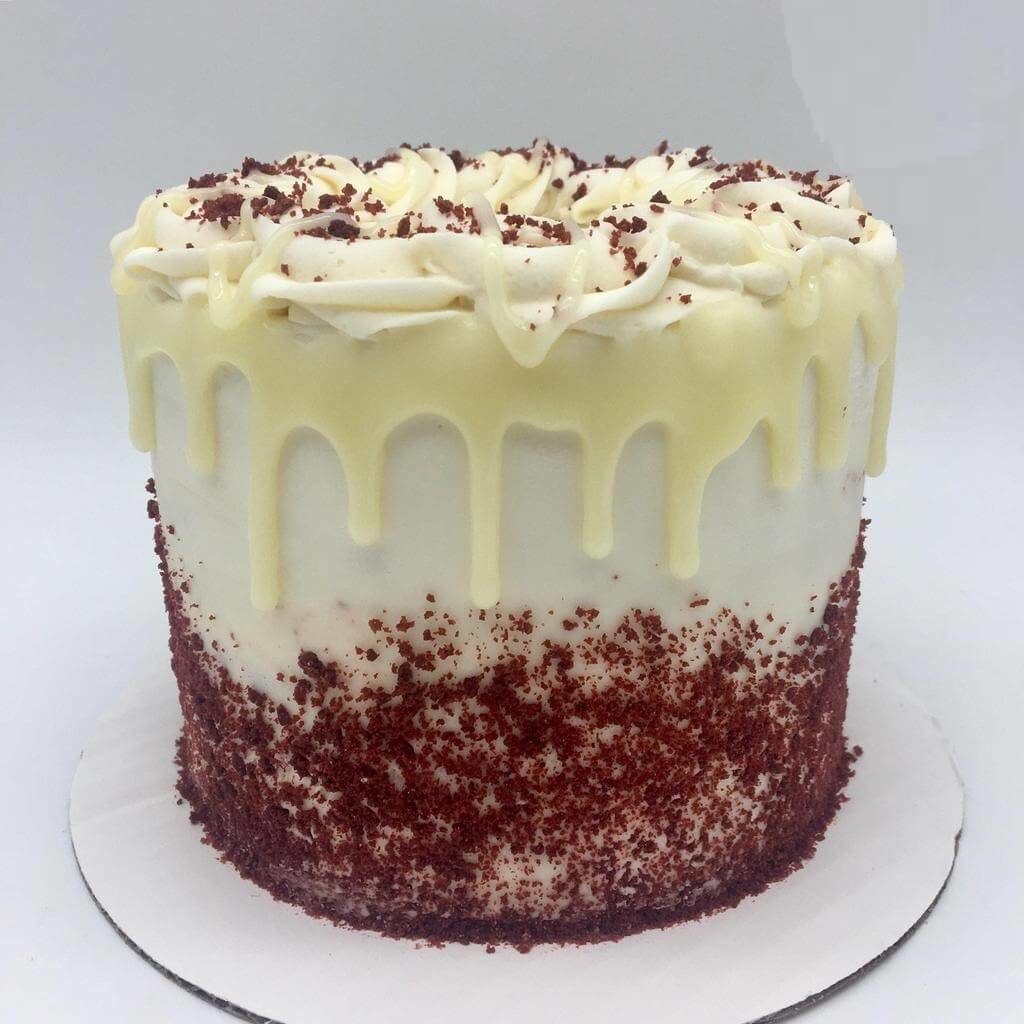
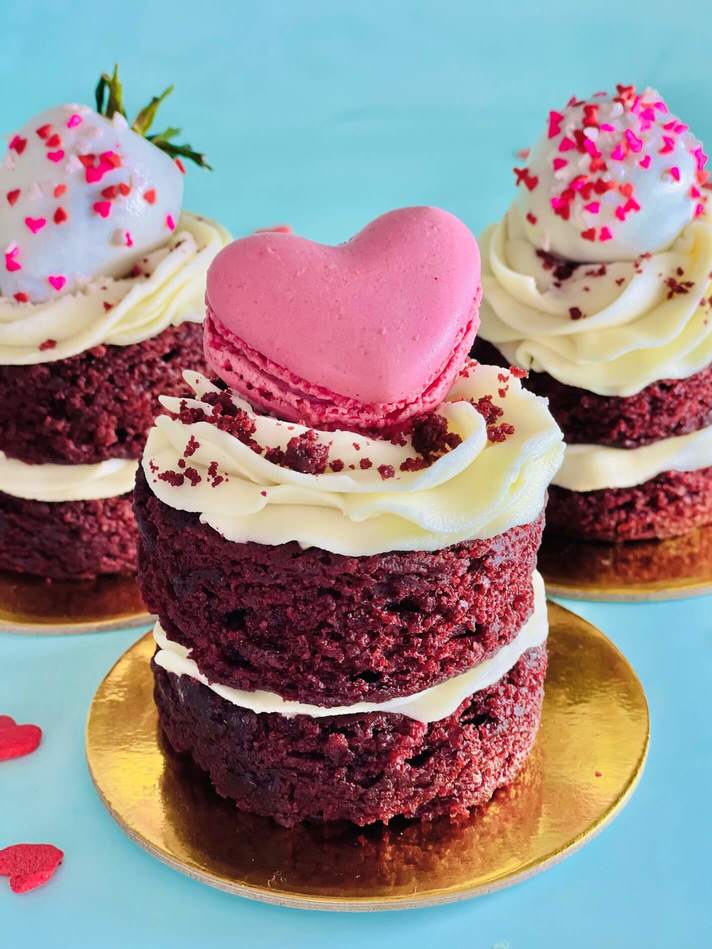
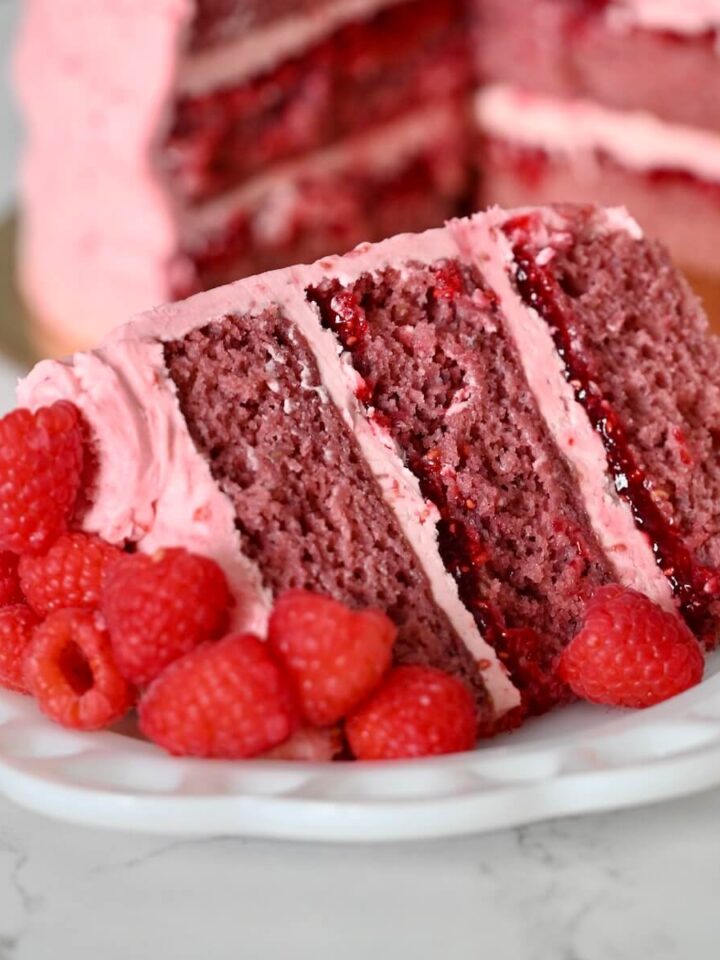
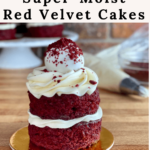
❤️ Perfectly Moist Mini Cakes-- These delicious mini red velvet cakes are soft, moist, and tender. They have a lovely light chocolate flavor and are perfectly paired with fluffy vanilla cream cheese buttercream. Using this recipe you can make six mini cakes out of one quarter-sheet pan of cake!

Jump to:
- About This Bakery Recipe
- Divide Your Time
- Bake the Mini Cakes in a Sheet Pan
- Extra-Moist Two Bowl Method Cake Batter
- Mini Cake Toppings
- Valentine's Day Cake Ideas
- The Perfect Cake Boxes and Boards for Gifting
- FAQs--Refrigeration, Storing and Timing
- FAQS--Substitutions, Adjustments and Ingredients
- 🎥 Video
- 📖 Recipe & Step-by-Step Instructions
- 💬 Comments
About This Bakery Recipe
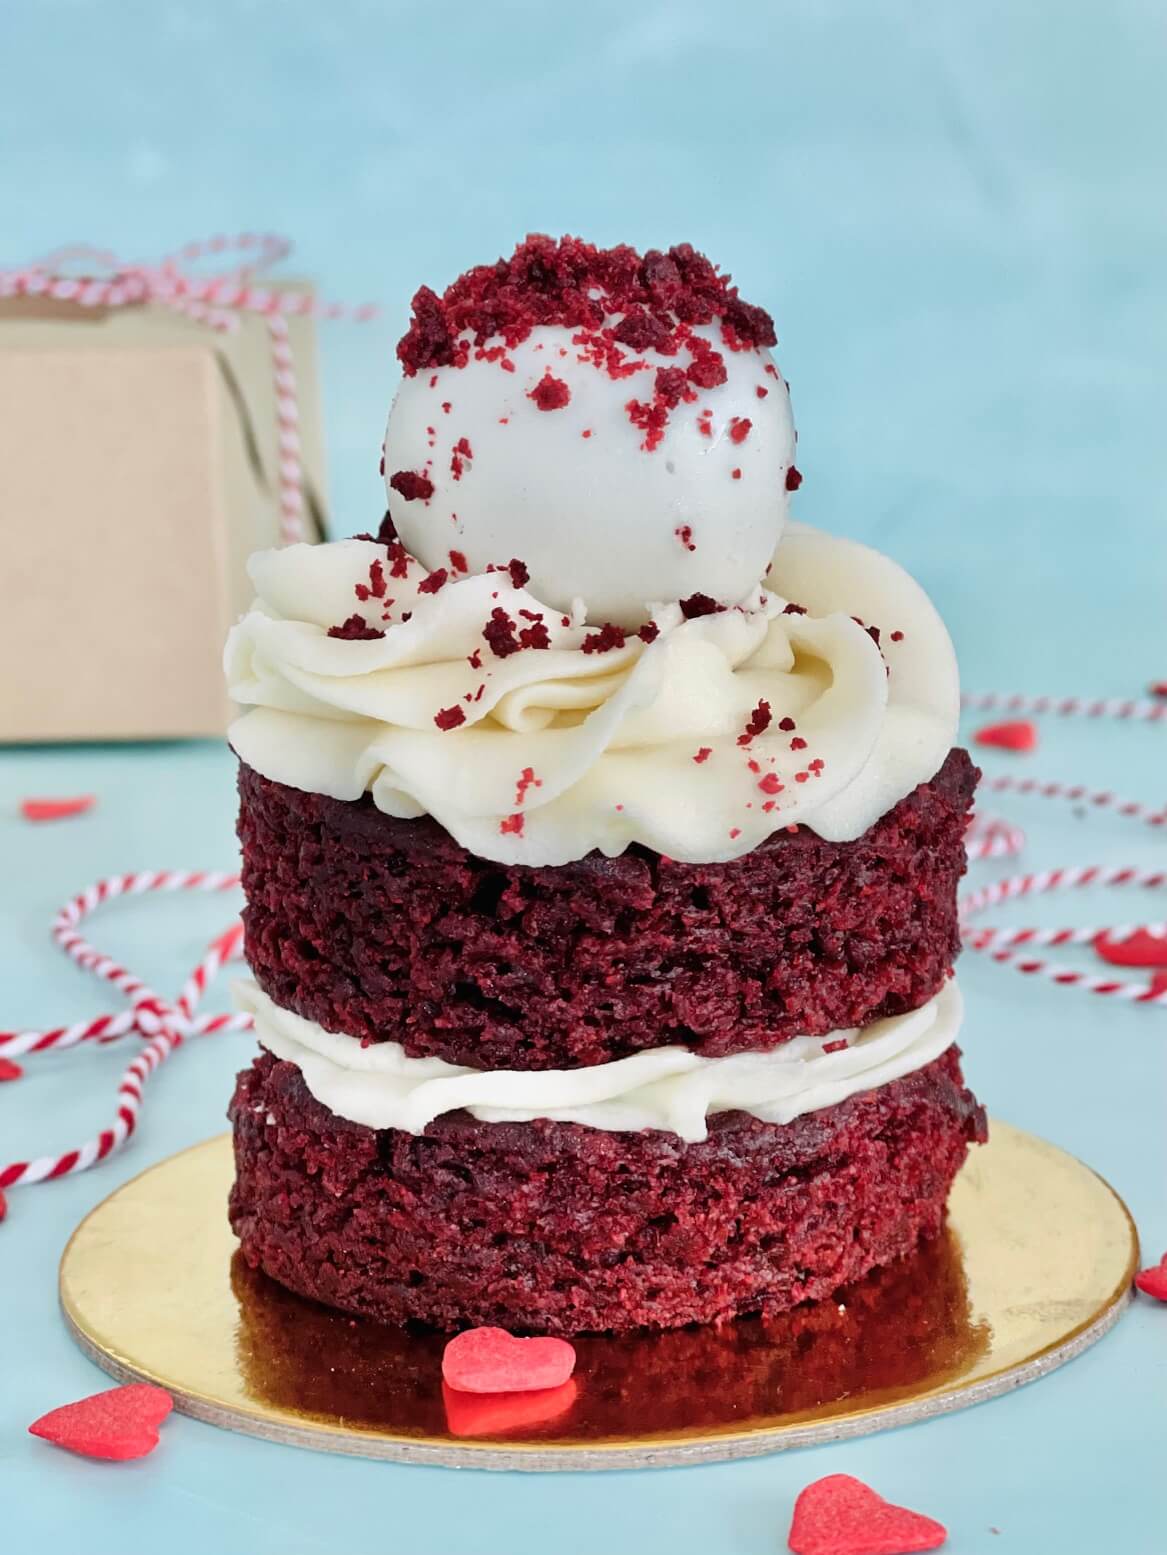
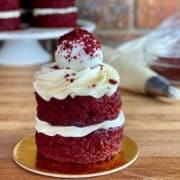
These cute little cakes are each topped with a mini red velvet cake truffle, making the perfect homemade gift for someone you love--or serve them as individual desserts or party favors!
Never Miss a Recipe!

I'm sharing my tried-and-true Amycakes Bakery recipes! Sign up to be the first to know about my favorite recipes, baking tips, and bakery secrets!
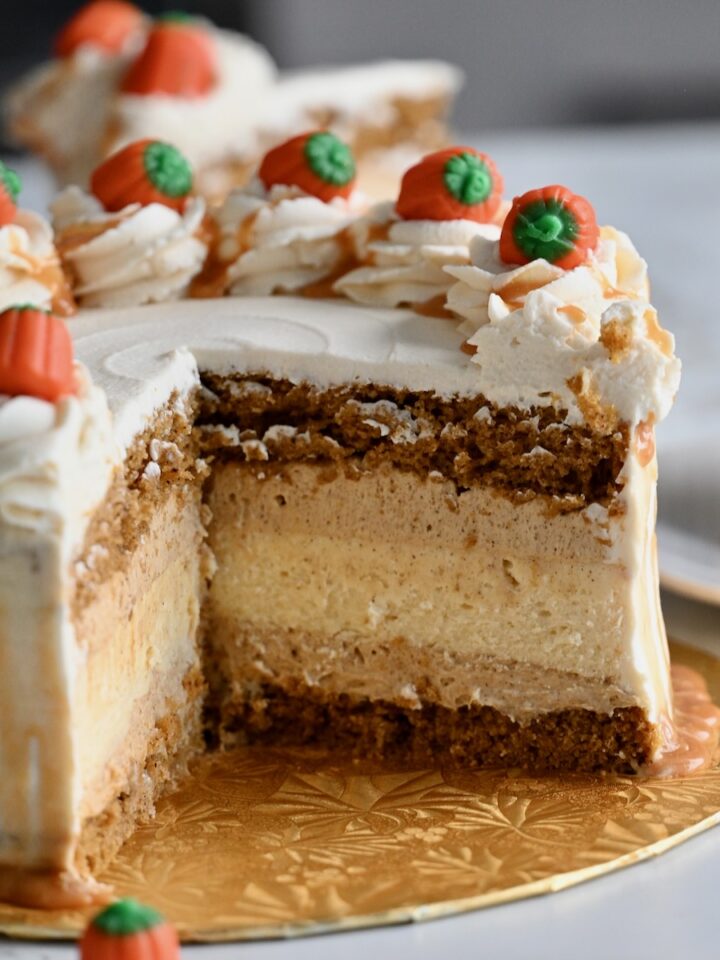
This extra-moist red velvet cake recipe is a much-requested bakery recipe from Amycakes Bakery! It was a popular flavor due to its super soft and moist texture and delicious flavor. I've made them into mini round cakes because I think they make the perfect Valentine's Day gift.
At Amycakes Bakery we called this size our "Amycakelets." (Check out my Mini Carrot Cakes for another adorable cakelet flavor). Feel free to turn this cake into a layer cake or sheet cake as described in How to Bake and Layer Cakes Like a Pro.
Divide Your Time
If you've followed my other cake recipes, you know I love to divvy up my time so I'm not completing every step on the same day, just like we did at Amycakes Bakery. This not only saves stress, but you will likely get better results! The mini cake truffles are easier to dip when they are cold, and the mini cakes are easiest to layer and decorate from frozen. Here's an example of how I divided my time for the cakes pictured in this blog post:
- I baked the red velvet cake on a Wednesday, then wrapped it and froze it in the cake pan.
- The next day I cut the cake circles from the frozen cake and reserved all the cake scraps. I rewrapped and froze the cake circles within the cake pan. After dividing the cake scraps, I smashed and balled the cake for the mini cake truffles and stuck them in the fridge. Then I made the red velvet cake dust.
- The following Tuesday, I made the House Vanilla Cream Cheese Buttercream and dipped the cake truffles.
- The next day I layered, frosted and decorated the mini red velvet cakes.
As you can see from my pictures and videos, the cakes are incredibly soft and moist after being frozen a week! I hope you can divide up the steps in a way that works best for you! 🙂
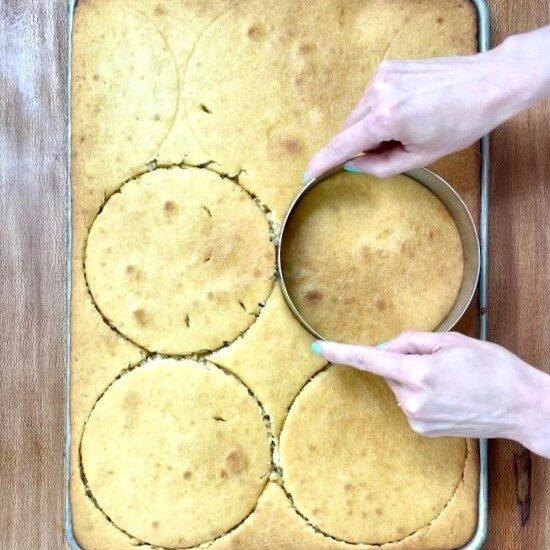
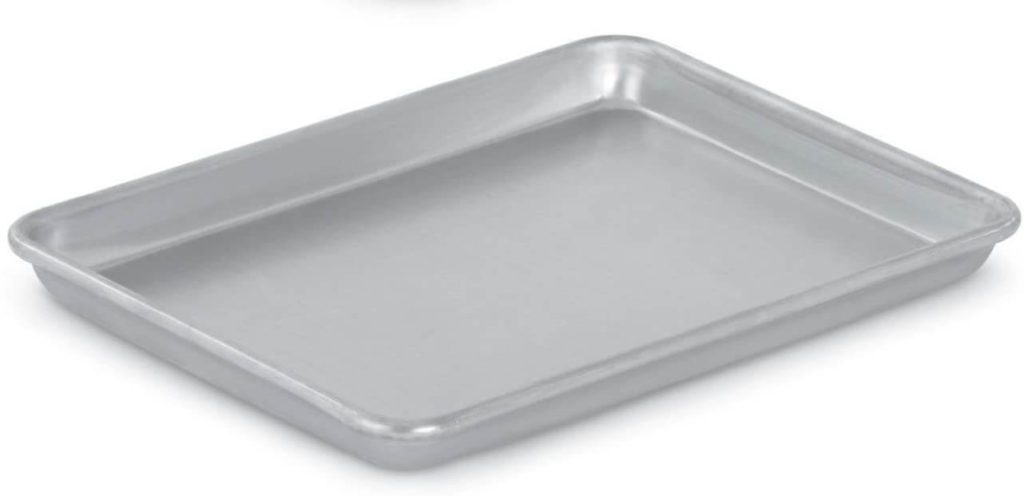
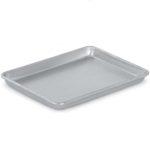
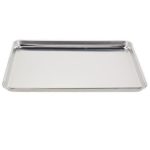
Bake the Mini Cakes in a Sheet Pan
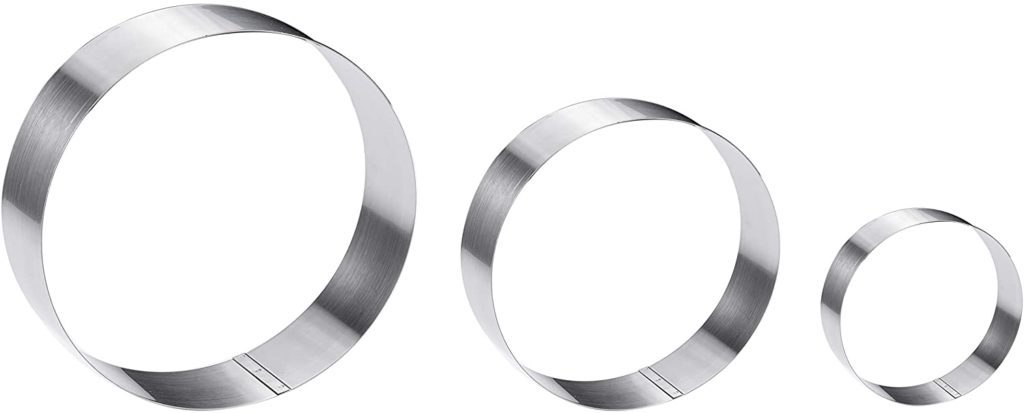
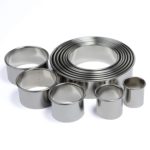
We'll be baking the cake in a sheet pan, then cutting the tiny layer cakes out with a small round cookie cutter. I use a 2.6" round cookie cutter for my mini cakes--with this size you can get 12 circles of cakes out of a ¼ sheet pan (9.5"x13"), which means six 2-layer mini red velvet cakes!
I find that these cakes are much easier to cut and layer when the cake is cold or frozen. After you bake the red velvet cake, wrap the sheet pan of cake in plastic wrap and pop it in the freezer until it is cold. You can also bake the cake in advance and freeze it for up to 2 weeks! Then cut the cakes and frost them with a piping bag and star tip.
Layer this Cake using the Cut and Stack Method
I bake all my cakes in sheet pans and cut them out with cake rings. I talk about this in detail in 5 Easy Steps to Baking and Layering Cakes Like a Pro, but here's a quick rundown:
1. Bake the Cake in a Sheet Pan
2. Wrap and Freeze the Cake in the Pan
3. Cut Desired Cake Size with Cake Rings and Layer the Cake from Frozen
4. Crumb Coat the Cake
5. Decorate and Serve
Extra-Moist Two Bowl Method Cake Batter
This red velvet cake batter comes together incredibly quickly with just two bowls and a whisk using the two-bowl method (no mixer necessary)! The cake is made incredibly moist by buttermilk, vegetable oil, and Instant Clearjel (or see my instant pudding mix substitution recommendation in the recipe FAQ). You can learn more about how to make super moist cakes in 7 Bakery Secrets to Incredibly Moist Cakes Every Time.
About the secret bakery ingredient in this recipe
This bakery recipe uses Instant ClearJel, a type of cornstarch that serves as both a thickener and a binder. It's tasteless and has no artificial ingredients.
You can also use Instant Pudding mix (when it's listed in the recipe), which contains Instant Clearjel as the second ingredient!
It's often used by professional bakers because it produces a smoother and glossier consistency than cornstarch, tapioca, or other starches. Even better, it enhances moisture and texture in cakes and thickens and stabilizes frostings. Here are a few brands I recommend:
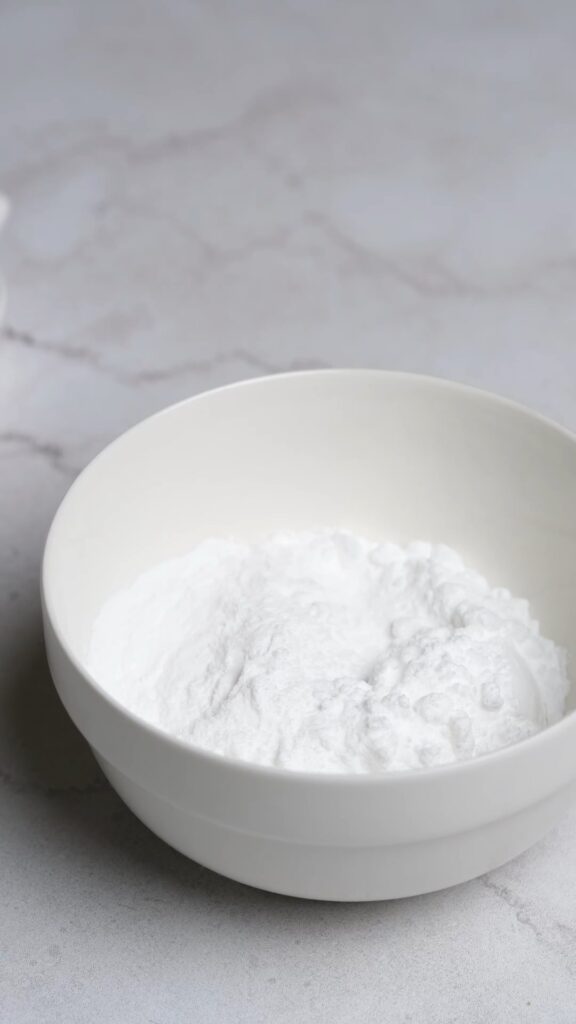

Although it's not often available in grocery stores, it's sold in a variety of online stores--just make sure whatever you purchase is labeled as INSTANT (cooktype and original clearjel will not work the same). It's also frequently found in Amish Markets. (Learn more about Instant Clearjel in Baking→)
Mini Cake Toppings
Mini Red Velvet Cake Truffle Toppers
Since we're cutting out the cakes from a sheet pan, we'll be left with some moist cake scraps. These cake scraps are perfect for turning into mini cake truffles. The cake is so moist that you don't even need to add frosting when making your truffle dough! Simply smash the cake into a soft dough and follow the instructions in my step-by-step Cake Truffle recipe, using a 4-tsp Cookie Scoop.
Red Velvet Cake Dust
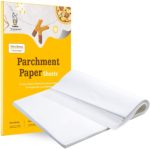
We will turn the remaining cake scraps into red velvet "dust" to decorate the cake. I love that the homey red velvet crumbs perfectly match the cake. To make the dust, crumble 1 cup of cake onto a sheet pan lined with parchment paper, and bake at 250 degrees 20-25 minutes, or until the cake feels crisp to the touch. Once the cake is cool, pulse the dried cake in a food processor until it turns into crumbly dust. If you don't want to go to the extra step, however, you can use red sprinkles instead!
Valentine's Day Cake Ideas
These mini cakes make a perfect treat for Valentine's Day! Some other cute toppings would be a red macaron, a chocolate-covered strawberry (you can use the same dip from in my cake truffle recipe), a heart-shaped macaron, or Valentine's Day sprinkles!
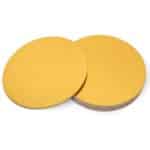
The Perfect Cake Boxes and Boards for Gifting
If you are giving out mini cakes as a gift or party favor, you'll need the right size cake boards and cake boxes so that the cake fits perfectly and doesn't slide around in the box. I love these 4" gold cake boards for all my mini cakes. These 2-layer cakes with the truffles are around 3 ½" tall, which means they fit perfectly in these 4"x4" cake boxes with a window.


Another great gift would be shorter one-layer mini cakes topped with the cake truffle--those would fit well in these cute 2.5" tall treat boxes (and you could make twelve 1-layer cakes in one recipe!). Tie the cake boxes with some red twine or Valentine's Day ribbon and you've got the most adorable gift!


FAQs--Refrigeration, Storing and Timing
How do you store these mini red velvet cakes?
Nearly all of my cakes are best at room temperature! When the cake is cold it will have a firm and different texture due to all the yummy butter in the cake and buttercream. I want to make sure you enjoy the soft and moist red velvet cake and buttercream texture that is intended by eating the cakes at room temperature.
You can refrigerate the cakes after decorating them, but allow them to come back to room temperature 2-3 hours before serving. (Keep in mind the buttercream can melt in warm conditions). I keep my leftover cake out of the fridge for up to 24 hours, but I'll refrigerate or freeze anything that won't get eaten within that time.
Always store these cakes in an airtight container. Since the sides of the cake are exposed to the air, keeping them airtight will keep the mini cakes moist. You can use airtight tupperware, or wrap other containers or cake boxes with plastic wrap.
How long can the house vanilla cream cheese buttercream stay at room temperature?
Most of my buttercreams contain some cream cheese for a creamy smooth texture. And according to many articles it can be left out overnight, although I recommend refrigerating your finished cakes until 2-3 hours before serving just so it doesn't get too soft on your cakes. I'll leave my cake leftovers that have cream cheese buttercream out for up to 24 hours because I want it to have a soft texture when I'm ready to eat it.
The buttercream can stay in the fridge for up to a week, or you can freeze it for even longer! Just thaw it in the fridge overnight, and allow it to get to room temp before using.
Can I Freeze these mini cakes?
Definitely! You can freeze the cake before decorating them as described within the recipe. You can also freeze the decorated cakes in airtight containers. I'd recommend serving the mini decorated cakes within 2 weeks, although they will probably stay moist even longer than that.
Always store these cakes in an airtight container. Since the sides of the cake are exposed to the air, keeping them airtight will keep the mini cakes moist. You can use airtight tupperware, or wrap other containers or cake boxes with plastic wrap.
FAQS--Substitutions, Adjustments and Ingredients
Can I make a larger red velvet layer cake instead of the mini cakes?
Sure! Instead of mini cakes, you can cut out a 3-layer 6" cake in a 1x batch (in the ¼ sheet pan), or a 3-layer 8" cake in a 2x batch (in a ½ sheet pan), as described within my article How to Bake and Layer Cakes Like a Pro. Or try my Red Velvet Bundt Cake recipe for a delicious and easy option.
What about cupcakes?
You can use my moist red velvet cupcakes recipe for easy cupcakes.
Can I substitute out the Instant Clearjel?
While I prefer the Instant Clearjel version, I did make a test batch of this recipe with 3 Tablespoons Jello Chocolate Instant Pudding in place of the 2 Tablespoons Instant Clearjel in the 1x batch of this cake recipe (not the frosting). It makes a slightly deeper burgundy red cake, but is delicious.
For the frosting, you can simply leave the ICJ out, and add a little more powdered sugar only if you need thicker buttercream.
Do you have any alternative recommendations for the red food coloring?
You can replace the food coloring with equal parts water and your cake will look like a light chocolate cake (a very delicious one 🙂 ). Or, you could try one of these natural alternatives to red food coloring listed at completelydelicious.com (I have not tried any of these alternatives).
Thanks for Reading. ❤️

🎥 Video
You can also get a quick recap with my Red Velvet Web Story.
📖 Recipe & Step-by-Step Instructions
Mini Red Velvet Cakes: Super-Moist and Topped with a Cake Truffle
Equipment
Ingredients
Dry Ingredients
- 177 grams (1 ¼ cups + 1 Tablespoon All-Purpose Flour (I use Gold Medal)
- 1 ½ teaspoons Baking Powder
- 1 teaspoon Baking Soda
- ¾ teaspoon Salt
- 16 grams (2 Tablespoons) Instant Clearjel (a food starch used in commercial baking that you can use at home, see Note #1)
- 19 grams (3 Tablespoons) Unsweetened Cocoa Powder (I use Hershey's)
- 238 grams (1 cup + 3 Tablespoons) Sugar
Wet Ingredients
- 2 large Eggs
- ¾ cup Buttermilk
- ¼ cup Water
- ¼ cup + 2 Tablespoons Vegetable Oil
- 1 ½ teaspoons Vanilla Extract
Other Cake Ingredients
- ¾ stick(s) (3 ounces) Salted Butter
- 1 Tablespoon + 1 teaspoon Liquid Red Food Coloring
- 1 teaspoon Apple Cider Vinegar
Vanilla Cream Cheese Buttercream
- 455 grams (3 ½ cups) Powdered Sugar
- 8 grams (1 Tablespoon(s)) Instant Clearjel (a food starch used in commercial baking that you can use at home, see Note #1)
- 4 ounces Cream Cheese
- 1 ½ sticks (6 ounces) Salted Butter (at room temperature)
- 48 grams (¼ cup) Shortening
- 1 Tablespoon Pure Vanilla Extract
Instructions
Make The Red Velvet Cake
- Preheat oven to 325 degrees. Line a 1" tall ¼ sheet pan with parchment paper, then spray the bottom (on top of the parchment) and sides of the pan with cooking spray.
- Using a sifter or fine mesh strainer, sift the Dry Ingredients into a large bowl, then whisk until well blended.
- Combine Wet Ingredients in a separate large bowl and whisk until smooth and well-blended.
- Melt salted butter in the microwave (or over the stove) until just melted. Avoid overcooking.
- Pour Wet Ingredients over the Dry Ingredients, then immediately before stirring add in the apple cider vinegar. Whisk everything together--the apple cider vinegar will bubble slightly as it reacts with the wet and dry ingredients.
- Pour the melted Butter and the red food color into the batter and whisk until smooth, uniform and lump-free.
- Pour the red velvet cake batter into the prepared ¼ sheet pan and smooth out the batter until even (an offset icing spatula works well for this). The batter will be about ¼ inch from the top of a 1" tall sheet pan.
- Bake in the middle or top rack (avoid bottom rack) of a preheated 325-degree oven for 16 minutes. Without opening the oven, turn the temperature down to 300 degrees and bake for another 6-8 minutes. Check the cake at this point. See if it is done by lightly touching the top of the cake--try to avoid moving the cake pan or baking rack, which could cause an underdone cake to sink. If jiggly at all to your touch, bake for another 1-5 minutes. The cake is done when a toothpick or small paring knife comes out clean when quickly stuck in the cake. A few moist crumbs on your knife are fine, but they shouldn't look wet.
- Allow cake to cool completely, then wrap thoroughly in plastic wrap and freeze the cake in the pan until it is cold or frozen. (You can bake and freeze the cake a couple of weeks ahead if desired. I pull the plastic wrap out and place the pan on top of it. Then I wrap 2-3 ways horizontally and one way vertically so that there are two layers of wrap on all sides of the pan including the bottom).
Make House Vanilla Cream Cheese Buttercream
- Whisk the powdered sugar and Instant Clearjel together until well-blended. Set aside.
- Using a stand mixer (preferred) or handheld mixer and a large bowl, beat the cream cheese until broken up and softened. Add the room temperature salted butter and continue to beat, scraping the sides of the bowl as needed. Add the shortening and beat and scrape the sides until there are no lumps.
- While the mixer is on low, slowly add the powdered sugar mixture. Add the pure vanilla, and scrape down the sides of the bowl. Then beat the buttercream on high for 2-3 minutes. This will add air into the buttercream and make it light and fluffy. The Instant Clearjel will cause the buttercream to thicken slightly during the next 10 minutes as it sits.
Cut out the Mini Cakes and Make Red Velvet Cake Toppings
- The mini cakes are easiest to assemble from cold or frozen. Cut out 12 mini cake circles with a 2.6" cookie cutter. Reserve ½ cup of cake scraps for red velvet cake dust, and the rest for cake truffles, if desired. It is my preference to remove the cake scraps, then rewrap and freeze the cake circles, so that I can divide up my time between 2+ days.
- To make red velvet dust, crumble ½ cup of red velvet cake scraps onto a parchment-lined sheet pan, and bake at 250 degrees for 20-25 minutes, or until the cake feels crisp to the touch. Once the cake is cool, pulse the dried cake in a food processor until it turns into crumbly dust. Keep dust at room temperature or freeze until using.
- To make mini red velvet cake truffles, smash the remaining cake into a soft dough and follow the instructions in my step-by-step Cake Truffle recipe, using a 4-tsp Cookie Scoop. Sprinke the dipped truffles with red velvet dust right after dipping.
Layer, Decorate, and Serve
- Since the red velvet cake is very moist and delicate, the easiest way to layer and decorate these mini cakes is from cold or frozen. Place 6 cake circles on 6 mini cake boards. Pipe a swirl of buttercream on top, then top each cake with a 2nd cake circle and a second swirl of buttercream.
- Top the mini cakes with a sprinkle of red velvet dust and a red velvet cake truffle. Let them set up in the fridge, but remove from the fridge 2-3 hours before serving so they can come back to room temperature. These cakes have the best texture at room temperature. These mini cake red velvet cakes will stay very moist if kept in an airtight container. Eat within 2 days or freeze. Enjoy!


Donna Buckwheat says
Hi Amy
I came across you on Pinterest
Love your professionalism and your ability to teach.
I have a quick question about your chocolate cake recipe
Can I use dark cocoa as I am trying to get the cake as close to black as possible? Also can I marble in your red velvet into the chocolate batter?
My granddaughter is having a stranger things theme for her birthday
Thank you so much
Amy says
Hi Donna, that sounds like a fun cake! I haven't tried dark cocoa in that particular recipe yet. I've found in some different recipe testing that dark cocoa substituted in equal parts can make a less-moist cake (when comparing them side by side--it tends to need a little more buttermilk or vegetable oil to bump up the moisture). However, my chocolate cake recipe is already quite moist, so it may be fine! Since the chocolate cake batter and the red velvet batter are similar weights, I think turning it into a marble cake should work well! I hope it turns out great for you--I'd love to hear how it turns out! 🙂
Pamela says
I made this for my grandson and he absolutely loved it!
Amy says
I'm so happy to hear that! Thank you for your comment, Pamela!
Jessica says
Will this recipe work as cupcakes?
Amy says
Yes, you can! 🙂 This recipe makes moist and flavorful cupcakes--to make them use a 2-oz scoop (¼ cup) to divide your batter into around 16 standard-sized cupcakes in a 1x batch. Start by baking at 350 degrees for 10 minutes, then turn the oven down to 300 degrees for an additional 3-5 minutes or until they pass the toothpick test.
Ann Dunkin says
Excellent
Amy says
Thank you so much for your comment! So happy you enjoyed the red velvet recipe! 🙂
Pamela says
What if i want to make an 8inches cake?
What measurements should i use?
Amy says
Hi Pamela! I have a cake pan chart that lists my recommendations when working with different cake pan sizes. I'd recommend using 2 8" cake pans for a 1x batch and dividing the batter equally between the pans. Or 4 8" pans for a 2x batch of cake, the batter divided equally. The baking time will need to be adjusted--it may take a little less time in the oven, although all ovens are different, so I have heard from some that their cakes take longer in their oven than my oven. Hope you enjoy it! 🙂
PattyB says
This is the best red velvet cake I have ever tasted!! The recipe is so easy to follow. I love how beautifully they turn out. This one is a family favorite.
Amy says
Yay, I'm so happy to hear that! Red velvet has always been a family favorite of ours, too! 🙂
Mimi says
I have made this recipe twice into mini cupcakes (makes 6 dozen). I’ve tried many different recipes for red velvet cake, but these are the absolute best! Thank you for sharing!
Amy says
That is wonderful to hear! I'm so glad you enjoyed these as mini red velvet cupcakes. Thank you for your comment! 🙂
Amy says
These are the cutest! I love red velvet cake and the design of these is too irresistible! Can't wait to make these again for Valentine's Day!
Amy says
Thank you so much!! 🙂
Tristin says
I've been looking for red velvet cakes to make for my kids for Valentines Day. These will be so cute and they will love the truffle on top!!
Amy says
Oh good, hope you guys enjoy them! 🙂
Ksenia says
These are so cute! I tried them this week in the hopes of testing before v-day, and I can’t wait to remake them - they were a hit with my husband and son!
Amy says
Oh good, I'm so glad you enjoyed them, thank you! 🙂
Ramona says
I have wanted to make mini red velvet cakes for such a long time now and I am so glad I came across this recipe! I love how you decorated these. Thank you for sharing!
Amy says
That's wonderful, thank you so much! I hope you enjoy the recipe! 🙂
Amy Liu Dong says
This red velvet looks so delicious and yummy. Plus the texture and the mini design makes it so enticing and tempting. A very unique cake recipe thats easy to prepare and bake.
Amy says
Thank you so much!! 🙂
Dennis Littley says
I made your red velvet cakes for my wife's book club and they loved them! Especially the truffle
Amy says
Oh I love that!! So glad you enjoyed the recipe! 🙂
Natalie says
What a beautiful cake. Stunning presentation and flavors are amazing. It's a perfect treat for Valentine's Day.
Amy says
Thank you so much!! 🙂
Mikayla says
Such pretty little cakes. They were perfect for our girls movie day, everyone had their own cake and we felt spoiled with such a pretty cake all our own.
Amy says
That's great to hear! I'm so glad you enjoyed the recipe! 🙂
Dana says
These mini cakes are adorable for Valentine's Day and I just know my kids are going to absolutely love them!
Amy says
Yay, I hope you have fun making them! 🙂
Amanda Mason says
These are adorable! So perfect for Valentine's day or Christmas! I can't wait to make these!
Amy says
Yay! I love them as little holiday cakes, too! 🙂
jtmondaygirl says
Perfect Valentines Day gifts!
The link you shared for 4" cake boards goes to 6" cake boards - and I can't seem to locate the 4" boards. Any ideas how to find the 4" cake boards?
Amy says
Thank you so much, I hope you enjoy the recipe! I just double-checked the links included within this paragraph--https://amycakesbakes.com/mini-red-velvet-cakes/#The_Perfect_Cake_Boxes_and_Boards_for_Gifting. The photos and links of the gold boards will take you to 4" cake boards that I use. Do you happen to remember which link led you to the 6" boards? Then I will be sure to fix that error! 🙂 Thanks so much
*Update* I think I figured it out--it looks like that link will allow you to select between the 6" and 4" board size and between quantities of 20 and 30--the 4" are only available in quantities of 30. I hope that helps! 🙂
jtmondaygirl says
Thank you for your help! I'm looking forward to making these for Valentines Day!
Amy says
Yay, I hope you enjoy them! 🙂