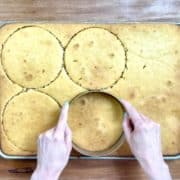
The process of layering cakes can be tricky and intimidating, but with a little practice, you'll be stacking cakes like a professional baker! All you need is a sheet pan and a round cookie cutter or cake ring, then you can choose the size of your layer cake after you bake it! That's how we cut and stacked up to a hundred cakes each week at Amycakes Bakery.
Cut and Stack Method
Years ago, one of Christina Tosi's helpful Milk Bar Cookbooks inspired me to change the way we baked at Amycakes Bakery. Unlike Amycakes, Christina stacks her signature naked cakes with acetate sheets -- you can check out her method here.)
Never Miss a Recipe!

I'm sharing my tried-and-true Amycakes Bakery recipes! Sign up to be the first to know about my favorite recipes, baking tips, and bakery secrets!
We first started what we called the "Cut and Stack Method" at Amycakes Bakery because of the taste. Baking in sheet pans prevents crispy or darker cake edges. You can have moist cake all the way to the frosted edge (as I describe in Seven Secrets to Baking Incredibly Moist Cakes Every Time).
Baking in sheet pans also creates a more even bake (less domed middles and less chance for sinking, a common issue in moist cakes). As a bonus, it saves lots of time--you don't need to divide batter evenly between pans, flip the cakes out, and wash multiple pans afterward.

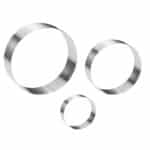
Use cake rings to bake and layer cakes from sheet pans (learn more)!
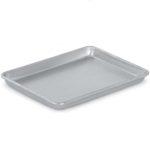
 Wear-Ever Collection Quarter-Size Sheet Pans, Set of 2 (9 ½-Inch x 13-Inch, Aluminum)")
I use these ¼ sheet pans for my 6" 3-layer cakes and mini cakes
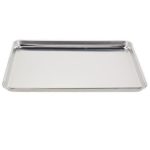
 Wear-Ever Half-Size Sheet Pans, Set of 2 (18-Inch x 13-Inch x 1-Inch, Aluminum)")
I use these ½ sheet pans for cookies and for 8" or larger cakes using the Cut and Stack Method)
Using my bakery recipes is a great place to start! And if you don't plan to make a layer cake, you can make a shorter sheet cake in either a ¼ sheet pan or a 9x13 cake pan like my easy chocolate fudge cake.
Timing is Everything
If you have the option, the cake stacking process will be easier and more efficient if you split up your time across a few days. Cakes stack so much easier when frozen. Especially extra-moist cake recipes that require a more delicate touch.
I've always found that dividing up my time makes it less stressful because I don't have to bake, make frosting, and decorate the cake on the same day.
My preferred timing for a stress-free cake is as follows:
Day 1: Bake the cake and freeze it in the cake pan. While the cake bakes, make the cake filling (like chocolate ganache or fruit compote) if using. (You can even complete "Day 1" up to 2 weeks in advance and freeze both the cake and filling! Just be sure to thaw the filling in the fridge the night before you want to layer your cake.)
Day 2: Make the Frosting. Cut the cake layers from frozen. Layer and crumb-coat the frozen cake. Allow crumb coat to set up in the freezer for 10 or more minutes. Then add your final coat of frosting, decorate the cake and refrigerate overnight.
Day 3: Serve the cake at room temperature.
Sometimes I only have time to freeze my unfrosted cake for a few hours before layering it instead of overnight. Just be aware that when the cake isn't frozen, it won't be as easy to handle.
If you don't have time to decorate the cake on Day 2, you can push back decorating to Day 3. Just wrap your crumb-coated cake in the refrigerator overnight the day before you plan to serve it.
The Freezer is our New Best Friend
There's no need to worry about the freezer drying out your cake. As long as the cake is moist when it goes in the freezer, it should be moist when it comes out (in our safe two-week window. You may be able to even go longer than that with a very moist cake).
If you're using my extra-moist cake recipes, the Instant Clearjel or instant pudding mix, buttermilk, and vegetable oil will keep your cake moist for days. Just be sure to wrap your cake thoroughly in plastic wrap before freezing overnight. (I'm talking double layers across all surfaces and no holes).
It's also helpful to let the cake set up in the freezer any time you are having trouble or are worried about the cake's stability. 10 minutes here or there in the freezer will allow your buttercream and cake to firm up, which will stabilize the cake so you can get back to work on it.
Here's a good place to start if you're a beginner to cake decorating, or if you just want the crispest-looking cake:
- Freeze for 10 minutes right after layering the cake but before crumb coating.
- Freeze for 10 minutes after crumb-coating.
- Freeze for 10 minutes after your final coat of frosting but before drizzling with ganache or adding rosettes or your choice of decorations.
The above extra 30 minutes in the freezer could be the difference between a slightly lopsided cake and a lovely crisply-frosted cake.
If you're worried about ending up with cake scraps, no problem! Check out these 5 genius tips to use up leftover cake scraps for lots of ideas.
Frequently Asked Questions
All the baking essentials that I use are linked on my Amazon storefront. I only link to products that I currently use, or if I couldn't find that exact product, something similar that I could see myself purchasing in the future.
If you only have round cake pans, head on over to the chart in Double Batches and Cake Pans Options: Everything you Need to Know -you can use sheet-cake pans or 6″, 8″, or 9″ round cake pans with my cake recipes. Just take extra care when baking. Round pans tend to have more batter in them than sheet pans and can be more prone to sinking or doming.
To fill a cake, you'll want to check out the details in my cake fillings post. Some of my favorite filled cake recipes are my fresh blueberry cake and my vanilla cake with strawberry filling!
🎥 Step-by-step VIDEO
I recommend watching the short video above with the sound or captions on. Then keep reading for the detailed tutorial with photos.
Whether you are an occasional home baker or a pro selling cakes online, below is a detailed step-by-step tutorial with photos that you can print or pin for later. Have you tried cutting and layering a cake with cake rings before? I'd love to hear your questions and comments below.
Thanks for Reading. ❤️

5 Easy Steps to Layering Cakes Like a Pro
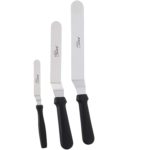
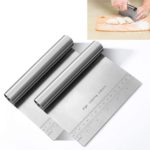
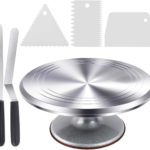
Equipment
Ingredients
- 1 cake baked in a sheet pan
Instructions
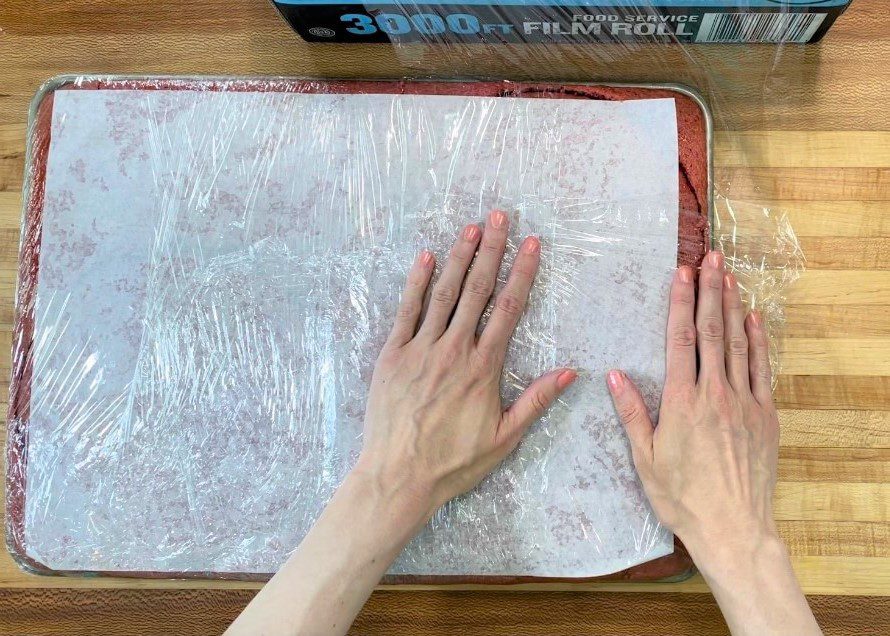
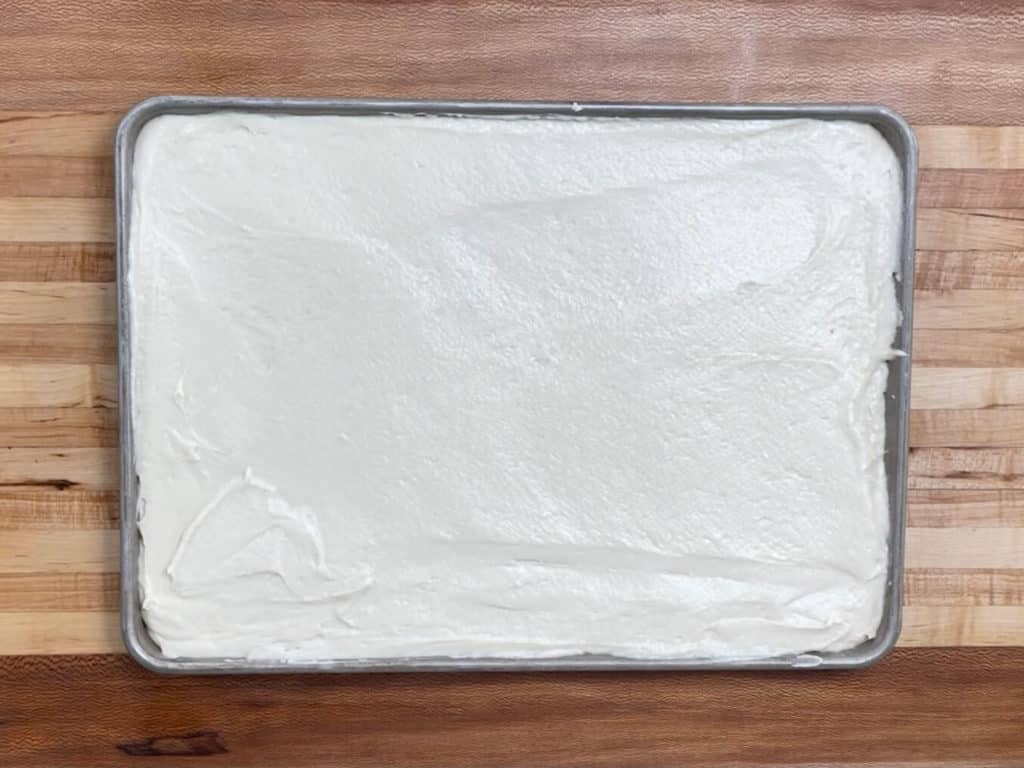
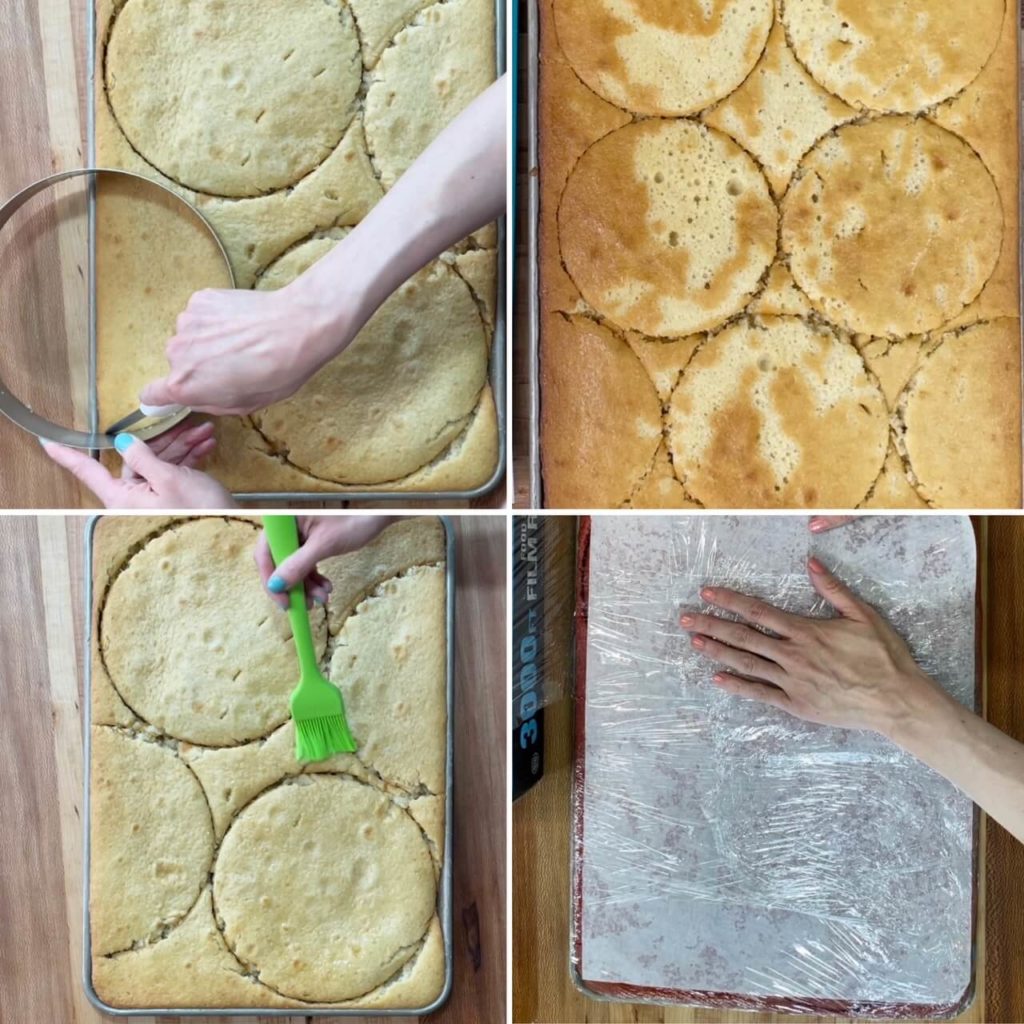
- Bake your cake in a Sheet Pan, then Freeze the cake. Allow cake to fully cool after baking. (If you are in a time crunch, you can use a portable fan to speed up the cooling. I like to place my sheet pan on a cooling rack over two chairs with the fan blowing directly under the cooling rack/ pan. The cake cools twice as fast!) Brush with simply syrup (optional, see Note #2) then wrap and freeze the cake. To wrap the cake, place another sheet of parchment on top of the cake (this will prevent the plastic wrap from sticking to the cake), and wrap the whole pan with plastic wrap. (I pull the plastic wrap out and place the pan on top of it. Then I wrap 2-3 ways horizontally and one way vertically so that there are two layers of wrap on all sides of the pan including the bottom).

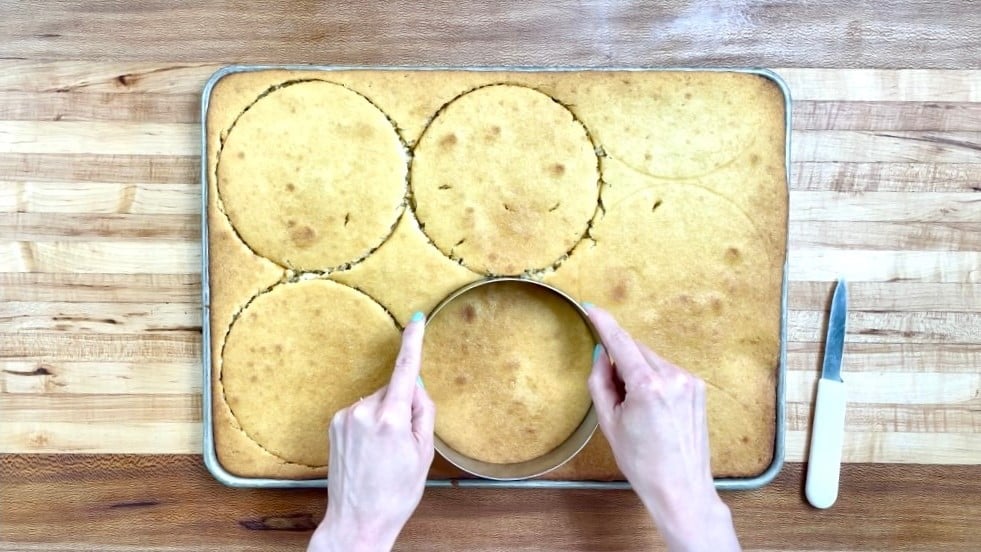
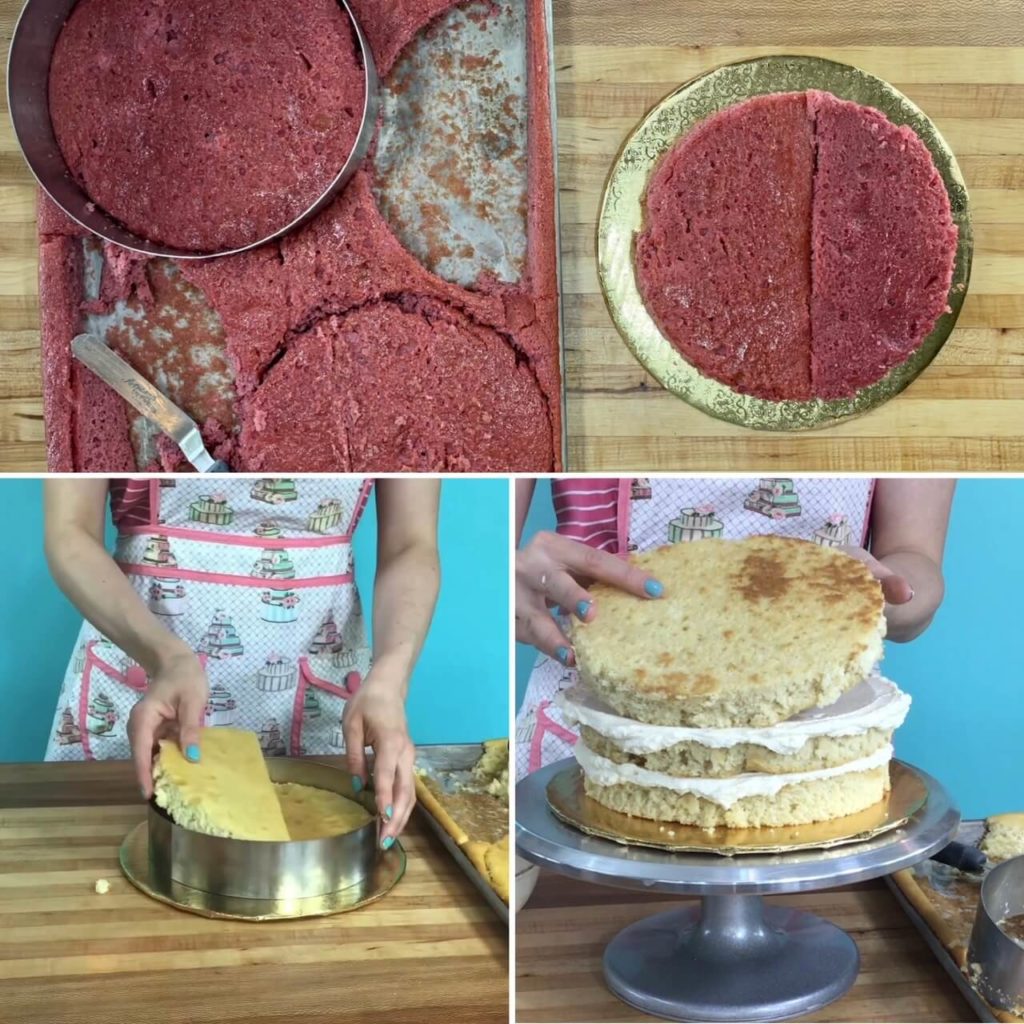
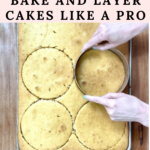
- Cut Your Desired Cake Layers from Frozen. You can choose your cake size after you bake it! Using your preferred cake ring(s), cut cake rounds out of the frozen cake in the pan using a slight sawing motion. Use a knife and your cake ring as a guide to cut any half circles that you'll piece together later. (See Note # 1 for cake size options).

- Layer the Cake from Frozen. The cake will be much easier to layer/stack when it is frozen. To remove the cake layers from the pan, use a spatula and the same cake ring you used to cut the cake. Piece the bottom cake layer together from two halves using the cake ring as a guide. If needed, fill in the middle of the bottom cake layer with more cake scraps. To build the most stable base, pack the cake in the cake ring tightly like Tetris. Then remove the cake ring and stack the remaining frozen layers with around ¼ inch of frosting or filling on the inside. (If using a soft filling like compote, pipe a ring of buttercream around the edge of each cake layer before filling the cake). Place the bottom cake layer "pan side down" (against the cake board) so it doesn't stick to the cake board when the slices are cut. Stack the remaining cake layers "pan side up" so that you are frosting on top of a flat surface. With the leftover cake scraps, you can sample your cake, or turn it into cake truffles, cake parfaits, or trifles.
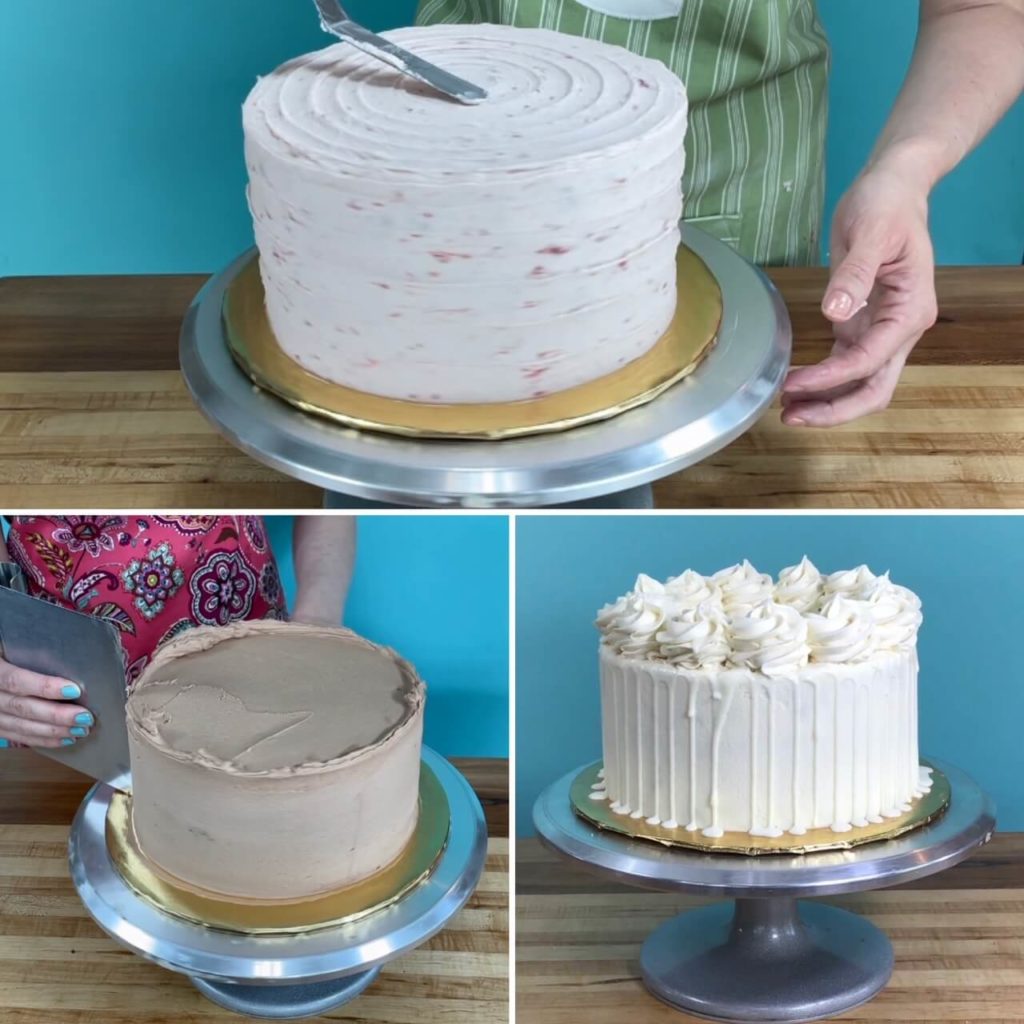
- Crumb-Coat the Cake. Using an offset spatula, apply a crumb coat (a very thin layer of buttercream that catches all the cake crumbs). Allow your crumbed cake to set up in the freezer for 10 or more minutes. The cake can also be placed in the freezer at any point during the layering and decorating process to produce crisper frosting and enhance stability.

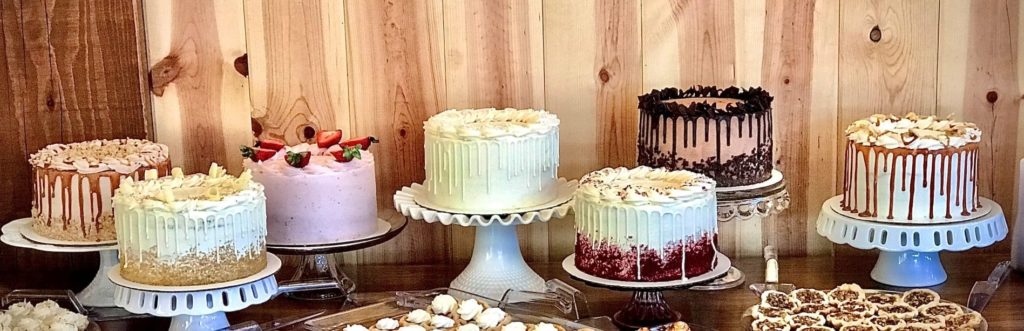
- Add the Final Coat of Frosting and Decorate the Cake to Your Liking. On top of the crumb coat, the second layer of buttercream will go on much crisper and smoother. You can achieve smooth frosting with a bench scraper, or make a horizontal, vertical, or homestyle texture with a small offset spatula. Amycakes Bakery's signature look was a drizzle of ganache (using a squeeze bottle) and rosette top border using a 1M star tip. Allow your cake to set up in the fridge, but serve at room temperature by removing it from the fridge at least 1-3 hours before serving. Enjoy!

Notes
- One 3-layer 8" cake (two full cake layers, one pieced from two halves).
- Two 3-layer 6" cakes (five full cake layers, one pieced from two halves).
- One 6-layer extra-tall 6" cake (five full cake layers, one pieced from two halves).
- Six or more two-layer Cakelets using a 4", 3" or 2" cake ring or cookie cutter. You can frost these Cakelets with a piping bag similar to a cupcake.
- One 3-layer 6" cake (two full cake layers, one pieced from two halves).
- Three or more two-layer Cakelets using a 4", 3" or 2" cake ring or cookie cutter. You can frost these Cakelets with a piping bag similar to a cupcake.
Thanks for Reading. ❤️
Kyla says
Question about simple syrup:
I plan to do a half sheet pan, three layers (I’ll do rectangle as I don’t have circle cutters). Plan to make it Tuesday, serve on Sunday. So I’m going to freeze for a few days, so do I cut the cake, leave in pan and use simple syrup and freeze? Or do I brush with simple syrup without cutting and freeze?
Would love your thoughts.
Thank you!
Amy says
I find it makes the crispest layers when cutting the cake after it has frozen, so I'll brush it with simple syrup before freezing, then cut it right before layering from frozen. I've got some more detailed cake layering instructions here. 🙂
Julia Abbott says
This seams like a whole new world of cake baking and decorating! Where is the recipe for to make the cake in the sheet pan? I’m so excited to try this! For a taller 8” cake how many layers would I need to do to achieve the same height at (4) 2” layers??
Amy says
I'm so glad you've found it helpful! My cake recipes here are all made with this sheet pan method, and include details within each recipe card. A 2x batch (you can hit 2x within each recipe card) makes a 3-layer 8" cake. It makes the cake around 4" tall, but can vary depending how much frosting you prefer in between the layers. If you need taller cakes (and you're doing a lot of cake baking), you can make two 4-layer 8" cakes (or one 4-layer and one 5-layer) from three 2x batches of cakes. You can also make a super tall 6-layer 6" cake from a 2x batch. Hope that helps! 🙂
Julia Abbott says
Thank you!! If you were to use a box mix how many boxes mixes would you use for the 1/2 sheet pan?
Thank you
Julia
Amy says
Hi Julia, I tested a doctored cake mix (1 mix) in a 1/4 sheet pan and it baked perfectly. So while I haven't tried the 1/2 sheet pan with cake mix yet, I assume that 2 cake mixes would fit great in the 1/2 sheet pan. 🙂
Sherry says
Love ❤️ everything but can you use simple syrup after you freeze the cake
Great great job tips
Amy says
Hi Sherry, yes you can! I've done that before if I forgot to do it beforehand. 🙂
Michal says
Thanks for all of the great tips and advice. I plan to try the sheet pan method. I have 2 questions, 1.) Do you know if gluten free cakes will work using your methods?, 2.) What do you do with the leftover cake scraps? Before going gluten free, I used to make a Russian Cake with leftover cakes/cake scraps, using melted raspberry jelly and rum, blended with a variety of flavors of cake pieces, packed into a loaf pan, weighted for a couple of days in the refrigerator, then frosted.
Would appreciate any advice.
Amy says
Hi Michal! I haven't tried this cake ring method with gluten-free cake recipes, but I think it would still work for you. It typically works with most recipes, but you may have to do some trial and error with the batter amounts. I do have a few things I recommend for cake scraps--cake parfaits, cake trifle, and cake truffles! I store my cake scraps in air tight containers in the freezer to use for those methods when I have enough. I also made little 30 second video showing these cake scraps ideas here on Pinterest. Love hearing about the Russian cake, I had never heard of that before but it sounds delicious! 🙂
Darla liverpool says
Hi Amy! Your blog has been so helpful! When you had the bakery did you bake your cakes in convection ovens or conventional? New to convection baking and looking for pointers.
Amy says
Hi Darla! So happy to hear it's been helpful! 🙂 At my bakery we had 2 commercial convection ovens. But on the recipes I test at home now, I use a standard residential oven with no convection option. When we used the bakery convection ovens, we typically baked our cakes at 300 degrees, and they didn't take as long to bake. We often rotated our sheet pans of cakes 3/4 of the way through baking, so that they would bake more evenly with the oven fans at the back of the oven. Hope that helps!
Jerry says
Do you use bleached or unbleached all purpose flour?
Amy says
I use Gold Medal bleached all-purpose flour! 🙂
Rachel says
I have always baked my cakes in round pans and am looking so forward to this way using cake rings. I really like two-inch tall cake layers. If I bought two-inch tall 1/2 inch and 1/4 inch sheet pans, how much recipe of a cake would I need to make for each one? Would 2 times the amount be enough for a 9 x 13 that is 2 inches tall? Would 4 times be enough for a 12 x 18 that is 2 inches tall? Thanks.
Amy says
Hi Rachel! Thanks for checking! I haven't tried this, since with my cake recipes, I like to do less batter in each pan so they bake the most evenly (less chance of sinking) without dark edges. I always use 1" tall sheet pans and just do more cake layers with less frosting in between each layer for taller cakes. However, if you want to experiment with it and are using my recipes, a 2x batch would be double the amount in a 1/4 sheet pan, and two 2x batches would be double the amount in a 1/2 sheet pan. That should be close to 2" tall in height. I would think that it would still turn out really well, it may just need much longer in the oven at the lower temperature. 🙂
Rachel says
Thank you so much! I had not thought of doing more one inch layers to get the same height cake. I like that because with more layers, there is more frosting, which I love.
Amy says
Oh good! It makes a pretty presentation when the cake is sliced, too! I hope you enjoy this method! 🙂
Sharon says
Hi, I am excited to try your cake recipes. I have 9 inch round cake pans and would like to make three layers. Should I double the cake recipes for that? Thank you for posting your recipes.
Amy says
Thanks, Sharon! 🙂 Yes, just click the 2x button within the recipe to double it, which is the right amount of batter for 3 9" round pans! 🙂
Chris says
Has anyone thought or tried to just cut the sheetcake into 4 retangular pieces and stacking them, maki g a re tangular cake?
Amy says
Sure, you can definitely make a rectangular cake! 🙂 We used to do 2-layer sheet cakes at my bakery as the cakes baked more evenly and could have filling in the middle--We would just do two-layer 1/4 sheet cakes out of one 1/2 sheet pan of cake (cut in half), or two-layer 1/2 sheet cakes out of two 1/2 sheet pans of cakes. 🙂
Karrie says
Love this! Question..does the sheet cake hold one cake mix? Or do I need more a larger cake dough recipe in order for the cake to be thick enough? Thanks
Amy says
Thanks for checking! I haven't tried using a cake mix with this method, but my guess is that you would need 1 cake mix for a 1/4 sheet pan (which makes 1 6" cake cut with cake rings), and 2 cake mixes for a 1/2 sheet pan (which makes 1 8" cake). I'm assuming this because most cake mixes have the option to bake them in a 9x13 pan, and a 1/4 sheet pan is 9x13x1"tall. However, you may likely will not need to use all the cake batter in 1" tall sheet pans, as I'm not sure how tall the cake mixes will rise, and I don't want them to overflow on you. You could use the extra batter for cupcakes. Feel free to check out my cake recipes to compare ratios, which are meant for sheet pans. If you have luck with it, I'd love to hear about it! 🙂
Ariel says
Excited to try this! Is the 1-3 hours before serving accounting for the cake being frozen? Like if I decorate it from frozen, let it set up in the fridge, then it’s out for 3 hours it will be thawed? Or is that going from fridge to room temp? Thanks!
Amy says
Hi Ariel, the 1-3 hours before serving is after the cake is thawed. 🙂 I prefer to decorate my cake from frozen the day before serving, then allow it to thaw slowly in the fridge overnight, then bring it out of the fridge 1-3 hours before serving so it can be eaten at room temperature. If I need to decorate the cake the day of serving, I'll still layer and crumb coat the cake the day before serving, then let the crumb-coated cake thaw overnight in the fridge. Then the day of serving I can decorate the cake that is already thawed. Hope that helps! 🙂
Ariel says
Very helpful, thank you!
Ariel says
Do you have recommendations on how to store the frosted sheet sized cake? I’m having trouble finding a cake keeper in that size but obviously want to keep the frosting decoration intact.
Amy says
At Amycakes Bakery we stored all our cakes in cake boxes that matched the size and wrapped the cake boxes all the way around in plastic wrap to keep them airtight (if it is fully crumb coated, you don't necessarily need to wrap the box tightly, but it can also prevent condensation from the fridge). Amazon usually sells cake boxes in quantities of 10 or more, but if you only need it for storing in the fridge, I'd recommend cutting and taping up a reusable "cake box" out of a regular cardboard box just for storing cakes in the fridge--I've had to do that before for larger cakes! 🙂
tricia says
can i use this method to make a 3 tier wedding cake?
Amy says
Yes you can! A small 4"6"8" wedding cake (each tier 3-layers) could be cut from two 1/2 sheet pans (1/2 sheet pans are 2x batches in my recipes). A 6"8"10" would need three 1/2 sheet pans and one 1/4 sheet pan of cake. (two 1/2 sheet pans would make 1 3-layer 10" cake, one 1/2 sheet pan would make one 3-layer 8" cake, and one 1/4 sheet pan would make one 3-layer 6" cake. 🙂 ).
Diana says
Beyond helpful. I am hoping to try this cake ... I want to make a super moist chocolate cake 7 layers. I just bought 2 large cookie sheet cake pans. This is a very special cake for my daughter in loves 50th surprise birthday party. I just wished I knew how to make the rich chocolate fudge icing that they use at the bakery. I worked at a bakery for 10 years (Years ago) . any suggestion would help. Her birthday party is on the 11th of February. Thank you...
Amy says
Thank you, Diana! I'm not sure about what fudge icing recipe they may have used. What we made at my bakery is a ganache filling and a chocolate buttercream icing with my extra moist chocolate cake--you can find that recipe here: https://amycakesbakes.com/triple-chocolate-ganache-cake/ 🙂 Let me know if you have any other questions!
Cherié says
Hi Amy! Love your recipes and methods! I live in Texas and have a very picky son! He does not like dense cakes. I cannot find a chocolate cake recipe that is light and fluffy. any suggestions?
Amy says
Hi Diana, thanks for reaching out! So happy to hear you've enjoyed the recipes! I wish I could be helpful, but my chocolate cake recipe is extra moist and fudgy, so at this time I don't think I have the recipe you're looking for!
Toren says
Cherie,
I have made this chocolate cake numerous times and it is so light and fluffy. Thought I’d share.
https://www.afamilyfeast.com/black-midnight-cake/
Melissa says
Thank you for all the helpful tips and links to items that you use 🙂
Amy says
No problem, so glad to hear that it's helpful! 🙂
Lisa says
I love baking the cake layers a sheet pan. My grandkids love eating the extra cake after I cut out the circles. Thanks for this time saving idea.
Amy says
So nice to hear that! 🙂 My kids are a big fan of sampling the cake scraps too. 🙂
Jennifer Mango says
This is sooo helpful. I can’t wait to try this. Thank you so much for sharing!
Amy says
Happy to! Let me know how it turns out! 🙂
Clancey Mills says
I had never heard of baking cake batter in a half sheet pan and using cake rings to cut out the layers, but now that I have it makes so much sense! It makes the whole process much easier.
Amy says
I'm so glad you've enjoyed this method! 🙂
Shari Ennes says
This is genius! Instead of having to get equal portions in each pan…love it!!
Amy says
Thank you, it saves so much time!
K R says
These are great tips! I went to culinary school and this is not the way we were trained at all, but it makes so much sense!
Amy says
Thank you, so glad it's helpful! There are a lot of things that we didn't necessarily do the culinary way at Amycakes Bakery, but it worked for us and saved a lot of time! 🙂