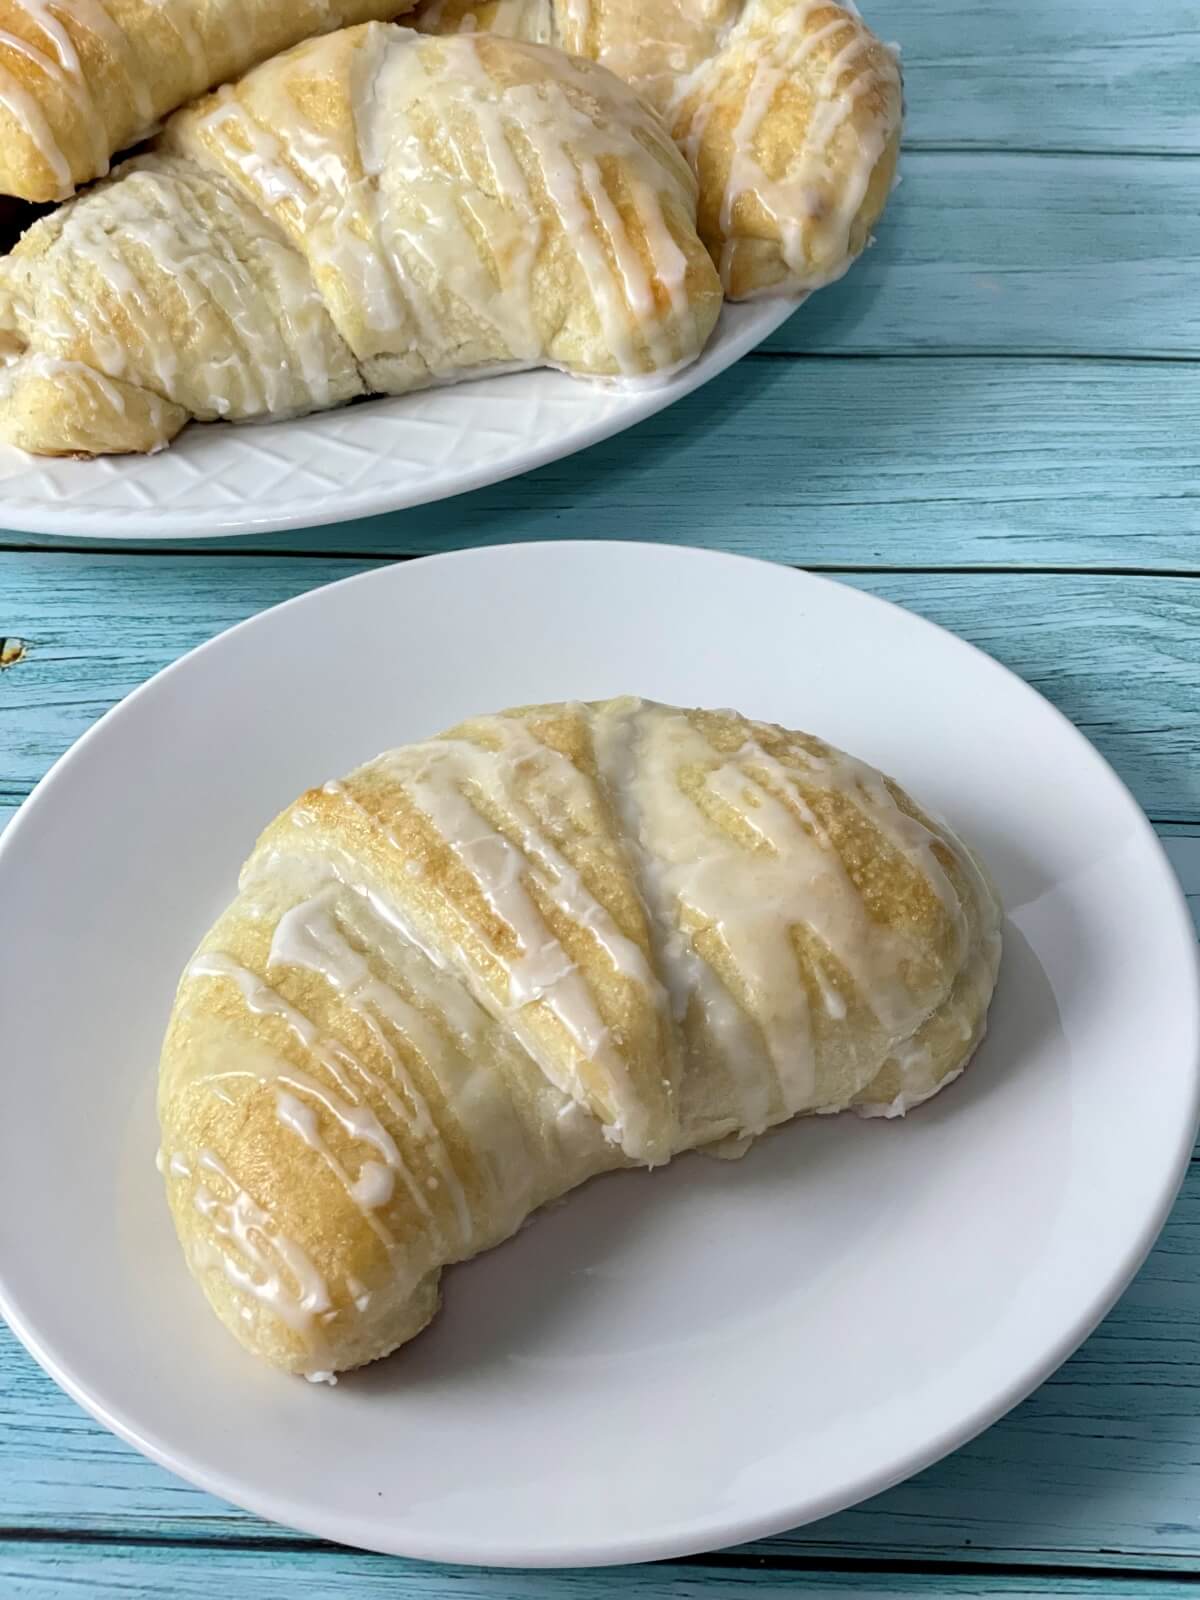
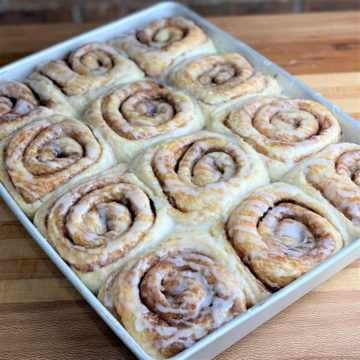
In the mood for a breakfast idea that the whole family will scarf down? This Homemade Cream Cheese Danish recipe is so delicious and made completely from scratch! It makes light, pillowy, and sweet danish pastries filled with cream cheese and your choice of fruit filling.

A soft and fluffy cream cheese danish is one of my all-time favorite treats (especially if it includes homemade cherry filling)! While we were known for our cinnamon rolls at Amycakes Bakery, whenever we served cream cheese danish they always received rave reviews. 🙂
Never Miss a Recipe!

I'm sharing my tried-and-true Amycakes Bakery recipes! Sign up to be the first to know about my favorite recipes, baking tips, and bakery secrets!
On the weekends, there seems to be more time for baking. This recipe is the perfect example of an impressive pastry you can create entirely from scratch in your free time. Give yourself two days to make these cheese danish so you can spread out the steps and really enjoy the process.
Jump to:
🥣 Key Ingredients
While this recipe takes some time, it’s easy to follow and only requires a few simple ingredients. You can fill these danish with a delicious cream cheese filling and add your choice of fruit filling. You can also enjoy them plain as a sweet croissant!
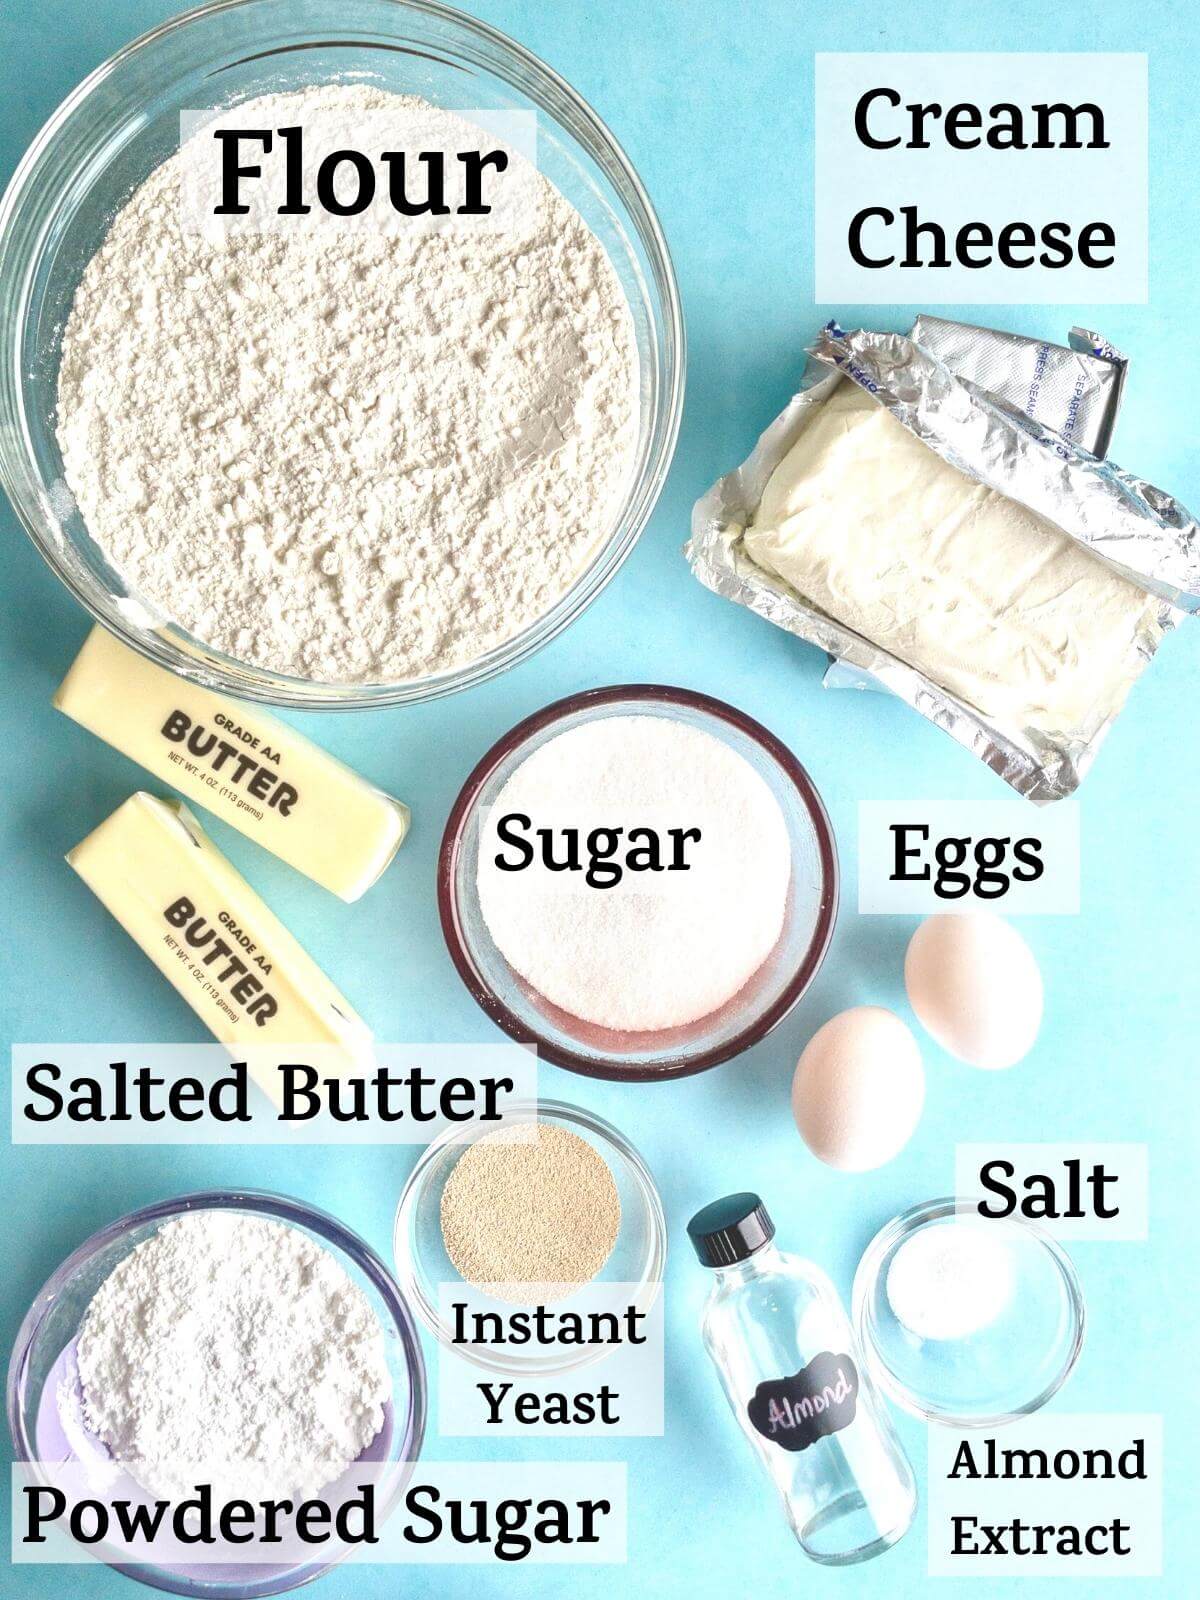
- It wouldn’t be a danish pastry without lots of butter. I prefer salted butter because it adds extra flavor to the pastries and balances the sweetness of the fillings and glaze.
- One of the most important ingredients in this recipe is instant yeast. It provides these cream cheese danish with their signature soft and sweet yeast dough. Even better, instant yeast will save you time as the dough will rise much faster.
- For the filling, you're going to need full-fat block cream cheese. The creamy deliciousness of the cream cheese filling with a hint of almond extract makes these the ultimate danish pastry.
- What makes this breakfast pastry so customizable is that you get to choose the fruit filling you want. Try all my easy homemade fruit filling recipes and pick out your favorite!
🥐 How to make Cream Cheese Danish from Scratch
To make cream cheese danish from scratch, you start with slightly-sweet yeast dough, then fold and roll it several times with cold butter. By incorporating the cold butter into your danish dough, you create lots of soft flaky layers in your pastries.
The detailed instructions are included within the recipe card at the bottom of this post, and you can watch how to roll out the danish pastries in the recipe video.
Every step will be worth it when you taste and share the final product! 😊
Make them in advance
This recipe makes 16 large danish pastries. I considered sharing a smaller batch size, but there is little difference between making 8 and 16 in terms of time. You might as well enjoy 16 if you're going to spend two days making them!
When I'm not serving a crowd I like to freeze half of my unbaked danishes (after they rise). Then I let them thaw in the fridge overnight the day before baking and serving.
🎥 Step-by-Step Video
This Cream Cheese Danish recipe video takes you step-by-step, from mixing sweet yeast dough to rolling out the flaky layers.
Watch the recipe video above or watch it on my Youtube.
👩🍳 Quick Tips
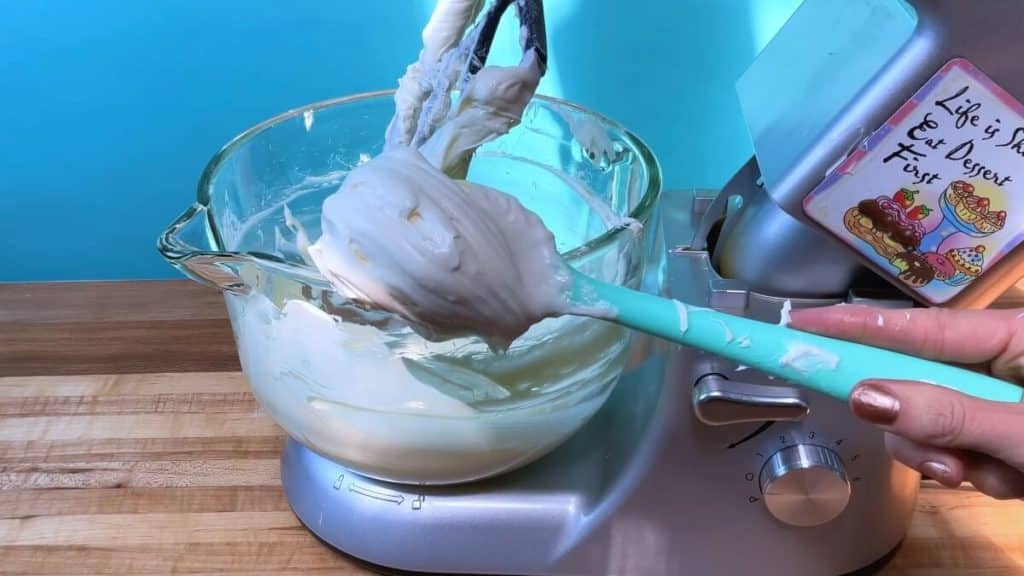
When it comes to cream cheese danish, one thing you want to ensure is that your cream cheese filling is very smooth without lumps. You can use room temperature cream cheese to help with this.
Another option is to just beat the cream cheese on high within a stand mixer (scraping frequently) until no lumps remain. The stand mixer will make your life so much easier and save you time too!
Be sure to pay attention to the temperature of each component of this Danish recipe (as described in the recipe instructions):
- The butter and flour mixture should be cold and firm.
- The danish dough should be room temperature (not warm) when it’s rolled out with the cold butter. We want to ensure the butter doesn’t melt, which would eliminate the soft flaky layers of the danish.
- The fruit filling should be completely cool when placed on top of the cream cheese danish filling.
💭 Frequently Asked Questions
Yes, you can! I recommend freezing your unbaked filled danish (as soon as they have risen) so you can bake them hot and fresh the morning you want to serve them. Thaw the danish pastries in the refrigerator overnight before baking.
In the fridge, these cream cheese danish will last for about 2-3 days, though they have the softest texture the day you bake them. Or freeze them for longer as described below.
Yes, you can! Make sure to wrap the danish thoroughly in plastic wrap or place them in a freezer-safe bag. When you're ready to eat them, just thaw them overnight in the fridge and reheat them in a 300-degree oven.
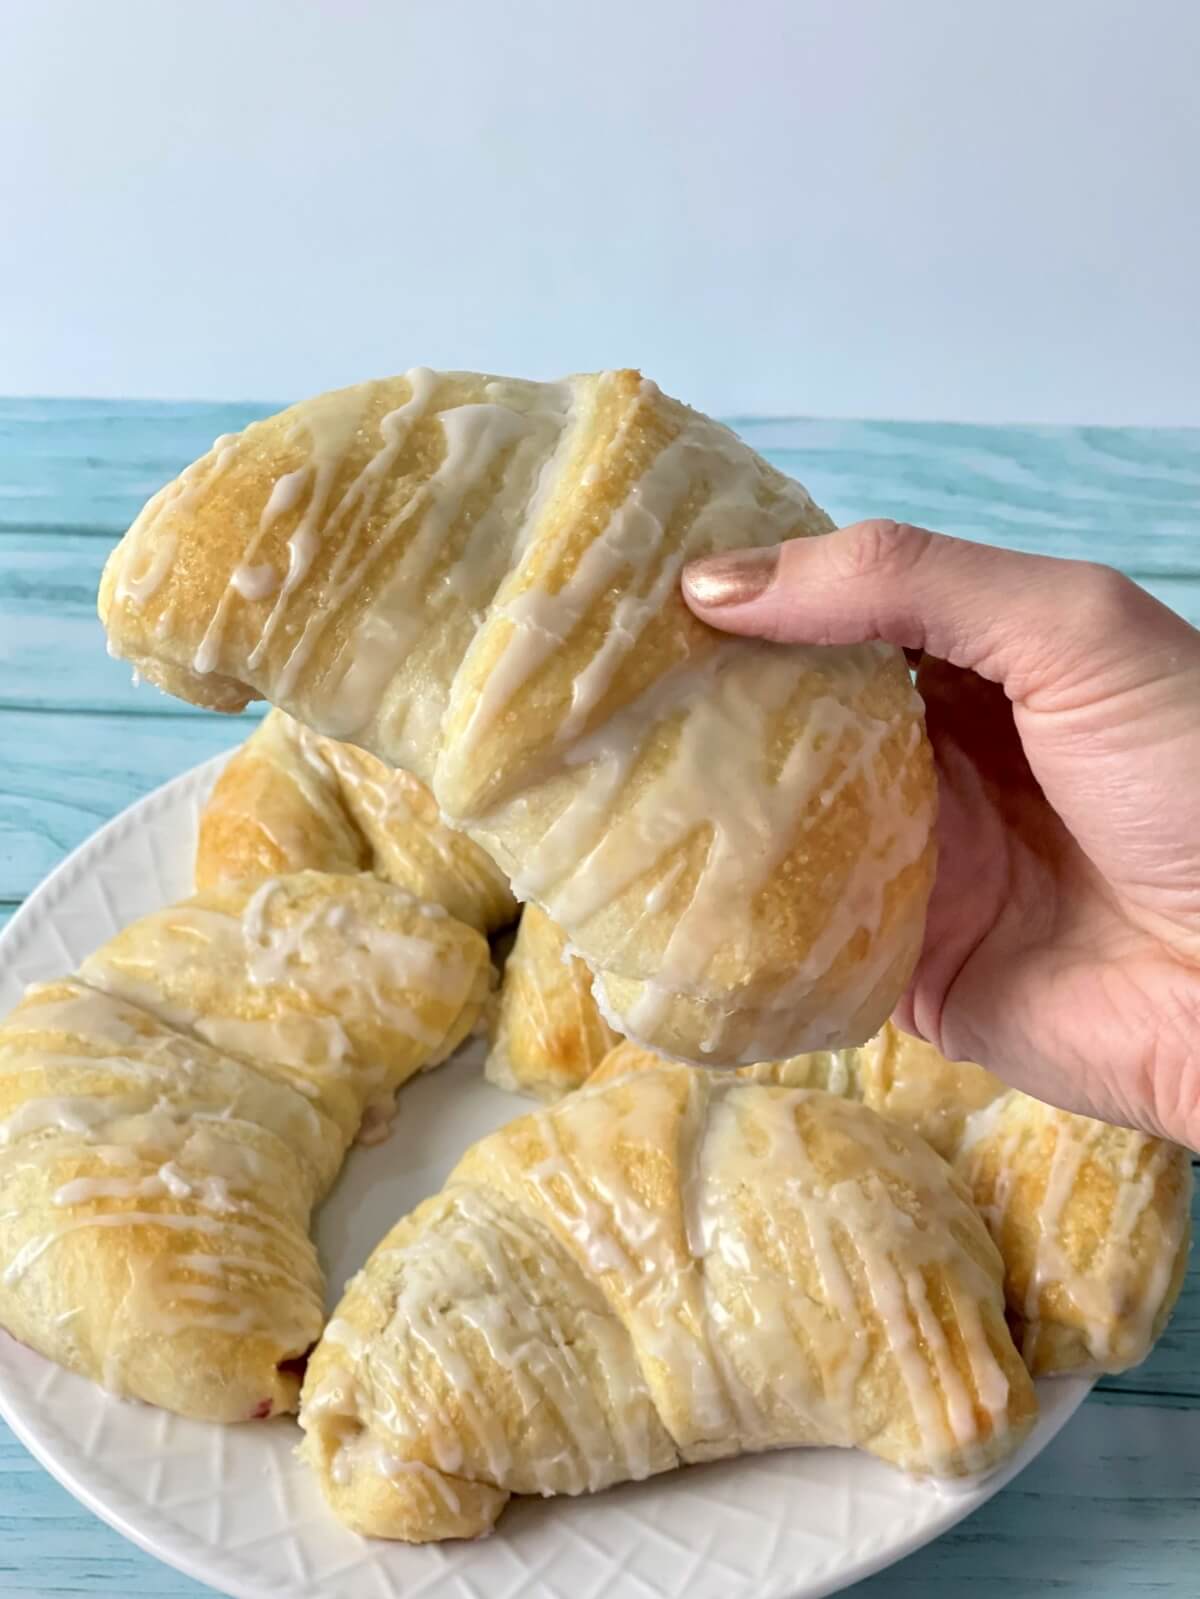
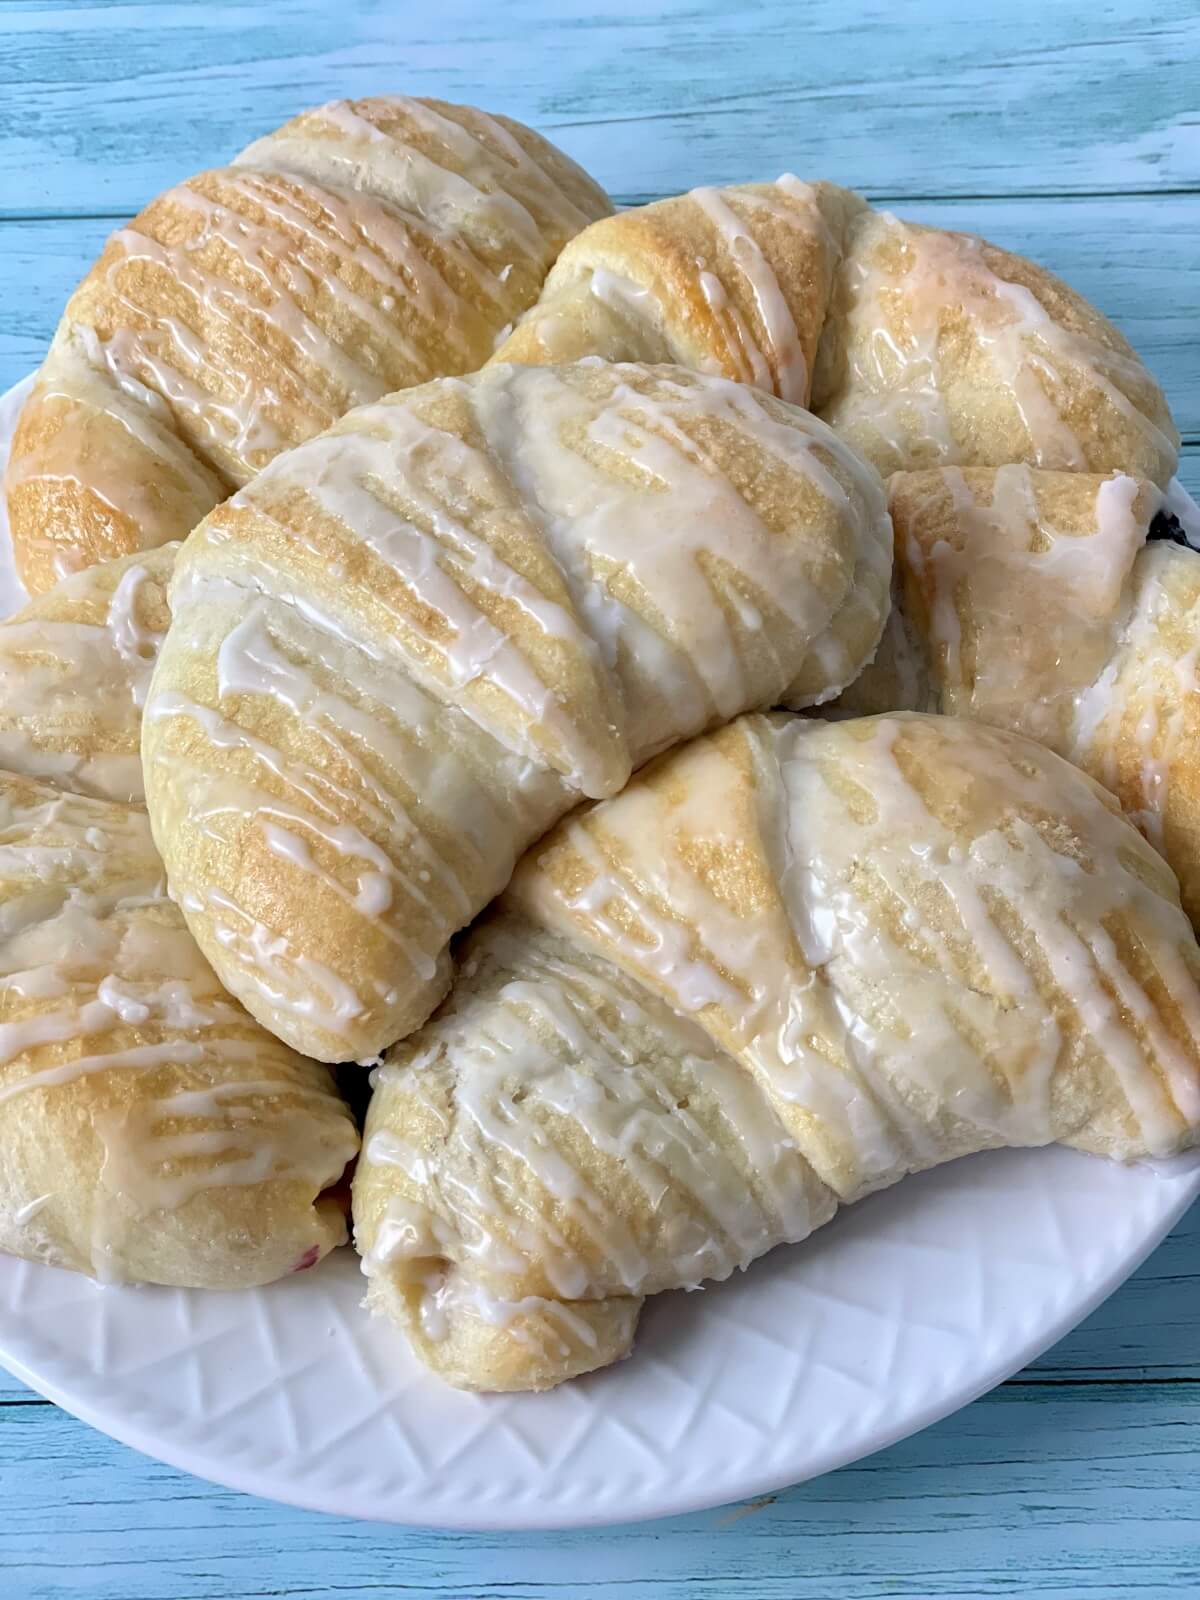
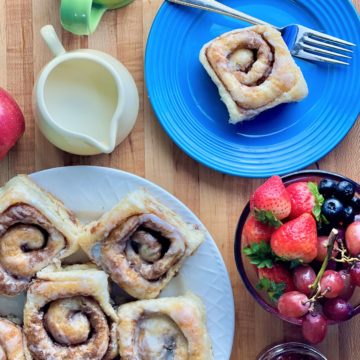
Sure! I love the look of the homemade croissant-shaped danish which holds extra cream cheese filling, but feel free to try out different danish pastry shapes.
The filling is made of cream cheese, sugar, and almond extract for my recipe. You can also make a blueberry cream cheese danish by adding blueberry compote filling, or cherry cheese danish with cherry filling.
No, they are not the same. Danish dough is made with yeast, egg, and (more) butter, while puff pastry is made mostly of flour, water, and (less) butter. Danish typically have a softer and fluffier texture, while puff pastries are more crisp and flaky.
Sure! Try some of my easy cake fillings inside the pastries and see which one you like the best!
🥞 Other Breakfast Pastries You’ll Love
Here are some more of my favorite scratch-made breakfasts sweets (secret bakery recipes from the former Amycakes Bakery!).
I hope you enjoy this recipe for scratch-made Cream Cheese Danish! It's one of my all-time favorite bakery recipes!
If you have any questions, please feel free to contact me. I'm always happy to help! I’d also love to hear what you think of this recipe in the comment section below!
Thanks for Reading. ❤️

📖 Recipe

Homemade Cream Cheese Danish (from scratch!)
Equipment


Ingredients
Danish Butter Ingredients
- 2 sticks (8 ounces) salted butter (at room temperature)
- 44 grams (⅓ cup) flour
Danish Pastry Dough Ingredients
- 500 grams (3 ¾ cup) flour
- 2 Tablespoons instant yeast
- 1 ⅓ cup hot water (around 120 degrees)
- 1 egg
- 1 teaspoon salt
- ½ teaspoon almond extract
- 50 grams (¼ cup) sugar
Cream Cheese Filling Ingredients
- 16 ounces (2 blocks) cream cheese
- 200 grams (1 cup) sugar
- ½ teaspoon almond extract
Additional Danish Ingredients
- 1 cup prepared fruit filling of your choice (optional) (I recommend my homemade blueberry compote and/ or my tart cherry filling. A 1x batch of any of my fruit fillings will be plenty.)
- 1 egg, beaten (for an egg wash)
- ¼ cup sugar (for sprinkling)
Simple Glaze
- 141 grams (1 ¼ cup) powdered sugar
- 2 Tablespoons room temperature water
Instructions
Day One
Prepare the Danish Butter
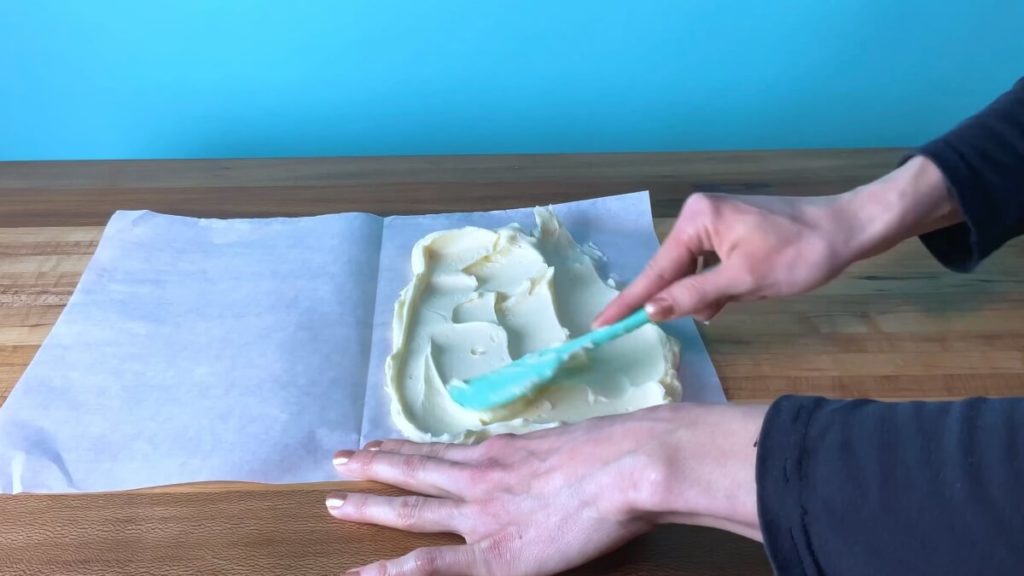
- Stir the room temperature butter and flour together in a medium-sized bowl until well mixed. Spread the butter mixture onto one half of a 12x16 piece of parchment paper (this half-sheet parchment works perfectly).

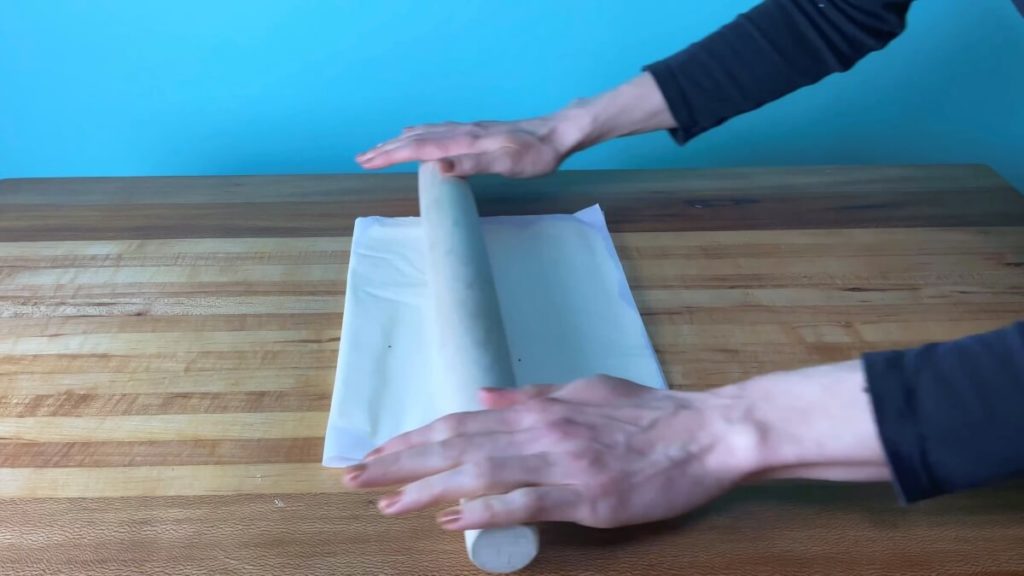
- Fold the parchment paper over the butter mixture, then use a rolling pin to flatten the butter between the parchment sheets. Wrap and place the butter-filled parchment on a flat place in the freezer until very firm, about 1-2 hours (or overnight).
Make the Danish Dough
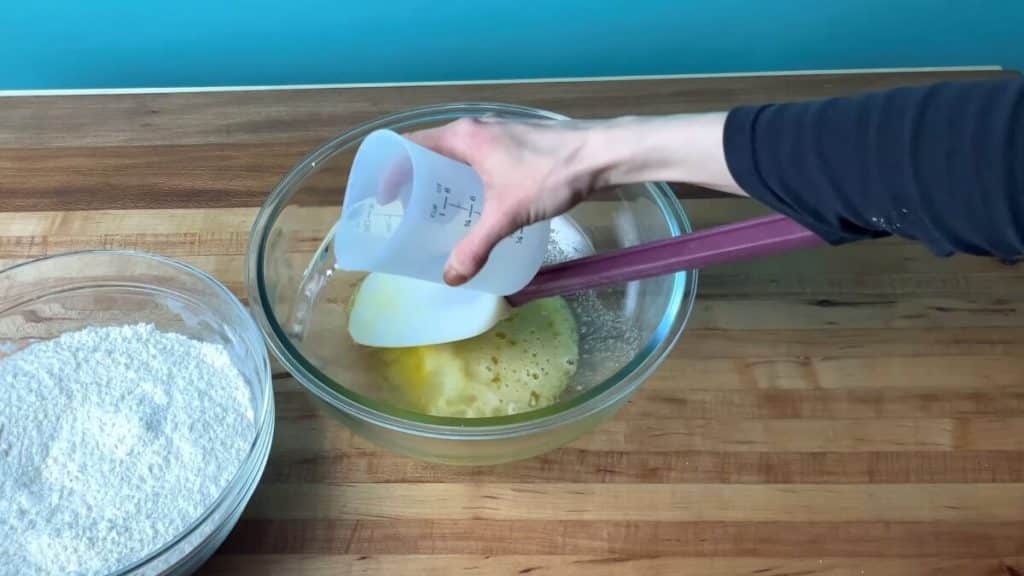
- Whisk the flour and instant yeast together. Set aside. In a separate large bowl, mix the egg, salt, almond extract, and sugar together. Pour one cup of very hot water over the ingredients in the bowl, then top with the flour/ yeast mixture.
- Stir with a sturdy spatula until the dough is uniform, stretchy, and sticky, about 5 minutes. Allow the dough to rest for a few minutes at room temperature until it is no longer warm.

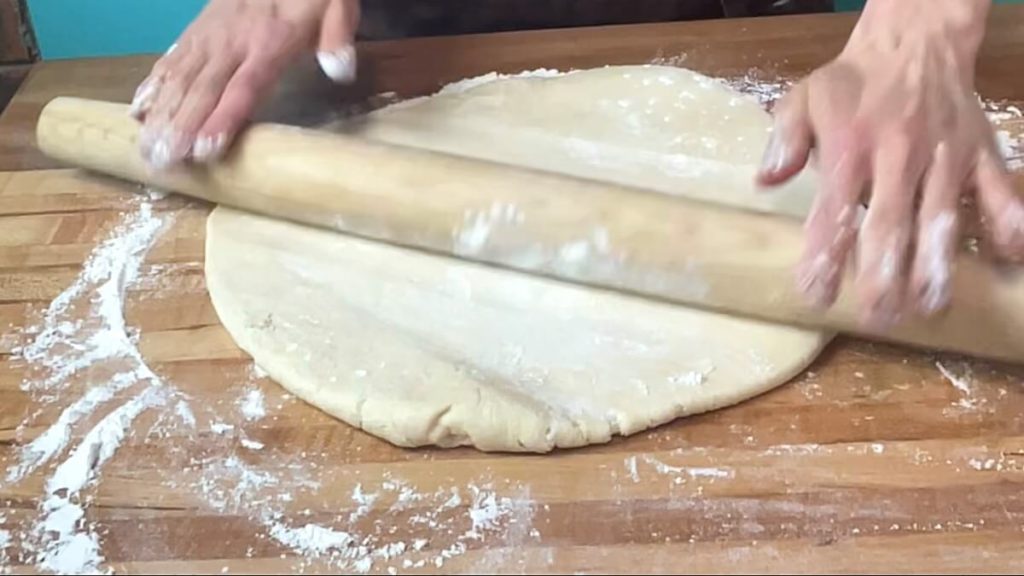
Roll Out the Danish Dough
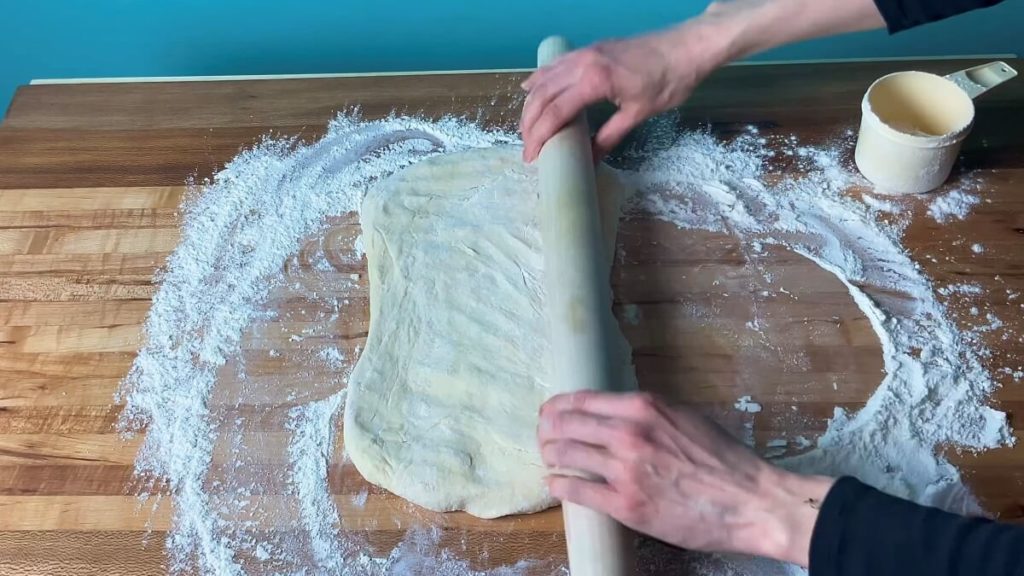
- Scrape the cooled danish dough on top of a counter generously dusted with flour. Use your fingers to scrape out any stuck to the bowl and add it to the dough. Avoid kneading the dough or turning it into a ball--this will overwork the pastry dough. We want to roll it out with very little shaping of the dough and only sprinkle additional flour as necessary to avoid sticking. Lightly press the dough into a rectangular shape before rolling.
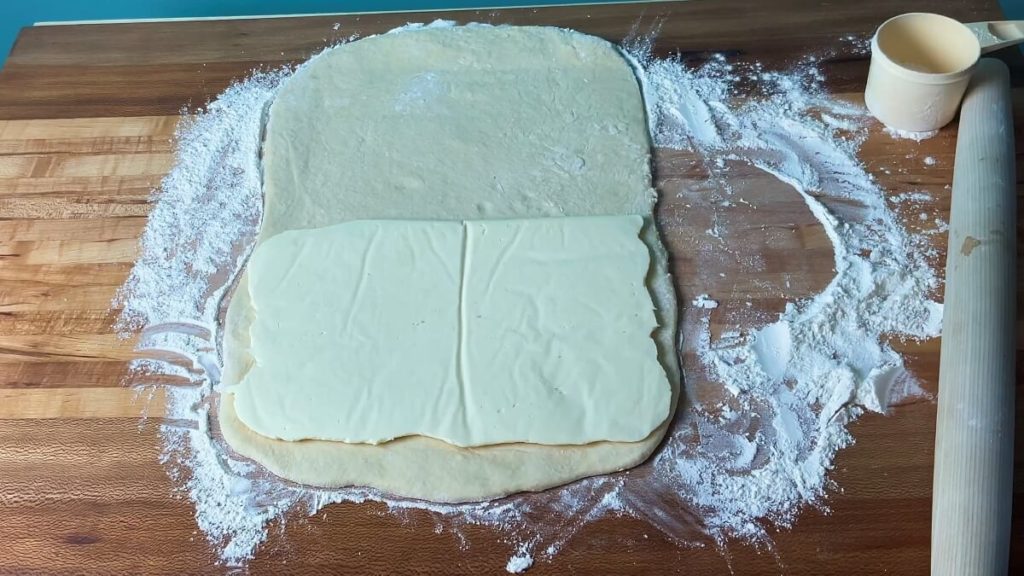
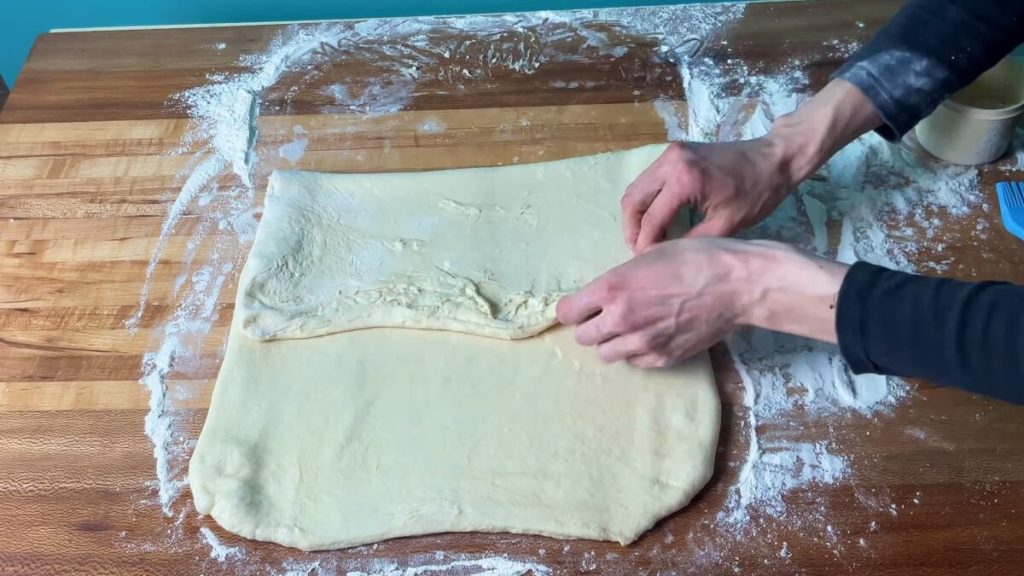
- Roll the dough into a 12x18 rectangle. Remove the firm butter from the freezer and discard the parchment paper. Place the butter on one half of the rolled-out dough. Brush the edges of the pastry dough with water using a pastry brush to help the dough stick to itself when folding. Then fold one half of the danish dough over the butter.
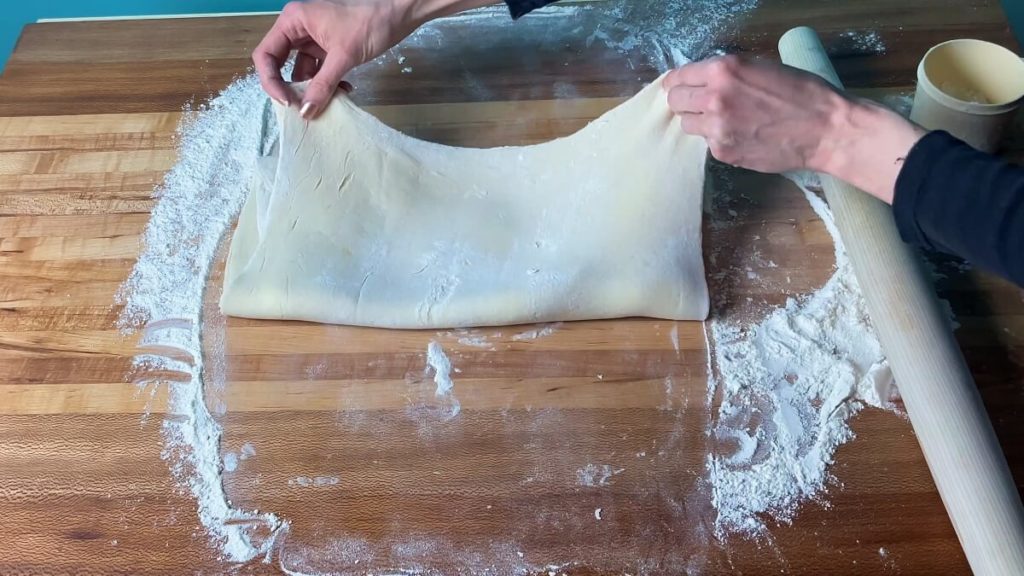
- Turn the dough 90 degrees, then roll out the folded dough into an approximate 10x16 inch rectangle. Brush the edges with water. Fold the dough into thirds like a tri-fold brochure. (Watch the recipe video).
- Repeat the previous step three more times. You have now added many buttery layers to your danish pastry dough, which will make it light, airy, flaky, and fluffy.
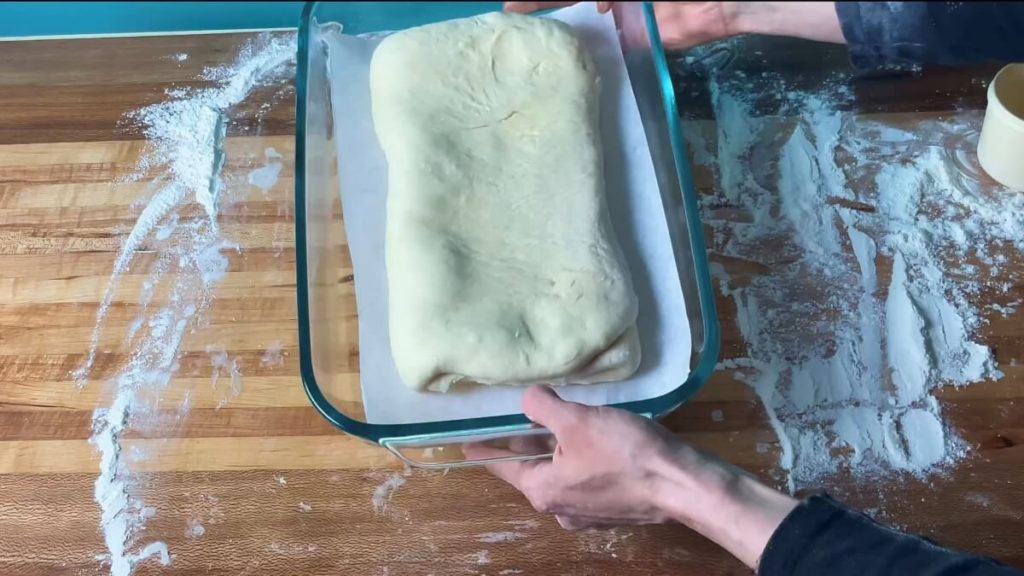
- Place the danish dough into a baking pan sprayed with nonstick cooking spray and very loosely wrap the pan in plastic wrap. Place this in the refrigerator to rise slowly overnight.
Prepare the danish fillings
- Blend the cream cheese, almond extract, and sugar together with a stand mixer or handheld mixer until smooth and creamy. Refrigerate until using.
- If you would like fruit filling in addition to the cream cheese filling, prepare your fruit compote fillings and keep them in the refrigerator until you are ready to use them.

Day 2
Form the Danish Pastries
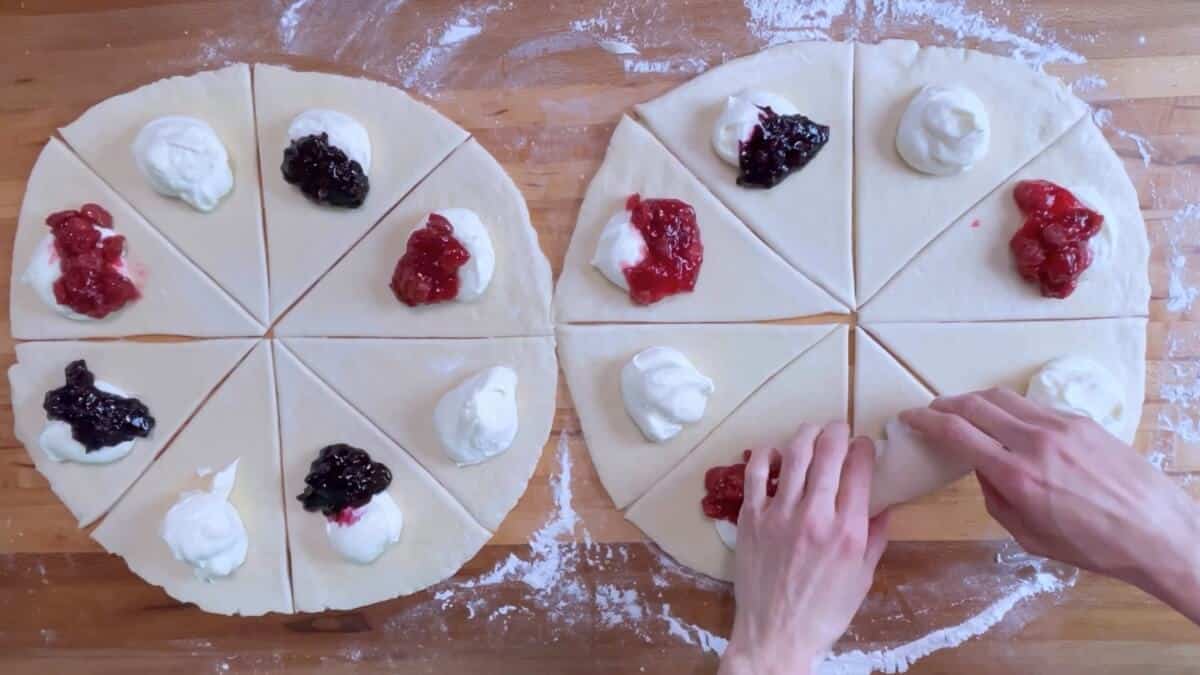
- Pull the risen dough from the fridge. Cut it in half so you have two equal halves. On a floured surface, roll each half into a 14-inch circle (only add flour as needed).
- Cut each circle into 8 triangles (a pizza cutter works well for this). Top the large end of each triangle with either 2 slightly heaping Tablespoons of cream cheese filling or 1 heaping Tablespoon Cream Cheese filling plus 1 heaping Tablespoon of fruit filling.
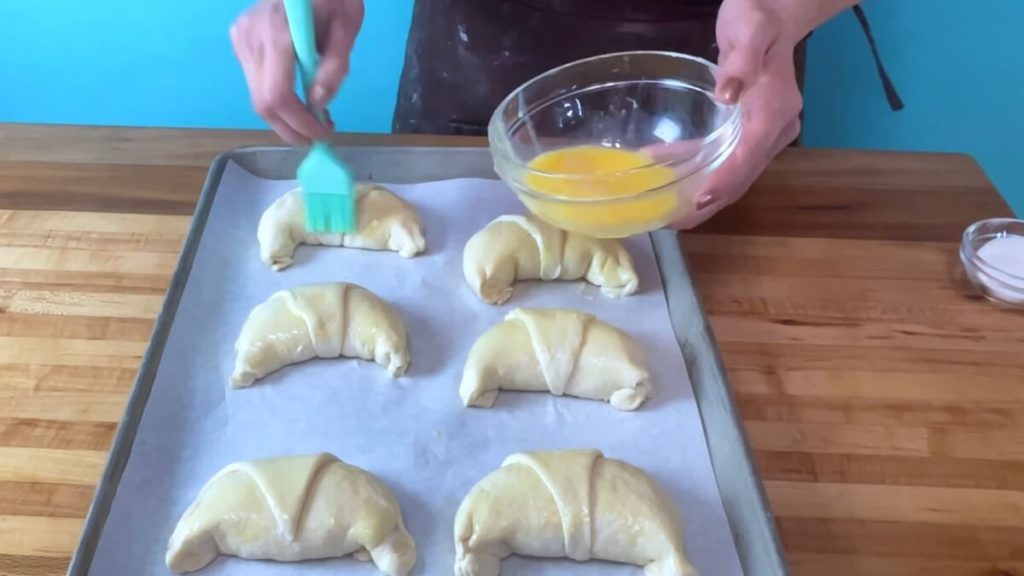
- Using a pastry brush, brush the edges of each triangle with water. Roll up each danish like a croissant with the cream cheese filling on the inside, then place them on a parchment-lined sheet pan, at least 2 inches apart.
- Brush each danish lightly with the beaten egg wash, then sprinkle them with sugar.
- Allow the danishes to rise for one hour or until double in size. Bake in a preheated 325-degree oven for 20-30 minutes, or until the danishes are puffed up, lightly golden, and flaky. Make sure they are baked all the way through.
- While the danishes are baking, make the simple glaze by whisking the powdered sugar and water together until smooth. Drizzle the warm danishes with the simple glaze. Enjoy!


Leslie says
This is a wonderful danish recipe! Thank you for the tips about the temperature! So helpful in making this.
Amy says
Thank you so much, so glad you enjoyed it! 🙂
Lauren Michael Harris says
Cream cheese danishes are one of my favorite pastries. These were so much fun to make at home and turned out so amazing!
Amy says
So glad you enjoyed the recipe, thank you for taking the time to comment! 🙂
Katie Crenshaw says
These pastries turned out light and flaky. The filling was delicious. We absolutely loved them.
Amy says
So happy to hear that you enjoyed the cream cheese danishes, thank you Katie! 🙂
Ann says
These danishes were so delicious! The pictures you posted were very helpful during the making process. Will definitely make these again!
Amy says
So glad to hear you enjoyed the cream cheese danish recipe, thanks for taking the time to comment! 🙂
megane says
Love the step by steps and tips. I am a pretty lousy baker but they turned out pretty awesome.
Amy says
I'm so happy to hear that! 🙂
Amanda says
These danishes came out so good! The dough was so light and pillowy, and it was wonderful with that creamy filling. I made them for holiday gifts, but I just may have to repeat them for Christmas morning.
Amy says
Thank you so much, so glad you enjoyed them!
Andrea says
Very delicious! I had never made a danish before. I loved the step by step photos. Thanks!
Amy says
So glad you enjoyed the recipe! Thanks for taking the time to comment. 🙂