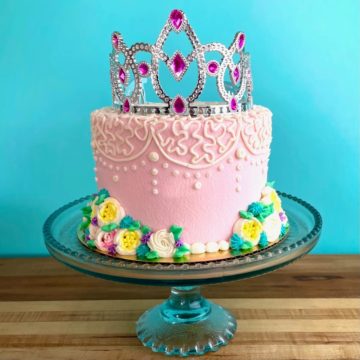
Once you learn how to bake delicious cakes, it's time to upgrade your decorating skills! Piping can be really intimidating for a beginner baker, but I promise it doesn't have to be! I'd love to share my cake decorating piping patterns, professional baker's tips, and my free printable piping templates to help you become a pro cake decorator in no time!
Jump to:
Equipment Checklist
This skill requires the right equipment. You really can't "make do" with the wrong equipment. For the specific designs I'm explaining below, you'll need a selection of different piping tips in a range of sizes, piping bags, and several other supplies, including:
Never Miss a Recipe!
I'm sharing my tried-and-true Amycakes Bakery recipes! Sign up to be the first to know about my favorite recipes, baking tips, and bakery secrets!
Round tips
We'll use mostly a variety of round tips to create all of these cake designs. I recommend getting a set with the following sizes: 2,3,4,5,10,12
Disposable Piping Bags
I recommend 12” bags for piping patterns. I save my 16” bags for frosting cupcakes and for large rosette borders. Smaller bags are best for piping patterns because if we put too much frosting in our bag (more than about 1 cup), it can cause your hand to hurt because it will require more pressure on your hand. (I like disposable piping bags for convenience and easy clean-up, but you can use a reusable piping bag if you'd prefer.)
Why You'll Love These Cake Decorating Piping Patterns
- Bakery-tested designs - In this post, I'm sharing 18 simple buttercream cake piping patterns from my bakery to help you create a beautiful variety of cakes using just a few common piping tips. To make it easier, I’ve got a free printable template for all these beautiful designs that you can download to practice your piping skills.
- Simple step-by-step directions - I'll help guide you through every step of the process and share my go-to tips and tricks. You'll be a pro in no time!
- Wide range of designs - There are 18 patterns covered in my free templates, and I'll start with the simplest and end with the more advanced ones. These are ideal for decorating wedding cakes or other special bakes!
Important Note
The designs below are not your traditional cupcake swirls. I'll teach you how to pipe fine details on layer cakes. This is a special skill that makes an ordinary cake look exquisite!
Printable Cake Decorating Piping Design Templates
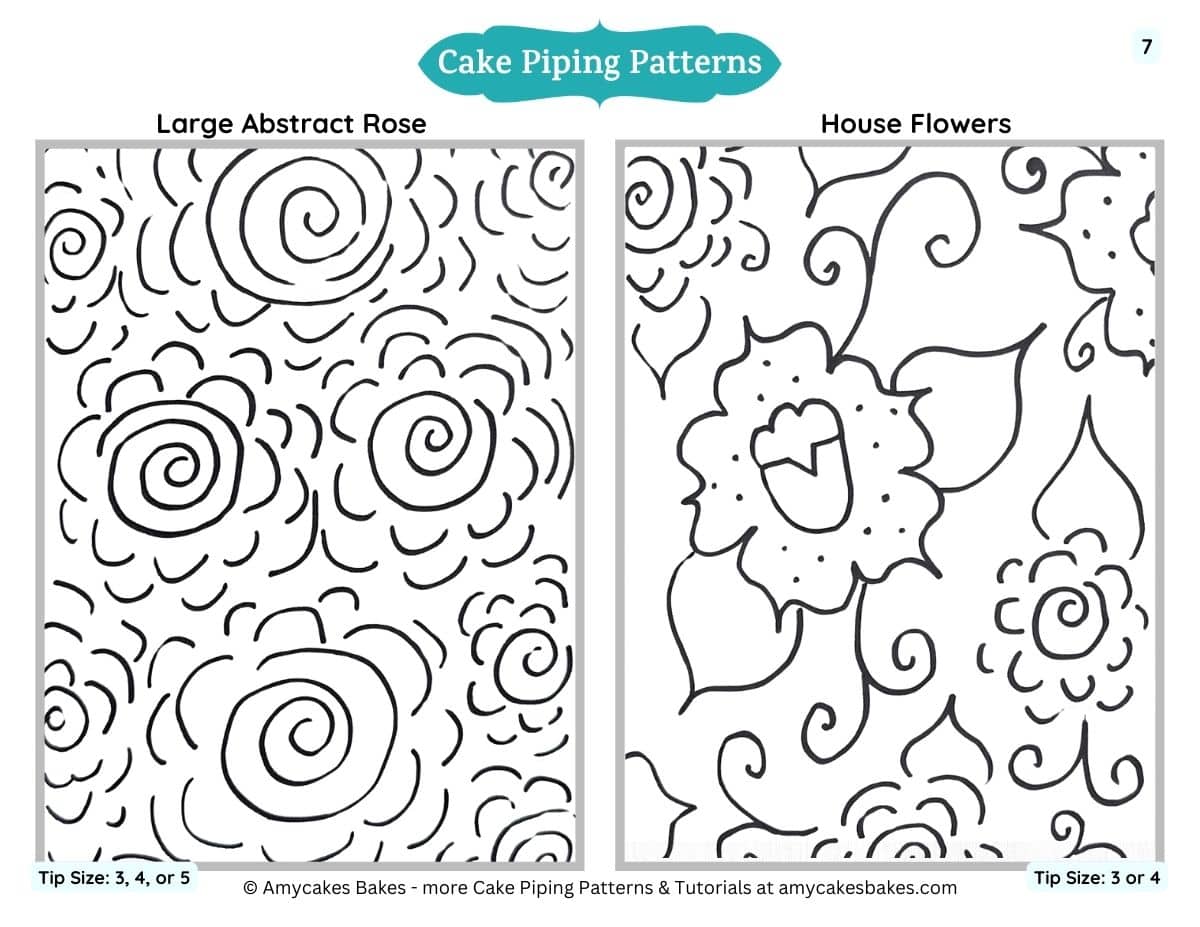
The 18 designs below are straight from my bakery’s cake decorating book. They're intended to help you practice these designs and develop the muscle memory to do them consistently again and again.
If you enjoy them, let me know in the comments below, and I’ll share more of my favorite buttercream designs!
How to Use
I list my recommended piping tips for each design at the bottom of the cake piping template sheets.
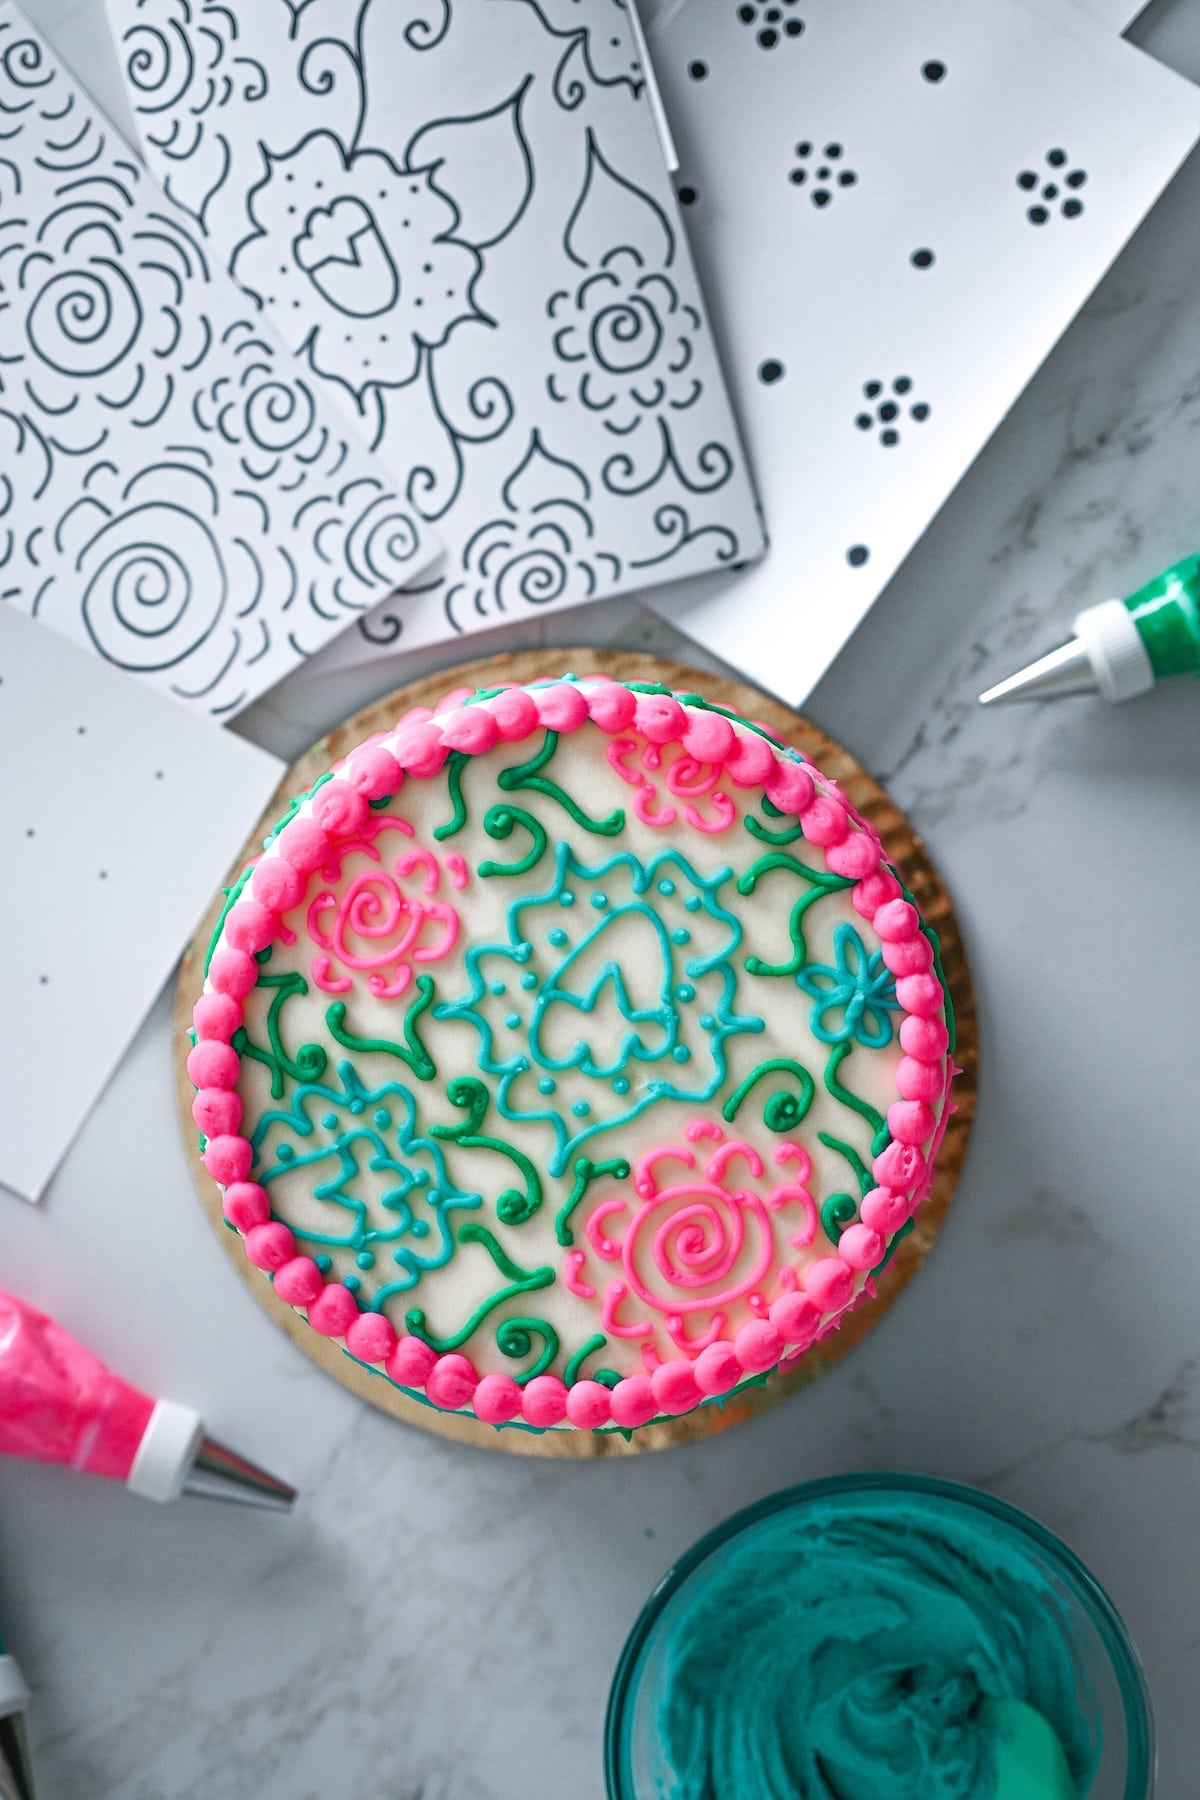
The printable templates can be placed under a piece of wax paper for practice. Tape the wax paper and template to the table or the wall to practice your piping skills. Practicing over the table is easier, but piping on the wall will help you master piping on the sides of cakes.
Once you’ve mastered tracing the templates on a piece of wax paper, you can move on to piping freehand with the patterns as a guide.
Baker's Tip
I highly recommend printing off the practice pages of cake designs to test your skills before you apply them to real cakes!
Step by Step Video
If you'd prefer to watch instead of read, here's the quick video of me explaining and demonstrating each of these cake piping designs. You can also watch it here on my Youtube Channel.
Dot Patterns
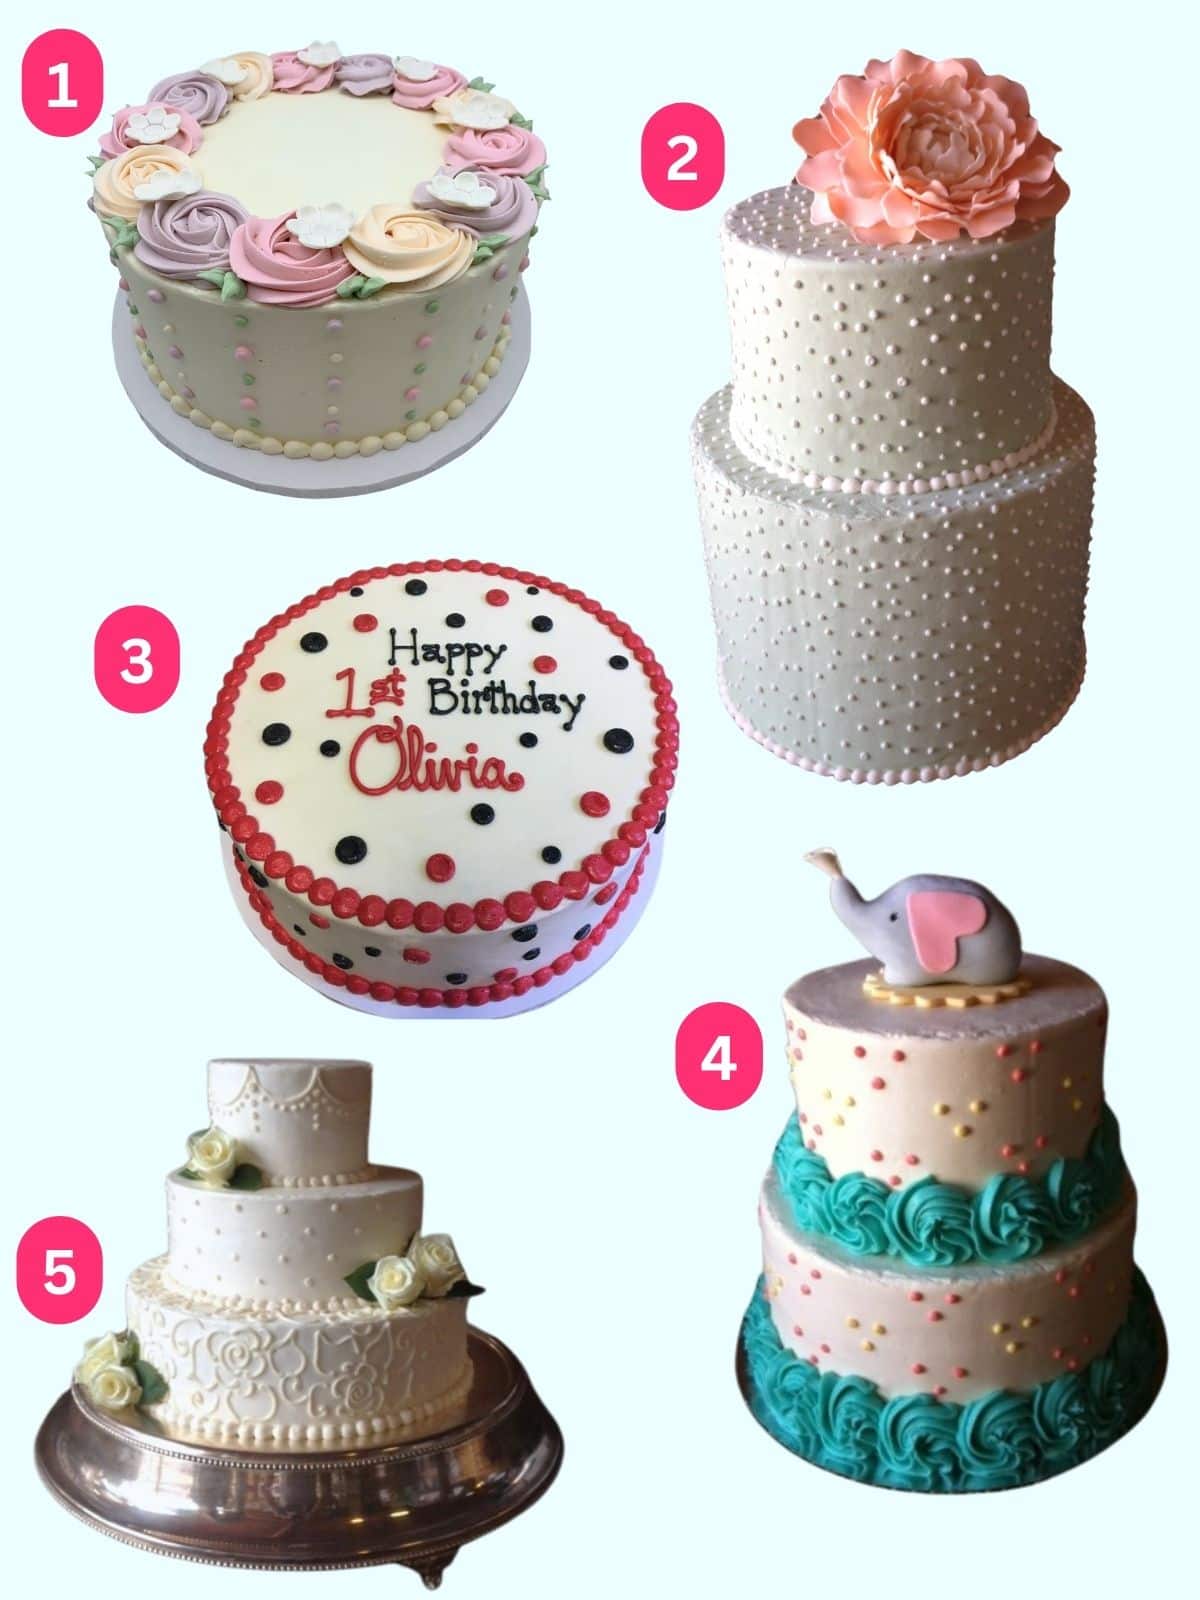
Dot patterns are a great place to start with for beginner cake decorators. This is one of the most basic techniques that anyone can do! It does take a little practice to get comfortable piping and forming consistent dots, but once you have a feel for it, you can go wild.
Polka Dots
I think polka dots are one of the easier patterns since the dots are randomly placed, and you can cover any imperfections on your cake with an extra polka dot. Using larger tips, like size 10 or 12, makes it easier.
Apply pressure, then release as you bring back your piping bag. For larger dots, apply more pressure and keep the piping tip in the same position. To flatten the top, bring your tip to the side as you release pressure, or tap your finger in warm water and gently press the dots.
Large Symmetrical Dots
For large symmetrical dots, start with vertical lines of dots 1 ½-2 inches apart using a 10 or 12 dot tip. Add a second line of dots between these lines to create a diamond pattern.
Polka Daisies
Polka Daisies are similar to polka dots, but we create little 5-petal flowers with a dot center and smaller dots between the daisies.
Line Dots
Line dots are like symmetrical dots but without the middle dots, forming lines of dots. This is such an easy technique, but it has a really timeless look.
Small Symmetrical Dots
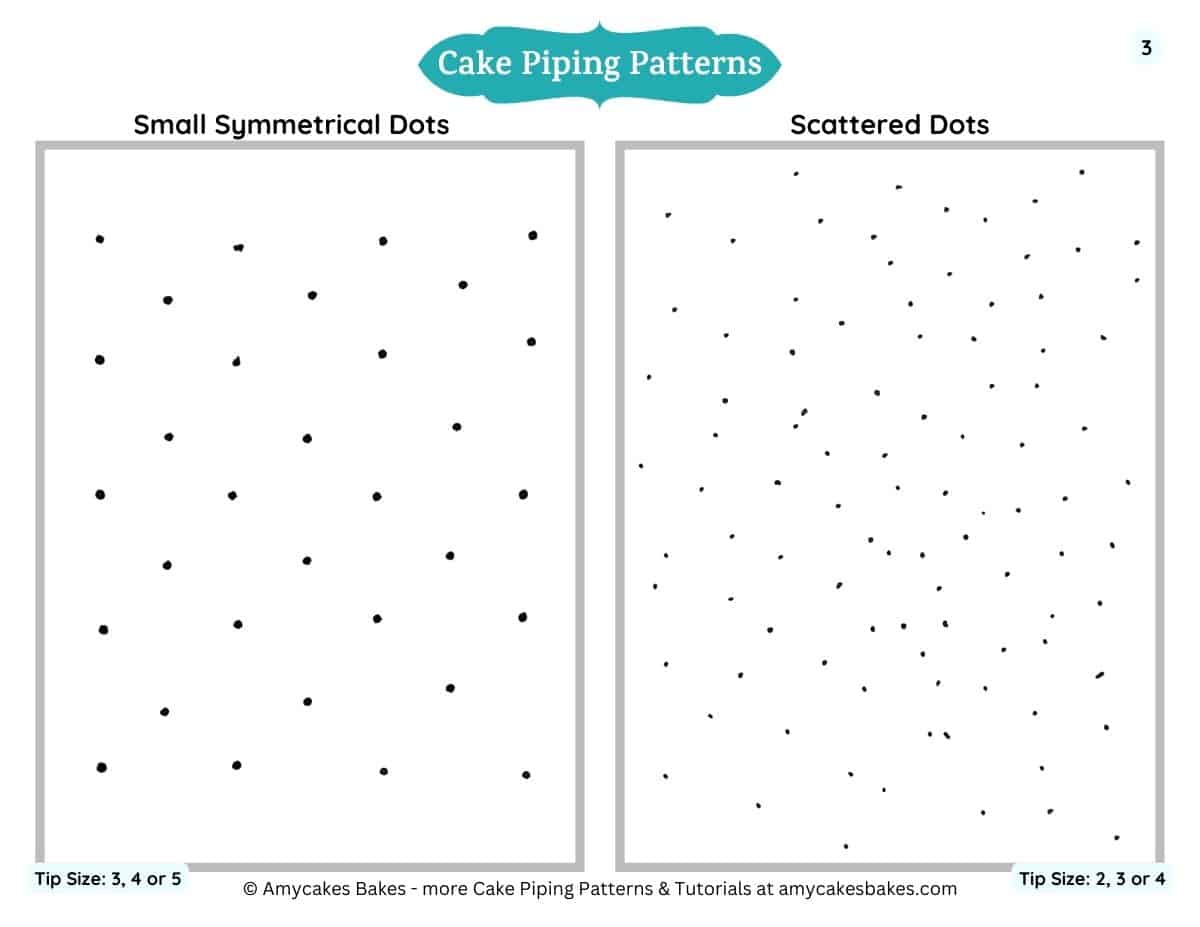
For small symmetrical dots, use a 3, 4, or 5 tip to create a more delicate version of our large symmetrical dots.
Scattered Dots
For scattered dots, use a small tip to create many tiny, randomly placed dots. This pattern looks fun and unique, but it takes time to cover a large areas with that many dots.
Baker's Tip
Remember to take breaks and don’t overfill your piping bag so that you don’t put too much pressure on your hand.
Swiss Dots
Swiss dots are like symmetrical dots but in clumps of 3. I think this is a great decoration for baby showers and delicate cakes with flowers.
Mini Swiss Dots
Mini Swiss dots use a smaller tip with dots closer together or touching.
Swirl Patterns
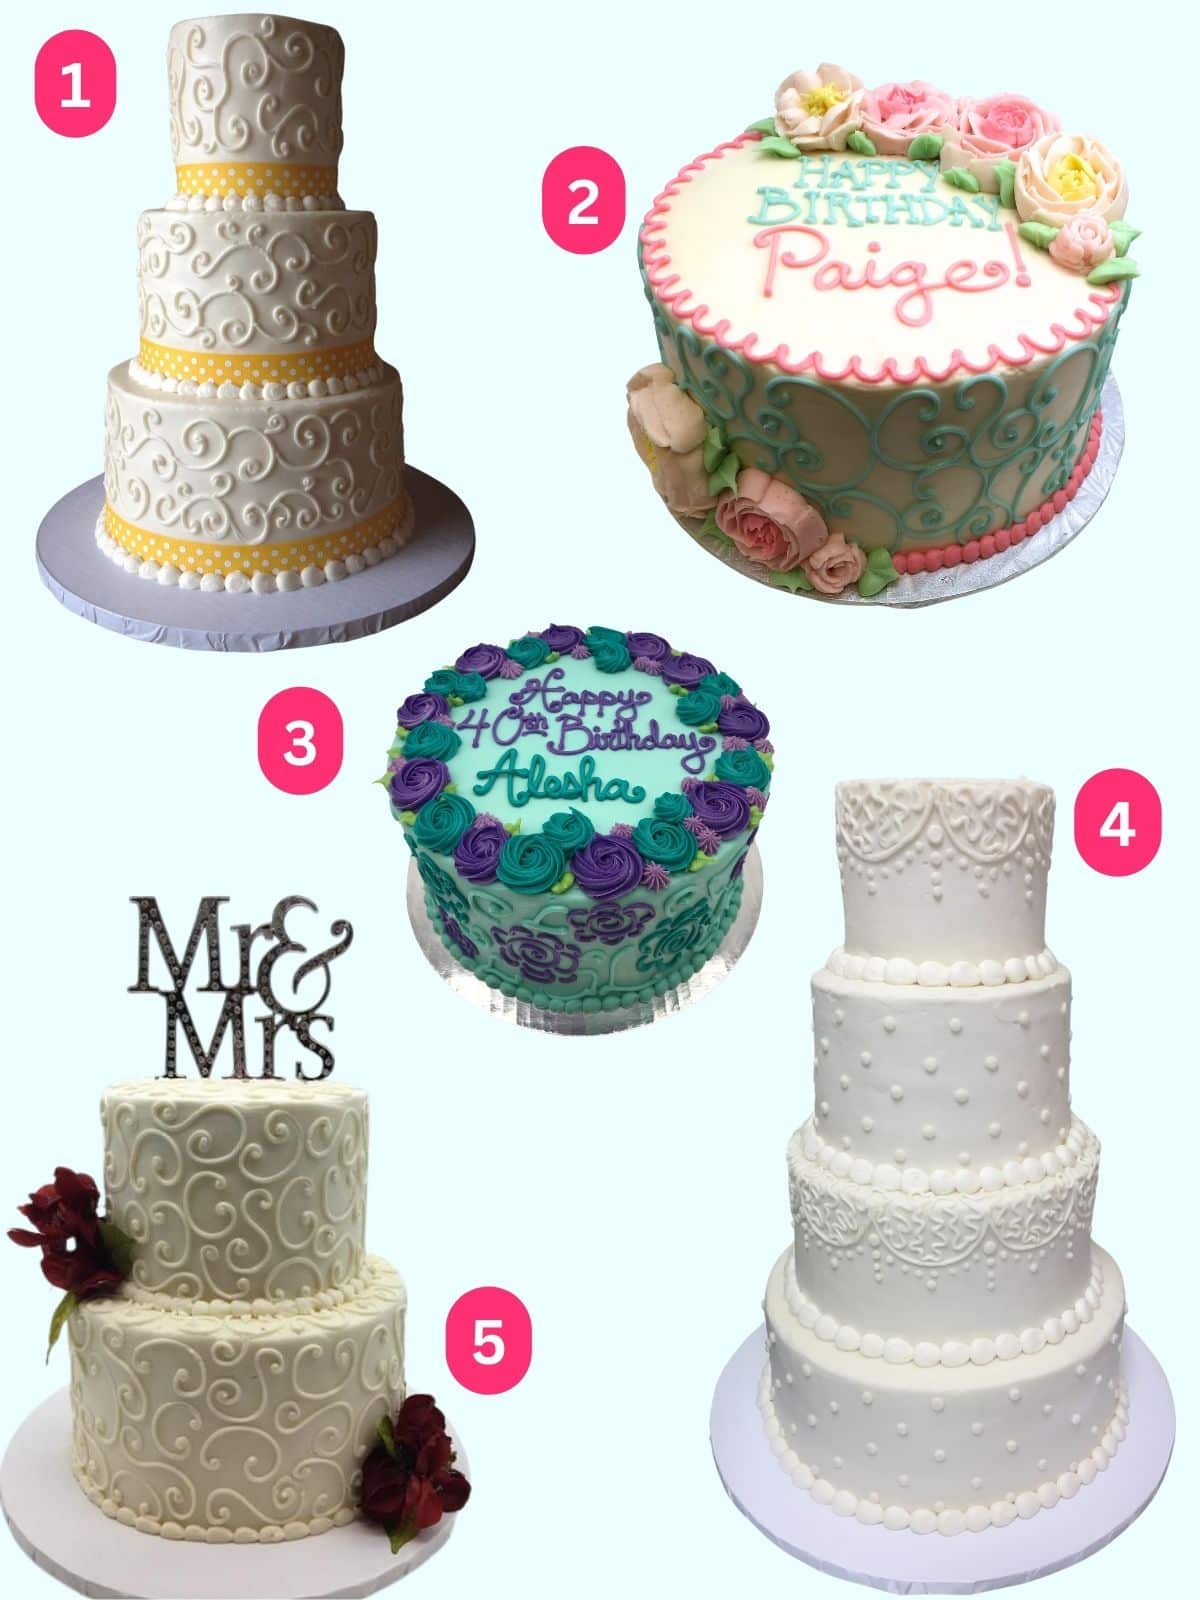
Swirls are a great next step after mastering dot patterns. They can be randomly placed, so you don’t have to worry about keeping the swirls symmetrical. That's especially helpful when you're just starting to learn all of these different effects!
Classic Swirls
For classic swirls, pipe sideways “S” shapes, then attach little curls. Use a round 3 tip for delicate swirls or a 4 tip for larger ones.
Vines and Flowers
To turn your swirls into vines, add little dot flowers next to your swirls, similar to polka daisies, using a 3 or 4 tip, or a drop flower tip. Then add leaves with a leaf tip.
S and C Swirls
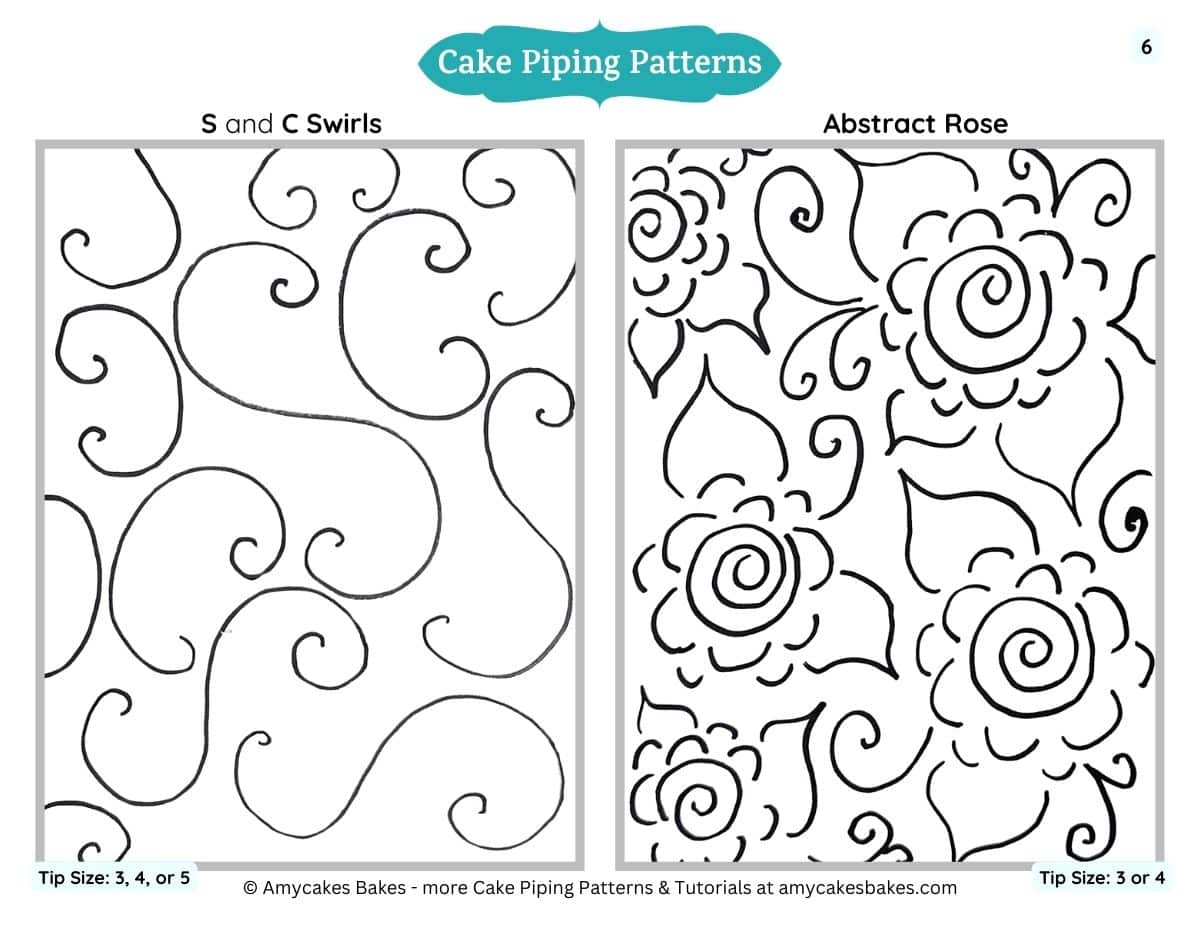
Pipe a combination of S’s and C’s, both normal and backward, either close together or touching. This looks great with a larger tip, like a 5.
Floral Patterns
Floral designs add a really beautiful, romantic look to layer cakes, but this is a more challenging skill. The intricate designs should be consistent every time. Build up to this skill and take your time!
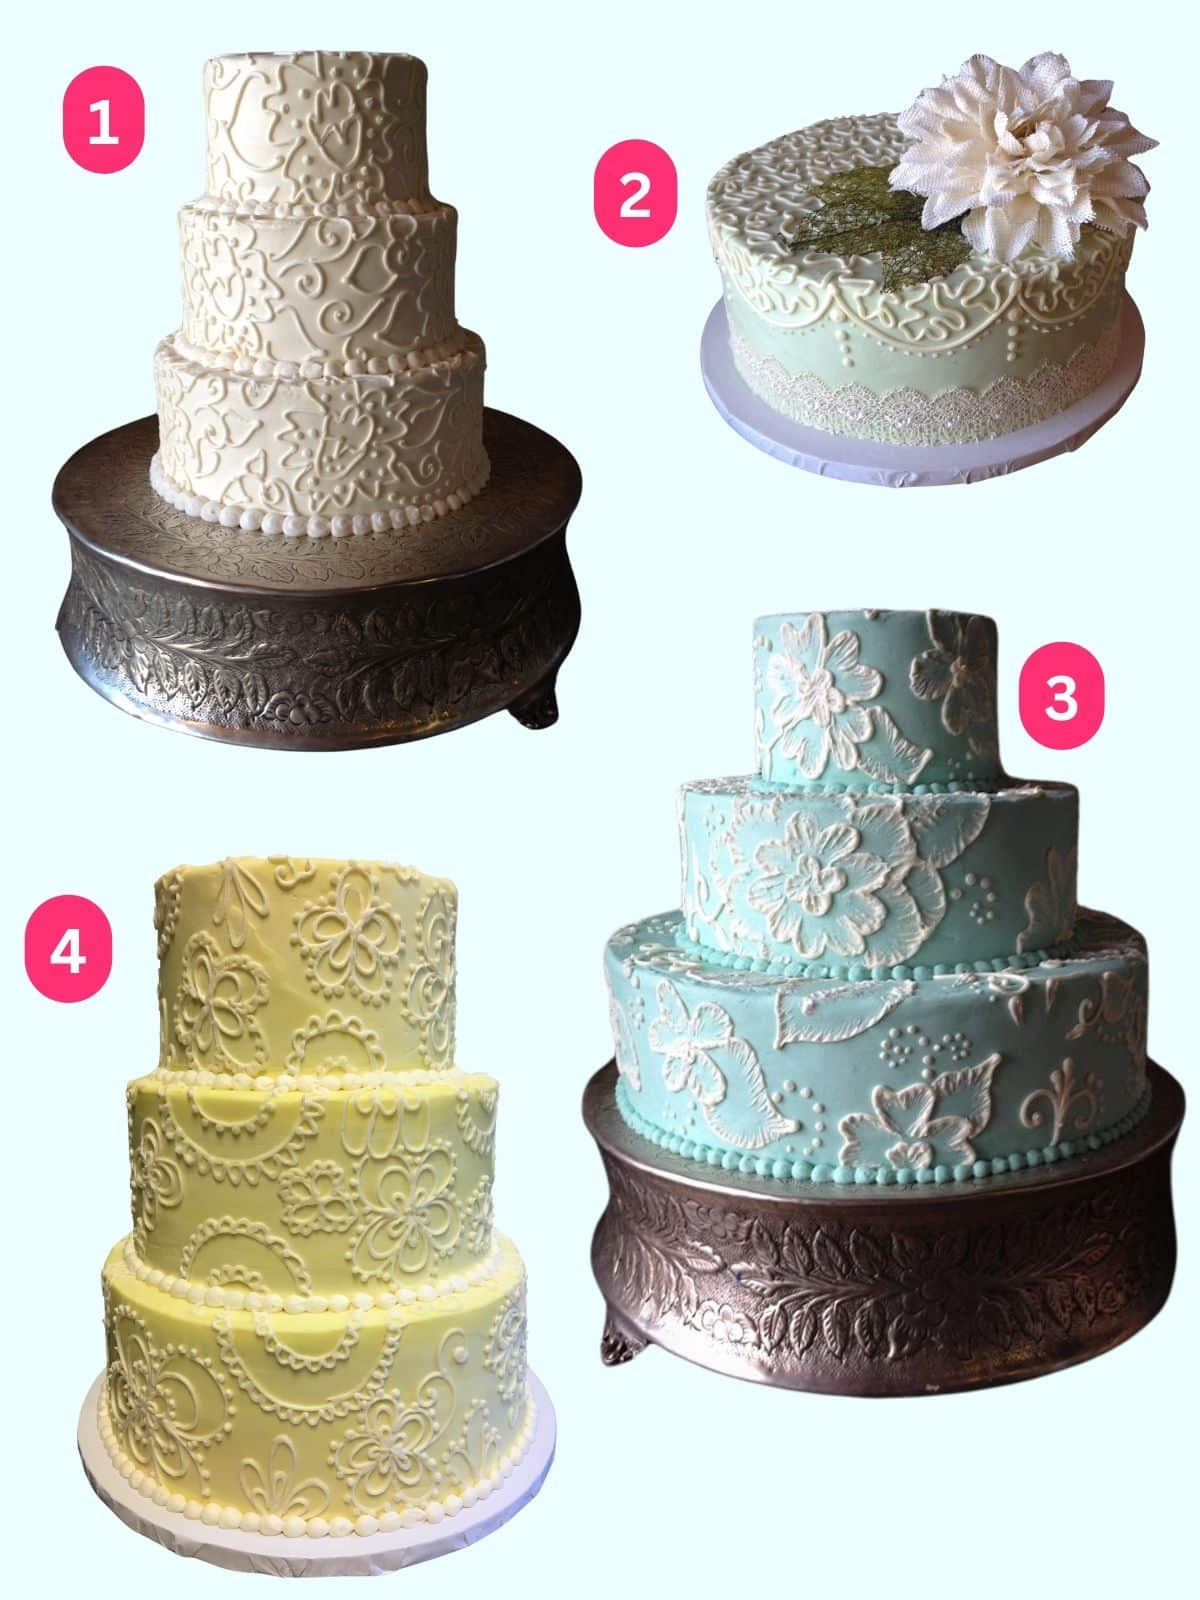
Abstract Rose
For the Abstract Rose Pattern, pipe a curly rose center surrounded by half-circle petals. Fill in the space with simple leaves and swirls. Use the same color or different colors for variety.
Large Abstract Rose
For the Large Abstract Rose pattern, we’ll pipe larger roses with repeated petals filling all the space, without leaves or vines.
Pro Tip
The Large Abstract Rose design is a great segue from the swirl patterns because you mostly move your hand in a circular motion.
House Flowers
House flowers were my bakery’s favorite floral pattern. It’s a combination of the abstract rose and a new 5-petal flower pattern. You repeat these 2 flowers, with vines and leaves filling in the extra space. We often did this as a white-on-white pattern for wedding cakes.
Lace Patterns
Lace patterns require more practice but are still great for beginners when practicing with my free printable templates. You'll use much smaller tips, which will give you greater control over where the buttercream applies.
Intricate Lace
The intricate lace pattern uses a small tip, either a 2 or a 3. It combines a 3-layer, 5-petal flower with dots encasing each petal and a simple 1-layer, 5-petal flower. You can use vines with little lace half-circles to fill in the extra space, as well as more lace half-circles on the bottoms and tops of the cakes.
The final step is to add delicate little dots in between the lace.
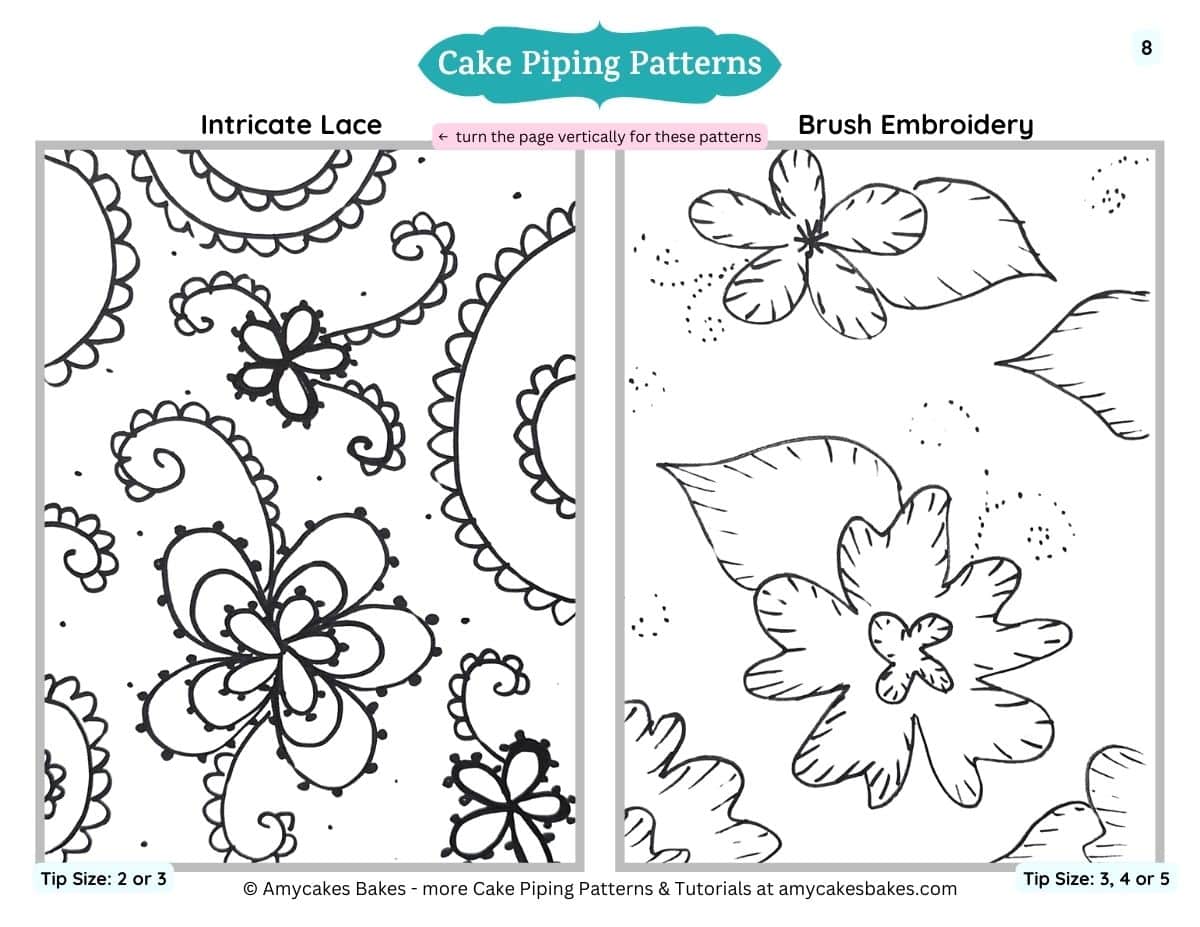
Brush embroidery
Brush embroidery is a beautiful lace-like pattern that looks more difficult than it is. First, we’ll pipe our pattern and then use a paintbrush to delicately brush the buttercream into the cake. I have several small paintbrushes specifically for cakes that I wash in the dishwasher.
Start by making simple, wavy 5-petal flowers, making sure the petals do not touch the center. Use a larger tip to have plenty of icing for brushing the flowers with the paintbrush.
While the buttercream is still soft, take your small paintbrush and gently brush the buttercream down into the cake to create the brush effect. I recommend pausing to brush after piping each flower and leaf so that the icing doesn't firm up before brushing.
Once you've finished the brush-embroidered flowers and leaves, add delicate dot swirl vines to fill in some of the extra space. These vines resemble our swirls from other patterns but use repeating dots to create the same effect.
Scallops
Scallops can create a beautiful pattern for showers, little girl birthdays, and princess parties.
Baker's Note
Scallops take quite a bit of practice. For beginners, I recommend taping my template on the wall to get used to piping scallops on the sides of cakes.
Start the scallops with half circles coming down from the top of your cake on the sides. You can use a ruler to mark where you want your scallops to end up to ensure they are even. If they are close in size but not perfect, it will likely not be noticeable.
Once the scallops are piped, add a large dot in between each scallop and a medium dot under the middle of each scallop. Then, fill in with tiny dots and add three dots coming down from between the scallops.
Lace Scallops
Start with regular scallops, then pipe delicate squiggles that do not touch inside the half circles and on top of the cake using a 2 or 3 round tip.
Pro Tips for Practicing Piping Designs
- Start by prepping your cake. Before piping, stack your cake layers, add a crumb coat, then add the final layer of frosting.
- Get crisp edges. Use a bench scraper, an offset spatula, or a cake smoother to achieve a perfectly straight-sided cake.
- Use your favorite icing. I typically use American buttercream (my bakery's go-to vanilla buttercream), but you can also use practice buttercream, Swiss meringue buttercream, or your favorite type.
- Make different colors of frosting. I often enjoy the simplicity of white decorative details, but you can go wild with color! Use high-quality gel food coloring to make lots of different-colored frostings to give your cake a unique look.
- Stretch out your hands to loosen them up, and use your dominant hand. I know that sounds obvious, but we need a really steady handy for this skill. Once your hand starts to feel shaky, give it a rest and try again later!
- Squeeze the outside of the piping bag to remove any air bubbles. Seal the top of the bag with a rubber band or clip to prevent spills.
- Practice more designs. In addition to the fine piping details I teach in this post, I also recommend practicing making a rope border, shell border, large rosettes, basket weave, and more. For these, you'll usually use larger piping tips like the large open star tip, closed star tip, and #47 tip. These are great for piping the border for your cakes, cupcake swirls, and more.
Related Posts
Looking for other cake designs to try? Here are some of my favorites:
I hope you enjoy using these piping patterns on your own cakes! If you enjoyed this post, please pin it for later and subscribe for more bakery secrets and recipes. And don’t forget to print off these free templates!
If you get a chance to try any of these cake decorating piping designs, take pictures of your creations and tag @amycakesbakes on your favorite social media channel. I'd love to see them! Happy Baking!
Thanks for Reading. ❤️
