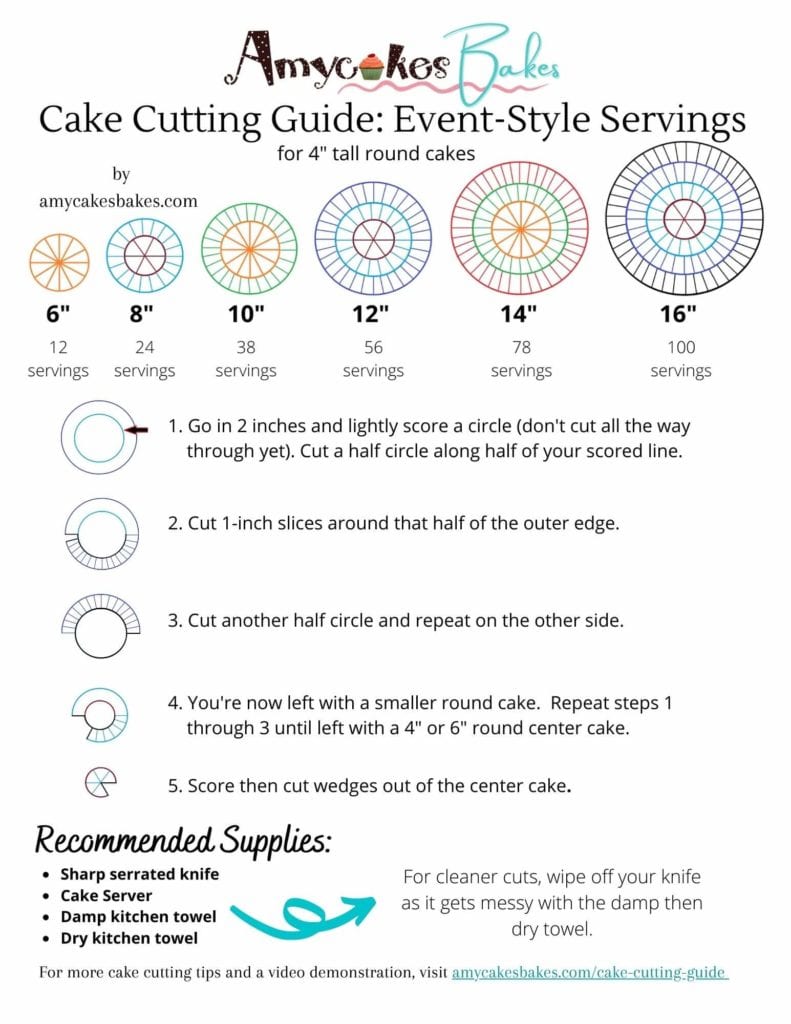
🍰 It's cake cutting time! Use this guide to learn how many cake slices to cut out of a round cake for a wedding or event. Scroll down for a Cake Cutting Video and a Printable Cake Cutting Guide.
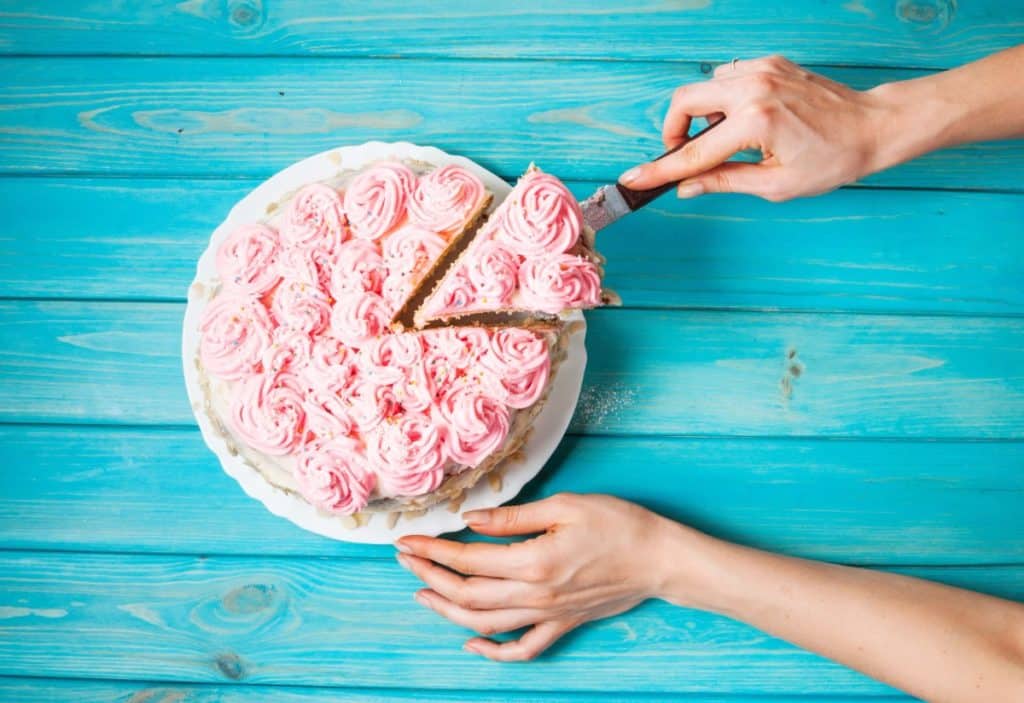
Cake cutting is a serious business. If you aren’t prepared, it can be stressful and messy. Not to mention (no pressure), if you are the lucky person tasked with cutting a wedding cake, there are usually dozens of hungry guests waiting in front of the cake table as you frantically cut the cake.
Never Miss a Recipe!
I'm sharing my tried-and-true Amycakes Bakery recipes! Sign up to be the first to know about my favorite recipes, baking tips, and bakery secrets!
I’ve cut many wedding, special event, and party cakes during my time at Amycakes Bakery, and I hope my free Printable Cake Cutting Guide below and the following recommendations can help ease your stress in getting the right amount of servings out of each cake in the least messy way.
How to Cut Event-Style Servings out of Round Cakes:
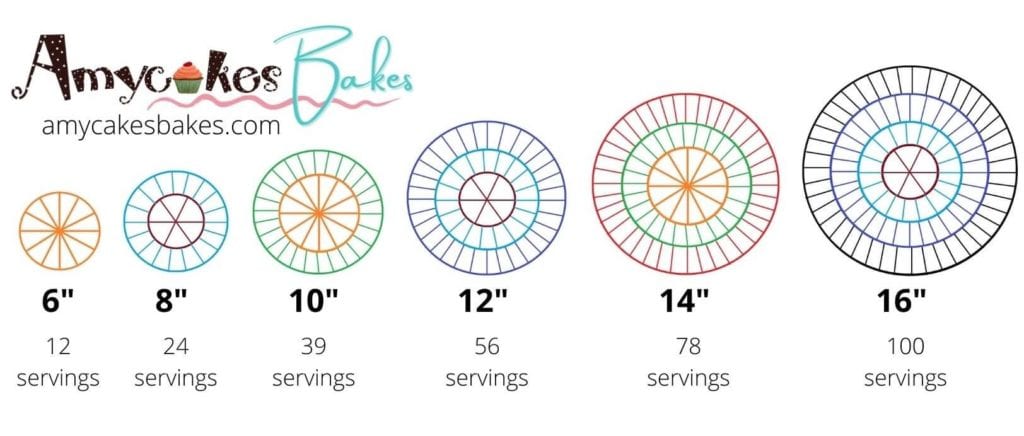
Event-Style Servings or Wedding-Size servings are approximately 4” tall by 2” by 1” slices. Some people call these “party slices.” This smaller slice is still a nice size serving after a meal or finger food. This is the serving size I always recommend for weddings.
If only dessert is being served and larger servings are desired, I recommend cutting servings twice as large (Generous Servings), or 1 ½ times as large (Standard Servings).
There are other ways to cut event and wedding size servings, but I've found this is the easiest way to get consistent size slices. Plus you don't need any special tools like cutting boards or rulers. Just use the edge of your thumb to eyeball an inch and you'll be golden!
This cake cutting method works best for standard 4" tall cakes. For shorter cakes, you may wish to cut larger than 1" slices.
- Measure two inches in from the cake’s outer edge (you can use the edge of your thumb as a guide). Score a circle two inches in by just lightly making a circle in the frosting. The benefit of scoring--you can adjust your score line if it looks off-center or too big or small.
- Once you are happy with your circle, cut a half-circle along half of your score line. Cutting a half circle instead of cutting all the way around the cake will add stability and help prevent the other side of the cake from falling over.
- Cut 1″ slices from this outer edge until all of the outer half edge has been served.
- Follow with the other side of the cake, cutting a second half circle along the remaining score line, and cutting the remaining 1” pieces on the outer edge.
- Now that the outer edge of the entire cake has been cut, you have a smaller cake to work with. For 10″ or larger cakes, repeat steps 1-4 until you are left with a 6" or 4" round center cake.
- Once you are left with a 6″ or 4" round cake on the inside, score then cut the center cake into small wedges.
Printable Cake Cutting Guide
Use this printable cake cutting guide when cutting event-style servings out of round cakes. Feel free to print copies for the person cutting your wedding or event cake.
If you sell cakes or baked goods online, feel free to link to this Cake Cutting Guide so your customers know how to cut their cakes!
What Supplies Do You Need When Cutting a Cake?

- Sharp Serrated Knife
- Cake Server
- Damp Kitchen Towel
- Dry Kitchen Towel
A sharp serrated knife will cut moist cakes evenly without smushing the slices--just use a delicate sawing motion as you cut. Use the cake server to transfer each slice to a plate.
As you cut the cake, your knife will get messy and sticky with cake crumbs and buttercream. The moister the cake is, the messier the cutting will be. (The mess is totally worth it--check out my article 7 Secrets to Baking Incredibly Moist Cakes Every Time).
If you keep cutting with a messy knife, it will stick to the cake and the slices won't cut as crisply and evenly.
To remedy this, every few slices, wipe the knife in the middle of a folded damp kitchen towel, then wipe your knife in the middle of a folded dry kitchen towel. It just takes a few seconds and then you can get back to cutting.
How to Cut a Tiered Cake
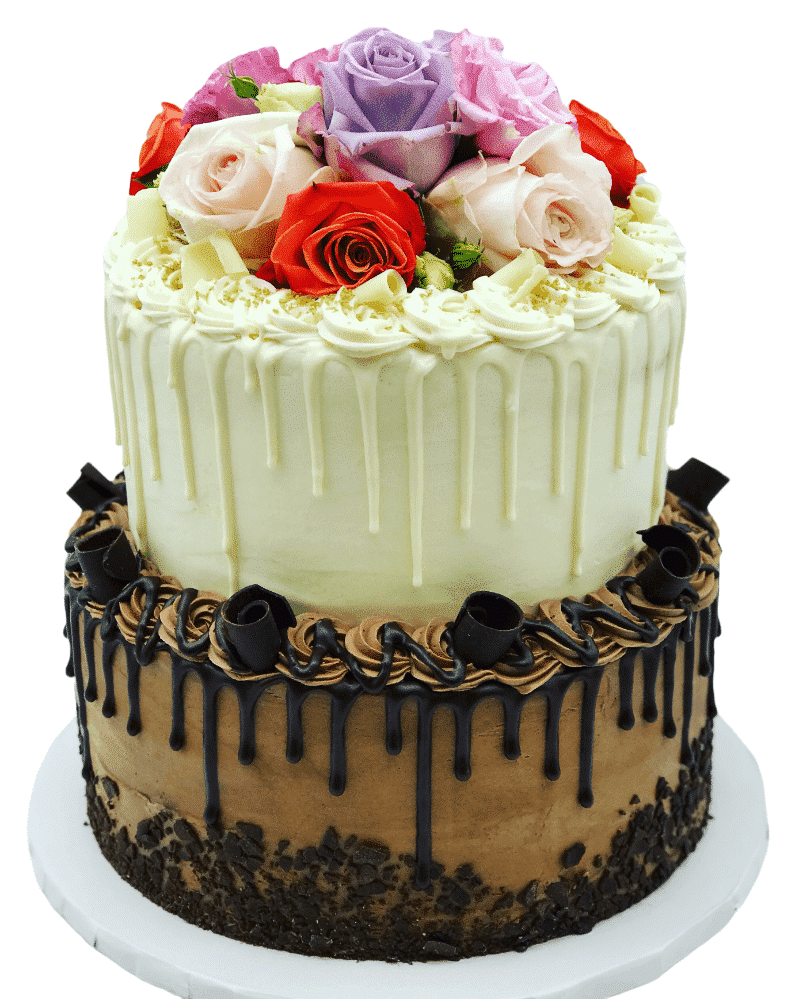
Tiered cakes vary from baker to baker, so first check with the person who made the cake--they may recommend something different. This is what has worked for me:
For smaller tiered cakes (2-3 tiers), you can cut the tiers from the top down while they are still tiered. Ask if the top tier is going to be saved for their one-year anniversary--if so, remove and box that cake using your cake server.
There should be a cake board or cake platter under each cake, which will tell you when to stop your knife. After you've cut that cake, you may remove the cake board and start on the next tier.
Remove wooden dowels or cake supports as you see them. (They should be hard to miss! Supports could be wooden dowels, straws, or plastic tubes depending on the baker.)
For taller tiered cakes, it's best to remove the top tiers and cut them on the table.
Larger Cake Slice Options
Now you know how to cut Event-Style and Wedding size servings, but what if you want larger slices for your guests? Choose one of the options below based on your type and size of event:
Standard Servings are approximately 4″ tall by 3″ by 1 ½″ slices. When ordering a party cake to feed a smaller group of fewer than 30 guests, I typically recommend standard-size servings. (The more guests you have, the more likely it is that not everyone will want a generous slice of cake.
With over 30 guests, you are likely to be safe cutting Event-Style servings).
Generous Servings are approximately 4″ tall by 4″ by 2″ slices. These are traditional wedges cut out of 6″ or 8″ cakes. This is a good size slice but still a reasonable portion for one person.
When we served cake by the slice at Amycakes Bakery, we would cut this generous size. This is the cake slice size I recommend for hungry guests, intimate gatherings, or if only dessert is being served (and larger servings are desired).
How to Cut Standard or Generous Cake Servings
To cut Standard or Generous Servings, use the same method in the cake cutting guide shown above.
For 10" or larger cakes, follow the instructions above and go 2 inches in and cut a half-circle, then cut slices from the outer edge. But instead of cutting one inch slices out of the outer edge, cut 1 ½-inch slices for Standard-Size Servings, and 2-inch slices for Generous Servings.
For a 6" or 8" cake, cut the entire cake into wedges--cut 1 ½-inch wedges for standard servings and 2 inch-wedges for Generous Servings.

Do you still have cake cutting questions? Comment below and I'd be happy to help!
Thanks for Reading. ❤️



Claire says
Hi there! Great tips, I really love your site. When I bake a cake whether it's 2 layer or -4-5 after we have cut several slice my cake always seems to fall over or collapse. What am I doing wrong?
Amy says
Hi Claire, thanks for checking! I usually have the best luck following the cake cutting video on this post (the video is about half-way down this post). That method usually helps the cake stay upright, since you are cutting one half of the cake at a time but leaving a smaller "cake" on the inside. Though the last final few slices are always tricky! 🙂 Colder cakes are much easier to cut, but since most cakes are best at room temperature, I don't really recommend cutting the cake from cold unless it's being sliced in advance and can get to room temp before serving. I saw this method on Instagram the other day (https://www.instagram.com/reel/CnPl70MuVDs/?utm_source=ig_web_copy_link by Baran Bakery) and it looks like a good method for keeping cakes from collapsing (if the icing is firm enough. My icings are soft unless they are cold). Hope that helps! .
Lindsey Yocum says
Great advice!
Amy says
Thank you! 🙂
Ally says
Tiered cake for 50th wedding anniversary: Is it ok to have different cake flavors for each tier? and if so, can each tier be removed so grandkids can have favorite flavor?
Amy says
Great question—in fact I’m going to add this info to my post. We did different flavors per tier often at my bakery. Since guests will most likely start getting slices while the cake is being cut, I do recommend removing each different flavored tier first, then cutting them all on the table. That way you can alternate between flavors (cutting one outer half-edge at a time), so guests (and grandkids 😊) have all the flavor options. Depending on the amount of tiers you’d need to be sure the cake table a large enough table to cut all the cakes and also hold the cake slices. The slices of cake can also go on a separate table or a rolling cart. 😊