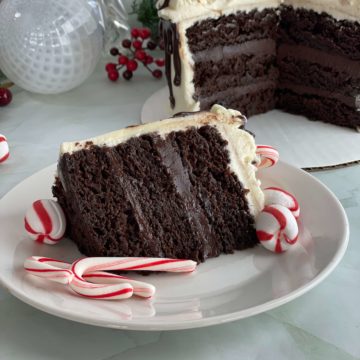
Moist Peppermint Fudge Cake
Amycakes Bakes | amycakesbakes.com
This peppermint chocolate cake combines layers of super moist and rich chocolate cake with fudgy chocolate peppermint ganache and creamy peppermint buttercream. At Amycakes Bakery, Peppermint Fudge Cake was our most popular seasonal cake flavorBake it in a sheet pan using the Cut and Stack Method and cut out the cake in cake rings for a more even-bake and no dark edge. Or choose a different pan size by visiting Half-Batches and Cake Pan Options: Everything You Need to Know.1x batch Yields: 1 6" three-layer cake cut out with cake rings using the Cut and Stack Method.2x batch Yields: 1 8" three-layer cake cut out with cake rings using the Cut and Stack Method.If you have a kitchen scale, please select grams above the ingredients for the most accurate results. If you don’t have a scale, no worries!–just be sure to “spoon and level” your flour and cocoa, and to fully pack your brown sugar into its measuring cup.
Ingredients
Dry Ingredients
- 170 grams (1 ¼ cups + 2 Tablespoons) All-Purpose Flour I use Gold Medal
- 1 ½ teaspoons Baking Powder
- 1 teaspoon Baking Soda
- ¾ teaspoon Salt
- 3 Tablespoons Chocolate Instant Pudding Mix or 2 Tablespoons instant clearjel a food starch used in commercial baking that you can use at home, see Note #1
- 26 grams (¼ cup) Unsweetened Cocoa Powder I use Hershey's
- 100 grams (½ cup) Sugar
- 113 grams (½ cup packed) Brown Sugar
Wet Ingredients
- 2 large Eggs
- ¾ cup Buttermilk
- ¼ cup brewed Coffee
- ¼ cup + 1 Tablespoon(s) Vegetable Oil
- 3 Tablespoons Dark Corn Syrup or use light corn syrup
- 1 ½ teaspoons Vanilla Extract
Chocolate Butter Mixture
- ¾ stick(s) (3 ounces) Salted Butter
- 43 grams (¼ cup) Semi-Sweet Chocolate Chips I use Nestle
Peppermint Fudgy Ganache
- ½ cup Heavy Cream
- 172 grams (1 cup) Semi-Sweet Chocolate Chips I use Nestle
- ¾ teaspoon Pure Peppermint Extract I use Olive Nation
Peppermint Buttercream
- 455 grams (3 ½ cups) Powdered Sugar
- 1 Tablespoon(s) Instant Clearjel optional, a food starch used in commercial baking that you can use at home, see Note #1
- 4 ounces Cream Cheese
- 1 ½ sticks (6 ounces) Salted Butter at room temperature
- 48 grams (¼ cup) Shortening
- 1 Tablespoon Pure Vanilla Extract
- ¾ teaspoon Pure Peppermint Extract I use Olive Nation
Instructions
Make Chocolate Cake
- Preheat oven to 325 degrees. Line a 1" tall ¼ sheet pan with parchment paper, then spray the bottom (on top of the parchment) and sides of the pan with cooking spray (See Note #2). Or choose a different cake pan(s) using the chart in my post about Half-Batches and Cake Pans.
- Using a sifter or fine mesh strainer, sift the first seven Dry Ingredients into a large bowl, then add brown sugar. Whisk until well blended. If you see any large brown sugar clumps, break them up and blend them in with your fingers.

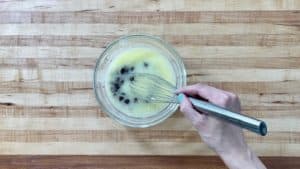
- Combine Wet Ingredients in a separate large bowl and whisk until smooth and well-blended.
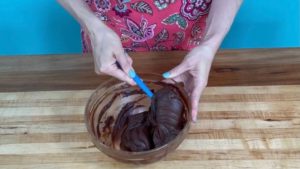
- Melt salted butter in the microwave (or over the stove) until just melted. Avoid overcooking. Add semi-sweet chocolate chips and whisk until melted and smooth (Whisk for 30 seconds to 1 minute--the heat from the melted butter plus the whisking will melt the chips).
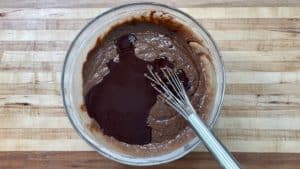
- Pour Wet Ingredients into Dry Ingredients and whisk until incorporated. Pour Chocolate Butter Mixture over batter and whisk until smooth and lump-free. (A few teeny brown sugar lumps are ok and will dissolve as it bakes).
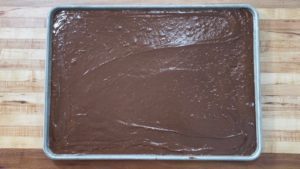
- Pour batter into the prepared ¼ sheet pan and smooth out batter until even (an offset icing spatula works well for this). The batter will be about ¼ inch from the top of a 1" tall sheet pan.
- Allow pan to set for 5-10 minutes before putting it in the oven. This will give time for the instant clearjel (or instant pudding mix) to thicken the cake batter before it bakes, allowing for a better rise.
- Bake in the middle or top rack (avoid bottom rack) of a preheated 325-degree oven for 16 minutes. Without opening the oven, turn the temperature down to 300 degrees and bake for another 6-10 minutes. Check the cake at this point. See if it is done by lightly touching the top of the cake--try to avoid moving the cake pan or baking rack, which could cause an underdone cake to sink. If jiggly at all to your touch, bake for another 1-5 minutes. The cake is done when a toothpick or small paring knife comes out clean when quickly stuck in the cake. A few moist crumbs on your knife are fine, but they shouldn't look wet.
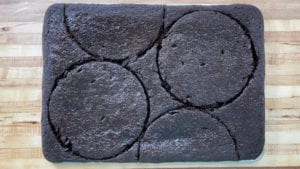
- Once the cake is cool, I recommend wrapping and freezing the cake in your cake pan for at least 2 hours or overnight, then cutting out the cake layers with cake rings as described in How to Bake and Layer Cakes Like a Pro. The cake will be much easier to layer when cold or frozen. (You can even bake the cake up to a week ahead of time and freeze). To wrap the cake, I pull the plastic wrap out and place the pan on top of it. Then I wrap 2-3 ways horizontally and one way vertically so that there are two layers of wrap on all sides of the pan including the bottom).If you will be freezing it for more than a couple of days, I recommend brushing the cake with simple syrup before wrapping it (see Note #3).
Make Peppermint Ganache Filling
- Combine heavy cream and semi-sweet chocolate chips in a medium-sized microwave-safe bowl. Microwave at 30-second increments, stirring for 30 seconds to one minute in between each heat. (It should only take two to three heats in the microwave. Lots of whisking will melt your chocolate faster and prevent the chocolate chips from overcooking in the microwave.
- Once all the chocolate chips are melted and your ganache is shiny and smooth, whisk in the peppermint extract. Place the peppermint ganache in the fridge to cool. Stir occasionally until it is has cooled to a very thick and fudgy consistency. Once it is the right thickness, remove it from the fridge until you are ready to fill and layer your cake. (If your ganache gets too cold, it will be too thick to spread. Simply reheat in the microwave at 5-10 second increments, stirring frequently, until it is the right consistency.)
Make Fluffy Peppermint Buttercream
- Whisk the powdered sugar and Instant Clearjel together until well-blended. Set aside.
- Using a stand mixer (preferred) or handheld mixer and a large bowl, beat the cream cheese until broken up and softened. Add the room temperature salted butter and continue to beat, scraping the sides of the bowl as needed. Add the shortening and beat and scrape the sides until there are no lumps. The creamed mixture should look fluffy and creamy with no lumps. If you see any lumps, beat on high and scrape often until they dissolve.
- While the mixer is on low, slowly add the powdered sugar mixture. Add the pure vanilla and peppermint extract, and scrape down the sides of the bowl.
- Beat the buttercream on high for 2-3 minutes. This will add air into the buttercream and make it light and fluffy. The Instant Clearjel will cause the buttercream to thicken slightly during the next 10 minutes as it sits.
Layer, Decorate, and Serve
- The easiest way to layer the cake is to layer the cake from frozen the day before you plan to serve it. If serving the cake the same day you are layering it, use refrigerated cake layers instead of frozen. Reserve ¼ cup chocolate ganache for drizzling down the sides of the cake (optional). Cut the cake layers with cake rings as described in How to Bake and Layer Cakes Like a Pro. Fill each cake layer with the remaining fudgy peppermint ganache (about ¼ inch high). An offset icing spatula (I use the small and medium-size on all my cakes) helps with this. I recommend frosting a thin crumb coat of peppermint buttercream on the outside of the cake which will catch all the crumby edges, then allow it to set up in the freezer for about 10 minutes until the buttercream is firm. The remaining cake scraps can be used for cake truffles if desired.
- Frost the cake with a final coat of peppermint buttercream. Microwave the reserved ganache until thin, and drizzle down the sides of the cake using a spoon or squeeze bottle. There is enough fluffy peppermint buttercream to frost a row of tall rosettes around the top of the cake using a pastry bag and 1M star tip (or get creative with a different design!). You can let the cake set up in the fridge, but remove it from the fridge 2-3 hours before serving so it can come back to room temperature. Top the cake with mini candy canes before serving. This cake has the best texture at room temperature. Enjoy!
Notes
- Read my article Instant Clearjel: a Magical Little-Known Bakery Ingredient to see why I think this ingredient is worth having in your pantry. Instant Clearjel must always be whisked thoroughly with other dry ingredients before being added to wet ingredients to avoid clumping. I have tested this recipe with the following Instant Clearjel brands: Prepared Pantry, Hoosier Hill Farm, and Ingredion (Make sure what you purchase is labeled as "Instant." Cooktype Clearjel is a different product that does not work the same in cakes). If you need a substitute, in the cake batter you may substitute 3 tablespoon Jello Chocolate Instant Pudding Mix in place of the 2 tablespoon Instant Clearjel in a 1x batch, but just leave the Instant Clearjel out of the frosting, adding a little more powdered sugar if you need a thicker frosting.
- When baking cakes in a sheet pan, the cake bakes more evenly (flatter on top and with no dark edges), and you get to choose your cake size after baking! With a 1x recipe in a ¼ sheet pan you can make a 6" 3-layer cake (2 full rounds, one pieced round from two half-circles) or several little cakelets. In a 2x batch in a ½ Sheet Pan you can make a three-layer 8" cake (two full rounds, one pieced round from two half-circles), an extra tall six-layer 6" cake (5 full rounds, one pieced round from two half-circles), TWO 3-layer 6" cakes (eat one now and freeze one for later. :) Or have a baking party with a friend and you each get a cake!) or several little Cakelets using a 4" cake ring or 3" or 2" round cookie cutters.
- Simple Syrup is optional, but I use it to seal in the moisture for cakes that will be refrigerated or frozen for more than a couple of days. While the cake cools, make a simple syrup by combining 2 teaspoons water and 2 teaspoons sugar in a small microwave-safe bowl. Microwave until the sugar is dissolved after whisking, about 20-30 seconds. Lightly brush the simple syrup on top of the cake with a silicone pastry brush (you won’t need to use all of it in a 1x batch baked in a ¼ sheet pan). You can also make a larger batch of this (1 part sugar to 1 part water) and keep it in the fridge if you’re doing a lot of cake baking.