Vanilla Almond Cake (Mix & Match Recipe)
Amycakes Bakes | amycakesbakes.com
This is a Mix & Match Recipe, which means it is the cake only. Mix and Match cake recipes are meant to be used with your choice of fillings and frostings. For the bakery-style detailed recipe with buttercream frosting, view my Moist Vanilla Almond Cake recipe.This extra-moist Vanilla Almond bakery-style cake was by far my most popular flavor at Amycakes Bakery. The cake is buttery, moist, and soft with a delicious almond flavor.If you have a kitchen scale, please use it for the grams (g) listed in parenthesis next to each dry ingredient. If you don’t have a scale, no worries!–just be sure to “spoon and level” your dry ingredients.
Ingredients
Dry Ingredients
- 1 ½ cups All-Purpose Flour (I use Gold Medal)
- 2 tablespoon Instant Clearjel (See Note #1)
- 1 ½ teaspoon Baking Powder
- 1 teaspoon Baking Soda
- ¾ teaspoon Salt
Wet Ingredients
- ¾ cup Buttermilk
- ¼ cup Water
- 1 ½ teaspoon Vanilla Extract
- 1 tablespoon Almond Extract
- 1 ½ teaspoon Apple Cider Vinegar
Creamed Ingredients
- 1 cup Sugar
- 1 stick (4 oz) Salted Butter at room temperature
- ¼ cup Vegetable Oil
- ¼ cup Light Corn Syrup
- 1 large Egg(s)
Whipped Ingredients
- 2 Egg Whites
- ¼ teaspoon Cream of Tartar
Instructions
Make the Vanilla Almond Cake
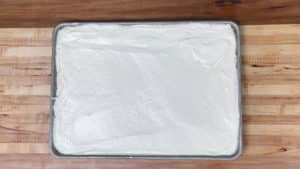
- Preheat Oven to 325 degrees. Line ¼ sheet pan with parchment paper, and then spray bottom (on top of the parchment) and sides of the sheet pan with cooking spray.
- Sift Dry Ingredients in a bowl and then whisk until well blended.
- Combine and stir Wet Ingredients in a separate bowl or pitcher.
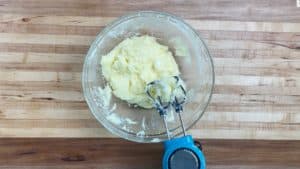
- With a stand mixer (preferred) or handheld mixer, cream sugar and salted butter together until creamy and fluffy. Add oil and corn syrup and beat until incorporated. Add 1 egg(s) and cream until well blended, scraping sides of the bowl as needed.
- On low speed, alternate adding Dry ingredients and Wet ingredients to the Creamed Ingredients, a little at a time. I do ⅓ Dry, ⅓ Wet, and so on, adding one-third at a time and blending on low after each addition. Continue to mix just until the batter looks well blended and smooth (avoid overbeating). Scrape sides of the bowl as needed.
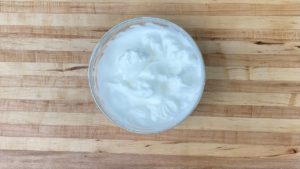
- Using a whip attachment and a clean bowl, whip the 2 egg whites and cream of tartar until stiff peaks form. (Make sure your bowl and beaters are clean and free from grease so that the whites will whip).
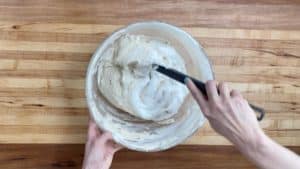
- Carefully fold the Whipped Whites into the cake batter, one half of the whites at a time. The batter is ready when no egg white streaks remain and it should look smooth and uniform.
- Spread into prepared pan and make sure the batter is evenly distributed. An offset spatula works well for this.
- Bake on the middle or top rack (avoid bottom rack) of preheated 325-degree oven for 18 minutes, then turn the oven down to 300 degrees. Set the timer for an additional 6-8 minutes. Check the cake at this point. If it is jiggly at all when lightly touching the top of the cake, continue baking for 1-6 more minutes. The cake is done when a paring knife or toothpick comes out mostly clean when stuck quickly in the cake. A couple moist crumbs on your knife are fine, but they shouldn't look wet. Allow to cool completely.
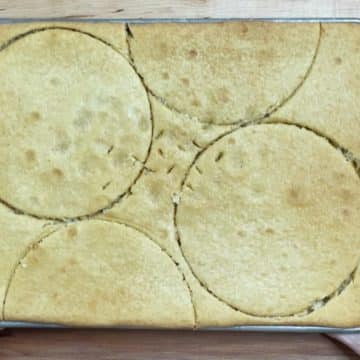
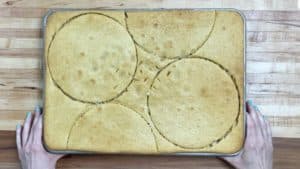
- Use cake as desired in another recipe, or cut the cake for layering--Leave the cake in the sheet pan, and using a slight sawing motion, cut the cooled cake into your desired cake size with cake rings (You can use a knife and the cake rings as a guide for any halve pieces that you cut.) Brush lightly with simple syrup (optional, Note #3).
- Wrap thoroughly in plastic wrap and freeze cake in the pan for 2 hours or overnight. (You can even bake the cake up to a week ahead of time and freeze). The cake will be much easier to layer if it is cold or frozen. To wrap the cake, place another sheet of parchment on top of the cake (this will prevent the plastic wrap from sticking to the cake), and wrap the whole pan with plastic wrap. (I pull the plastic wrap out and place the pan on top of it. Then I wrap 2-3 ways horizontally and one way vertically so that there are two layers of wrap on all sides of the pan including the bottom).
Notes
Notes for 2x batches:
1 + ½ tsp=½ Tbsp
3 tsp= 1 Tbsp
1 + ½ tsp=½ Tbsp
3 tsp= 1 Tbsp
- Read my article Instant Clearjel: a Magical Little-Known Bakery Ingredient to see why I think this ingredient is worth having in your pantry. Instant Clearjel must always be whisked thoroughly with other dry ingredients before added to wet ingredients to avoid clumping. I have tested this recipe with the following Instant Clearjel brands: Prepared Pantry, Hoosier Hill Farm, and Ingredion. Make sure what you purchase is labeled as “Instant.” Cooktyle Clearjel is a different product that does not work the same in cakes.
- When baking cakes in a sheet pan, the cake bakes more evenly (flatter on top and with no dark edges), and you get to choose your cake size after baking by cutting the cake out with cake rings.
- Simple Syrup is optional, but I use it to seal in the moisture for cakes that will be refrigerated or frozen. While the cake cools, make a simple syrup by combining 1 tablespoon water and 1 tablespoon sugar in a small microwave-safe bowl. Microwave until the sugar is dissolved after whisking, about 20-30 seconds. You can also make a larger batch of this (1 part sugar to 1 part water) and keep it in the fridge if you’re doing a lot of cake baking. Always cut the cake with cake rings before brushing the cake brush simple syrup, to avoid the cake being too sticky when cut.